2 ways to approve requests and documents in Microsoft Flow (now called Microsoft Power Automate)
Based on my experience, I would say that majority of business processes within organizations revolve around some sort of approval. It could be a simple vacation request approval or a document review. Most of the time, we just want to have a simple outcome of either Approval or Rejection. SharePoint by itself has a very simple Content Approval mechanism that can easily be enabled on any list or library, which allows users to approve/reject documents and items without engaging or creating a true workflow. I have provided detailed instructions on how to set it up in this post.
Microsoft Flow, naturally, allows users to build more sophisticated workflows, with approvals and custom notifications. When it comes to building an approval workflow, there are actually 2 unique ways of doing so in the Microsoft Flow. And that is what I would like to explain and demonstrate today.
- Option 1: Send Approval Email Action
- Option 2: Start an Approval Action
Both of the options above are built-in Actions within Microsoft Flow. In case you are wondering what an action is and want to brush up on terminology, I suggest that you check out this post.
Option 1: Send Approval Email Action
This action essentially sends an email to users with clickable options that can be specified in the configuration of the action within Microsoft Flow. For example, two output options could be Approve and Reject. Or Red and Blue. Whatever the options are – both will appear as clickable links within the email – allowing a user to approve or reject right from within the body of the email. Microsoft Flow then records the response as an Output and you can use the logic (i.e. Condition) to continue the flow based on the Output (response). For example, if Output is Approve – approval notification email will be sent. If Output is Reject – a rejection email ill be sent.
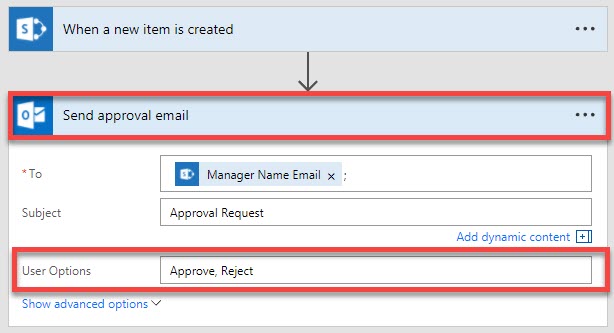
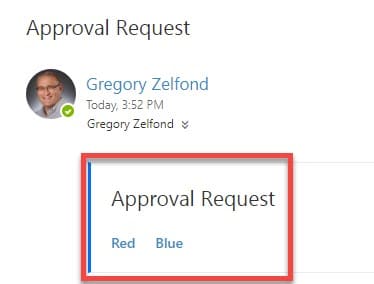
Here is what the Approval email will appear like to an approver. The Approval Request clickable options are set under User Options above. They can be anything you want, not just Approve or Reject.
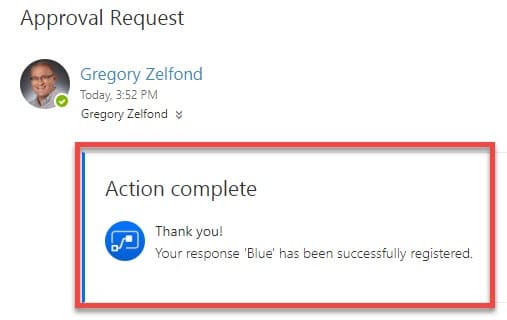
Once the Approver clicks the corresponding link within an email, the following user-friendly message will appear:
Option 2: Start an Approval Action
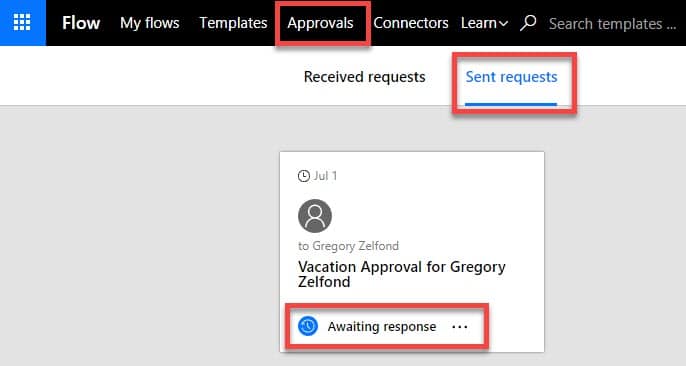
Because Approvals are so common and are part of so many business processes, Microsoft has created a special action altogether called Start an approval. Not only that, it designated a special area accessible via browser and Flow mobile app for the approvals!
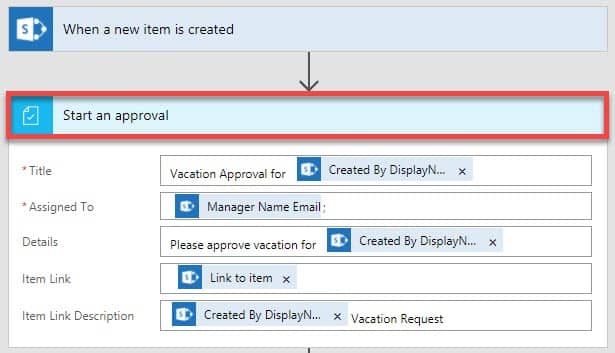
When you add the Start an Approval Action – you configure all the different aspects of it, like assigned to, linking to the item, message body, etc.
The cool part starts when you execute the flow. Just like with the Option 1, a user gets an email, and he/she can approve or reject the item right from within the email itself. However, unlike with the previous Option, when the users clicks on either Approve or Reject, they are redirected to the special Approvals Page, like the one below.
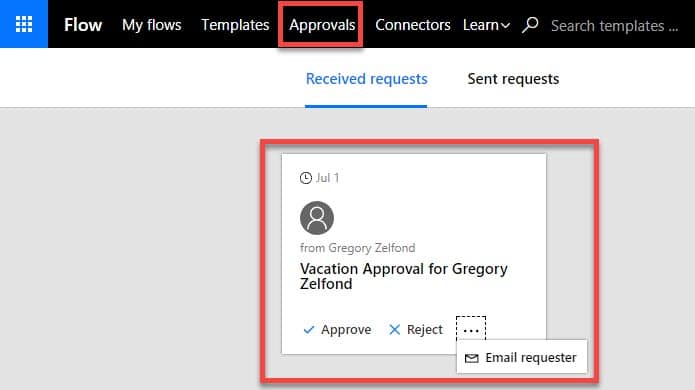
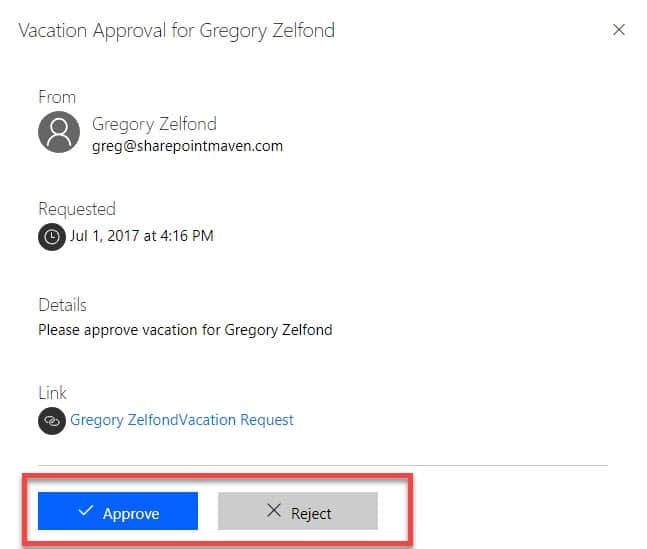
On that page, the user can get more info on the item, click Accept or Reject…
…and once Approve or Reject buttons are clicked, the approver can supply additional comments!
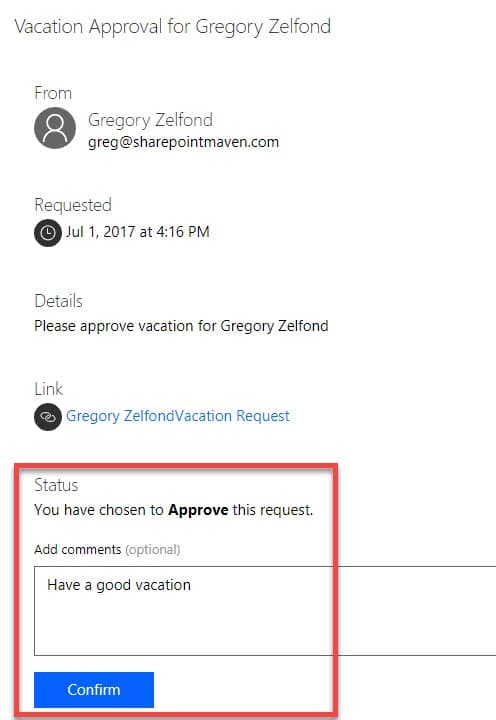
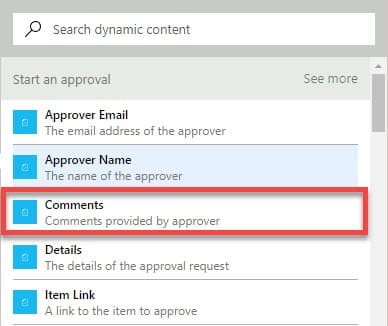
Approver comments can later be used in the body of the email when the response is sent back to the originator.
By the way, the same experience is available on the Flow mobile app as well. There is a special Approvals section on the mobile app that allows the user to access his or her pending approvals and one can do all of them all in one shot right on the mobile device. Isn’t it awesome?
Which option should I use?
By all means, I like Option 2 better! While it does not allow to customize Output/Response verbiage like Option 1 (you can either Approve or Reject), by far it provides the best user experience.
Not only this option allows you to capture Approval/Rejection comments (which is a very frequent requirement), but you also have a special area for Approvers! This is super convenient for managers, who might be getting tens, if not hundreds of approval requests during the day. By going to a single page, they can access various requests (from different flows and processes) and approve them all from one screen (in the browser or a mobile device).
Moreover, on that same page, there is an area for Requesters too! It shows the status of the request, and you can contact an approver from that same screen too! A good way to keep your boss in check, especially if you are trying to go on vacation! :-)
