How to bulk create many sites in SharePoint Online
Occasionally, my clients ask me to create several SharePoint sites for their Intranet or Project Collaboration. When it is just a few sites, I create them via the User Interface, but when we talk about 20-50 sites that need to be created, it is a different story. Luckily, there is a way to script site creation via PowerShell. So, in today’s article, I want to share the steps you need to take to create many sites at once.
While the actual PowerShell command is just a single string that you need to execute, there are many preparation steps you need to take for that command to execute successfully. Luckily, being a single father of three kids has taught me that it is all about being organized and prepared in this life, so we are going to run through a bit of prep with the first few steps.
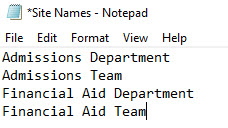
Step 1: Prepare a List of Site Names
The first step for you is to prepare the list of site names. We will need it later on for an Excel document/PowerShell command. List the site names in a notepad or Excel, and make sure they do not contain any weird characters.
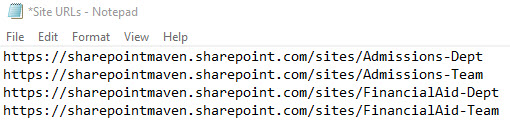
Step 2: Prepare a list of Site URLs
Another input to our future Excel document is the Site URL. For each and every site above, we need to create a site URL. It does not need to follow the exact site name. As a matter of fact, you might want to reference this article about site naming convention.
Step 3: Determine Site Template ID
Next, we need to determine the ID for the site. That will be another input for Excel. If you recall, in SharePoint, we can create 3 types of sites:
- Team Site connected to a Microsoft 365 Group
- Team Site without a Microsoft 365 Group
- Communication Site
Reference this article to learn more about types of sites.
Each site type/template has its own ID/code, which you will need to get and record. The 3 site templates above have the following IDs:
- Team Site connected to a Microsoft 365 Group ID: GROUP#0
- Team Site without a Microsoft 365 Group ID: STS#3
- Communication Site ID: SITEPAGEPUBLISHING#0
Please reference this excellent post from Vlad Catrinescu about site IDs/codes.
Important Note
While we have three types of sites that exist in SharePoint, we can only create non-group sites via PowerShell. This is because, for the Team Site with a Group, a Microsoft 365 Group has to be created first.
What that means to us is that we can only bulk-create sites via PowerShell for the two below sites:
- Team Site without a Microsoft 365 Group: ID STS#3
- Communication Site: ID SITEPAGEPUBLISHING#0
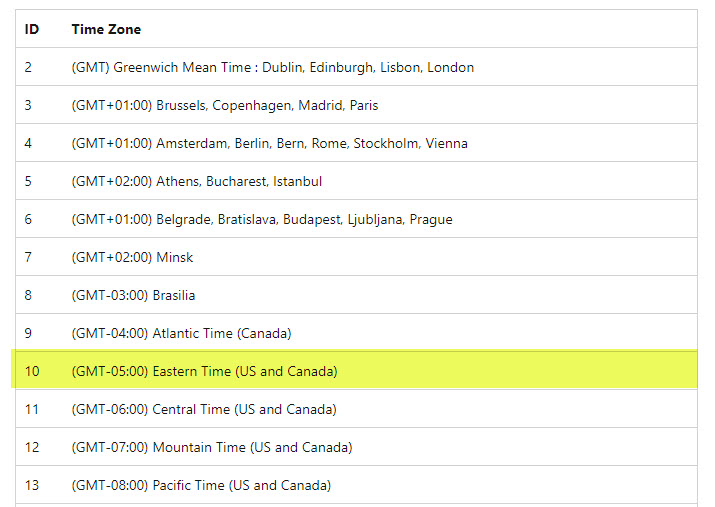
Step 4: Get Time Zone ID
The last input we need to gather for our Excel document is the Time Zone ID. As described in this article, we can set the time zone for our sites at a site level. So when the script creates the site, it needs to know which time zone the site will be created in. Please reference this article to obtain a time zone ID for your sites/organization.
Source: https://learn.microsoft.com/
Step 5: Prepare Excel
We are getting there. Now that we have all the ingredients, we are ready to populate the Excel (CSV) document. Please download the template file here. It contains a sample few rows to demonstrate how you should fill it out.
Just replace the information in sample Excel with the info from the steps above. Under Owner – put your Admin account email address. Leave StorageQuota and ResourceQuota columns as-is (they are not relevant but need to be there for the PowerShell command to work). When all set and done, this is what it could look like:

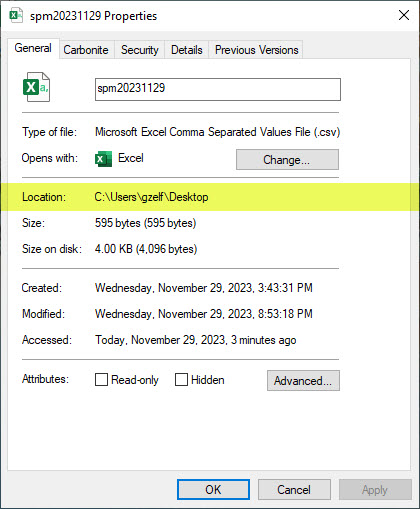
Step 6: Obtain the path of your CSV file
Once you save your Excel on a desktop or other location on your PC, note its path by right-clicking on a file and choosing Properties. You will need this path for the PowerShell command.
Step 7: Download PowerShell
If you do not have PowerShell on your PC or downloaded an old copy a long time ago, make sure to download the latest version of SharePoint PowerShell here.
Step 8: Run PowerShell Command
And finally, we are ready to run the PowerShell command.
- Connect to your tenant by using this command: Connect-SPOService -Url https://yourdomain-admin.sharepoint.com

- Log in using SharePoint Admin Role credentials.
- Run the following command: Import-Csv C:\users\MyAlias\desktop\Sites-list.csv | ForEach-Object {New-SPOSite -Owner $_.Owner -StorageQuota $_.StorageQuota -Url $_.Url -NoWait -ResourceQuota $_.ResourceQuota -Template $_.Template -TimeZoneID $_.TimeZoneID -Title $_.Name} where C:\users\MyAlias\desktop\Sites-list.csv is the path of your CVS file from Step 6.

- You will get a warning message “WARNING: The parameter ResourceQuota is obsolete.” for each site entry in your CVS; just ignore it.
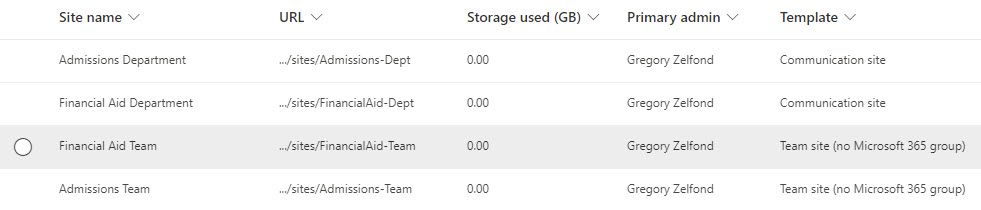
Step 9: Confirm that the sites have been created
Depending on the number of sites you have in a list, it might take few minutes to create all the sites. Navigate to SharePoint Admin Center to check and make sure they have been created.
Step 10: Sites created from PowerShell confirmation
One cool thing to note is that clicking on a given site from the SharePoint Admin Center will tell you how the site was created (from Teams, Planner, SharePoint, etc.). In our case, it will say that the site was created from PowerShell!
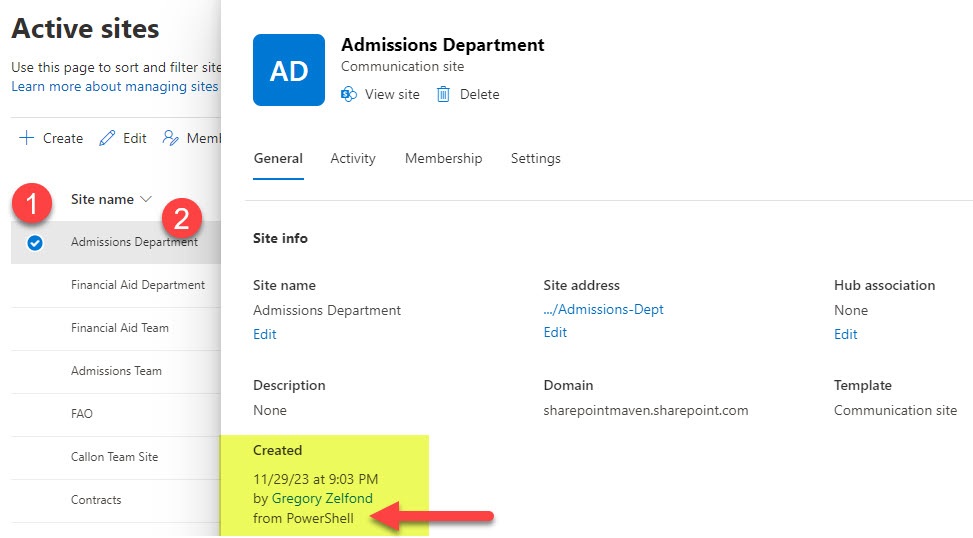
Does not hurt to know how and when the site was created.

Share Article


