How to share Microsoft Forms with your colleagues
I don’t blog often about Forms – at the end of the day, unlike SharePoint, it is meant to be plug and play kind of tool that can be used by any business user without any significant configuration. However, there are a few features/scenarios available where you might need to “go behind the scenes” once in a while. One of those scenarios – the ability to collaborate with others when putting together an input form or a quiz. So in this post, I would like to explain how you can easily share a form with others in case you need to co-author/collaborate with them.
What are Microsoft Forms?
In case you are new to this – I suggest you check out this post and a video.
How to share Forms
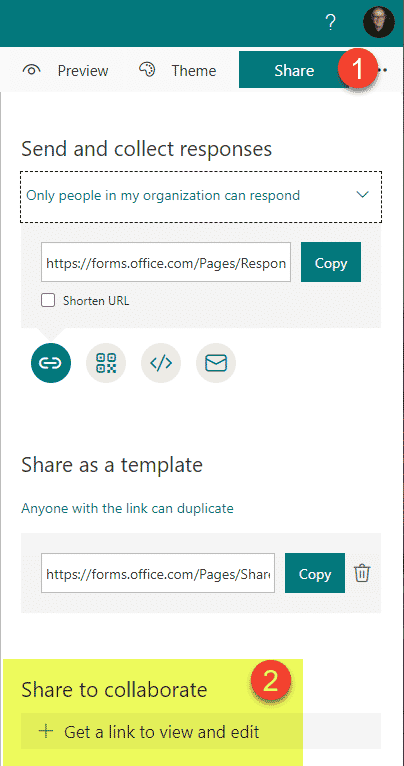
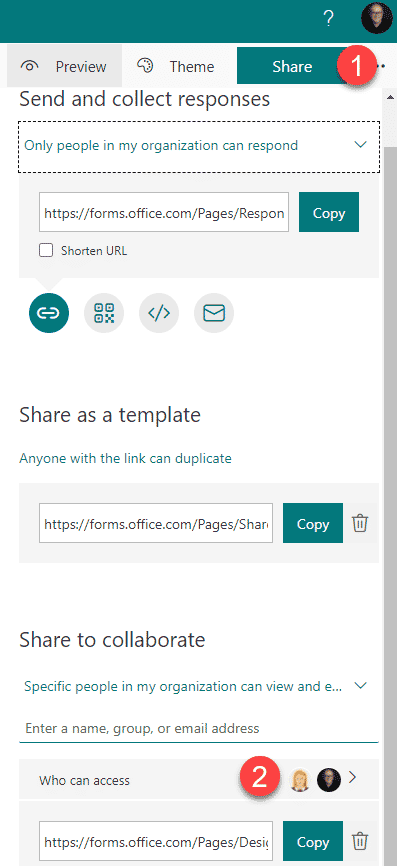
- From a given Form, click Share, then Get a link to view and edit (under Share to collaborate)
- From a menu that pops up, choose the type of link you would like to generate (depending on who you would like to share with)
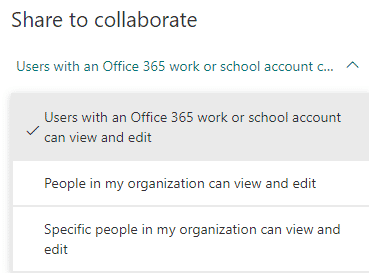
- In my case, I only want to share with my colleague, Mary, so I am going to choose Specific people in my organization can view and edit
- Type in the name of the individual you want the link to work for, then click the Copy button to copy the URL
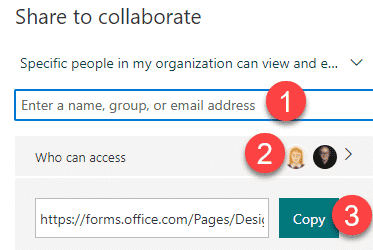
- Share the above URL with your colleague
What happens behind the scenes
When you share a Form with others, it works kind of the same way as if you are sharing a document from your OneDrive – you still remain the Owner of the Form and have total control over it.
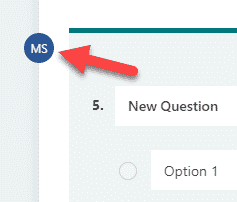
When the edits are done in real-time by multiple users, it will add the user’s initials modifying the form next to the question, so you know who is making the change.
How to revoke access to the Shared Form
- To remove access from the Form you shared, click on the Share button, then the users you shared with
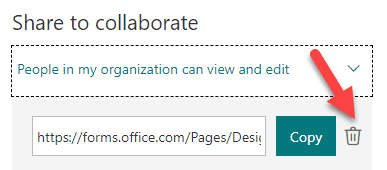
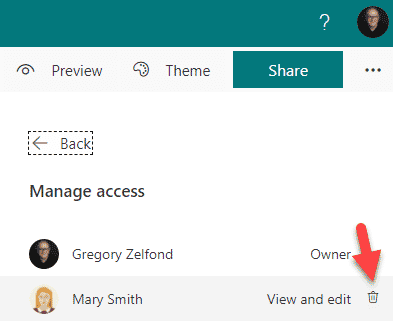
- Click on the trash icon next to the user you shared with
- In case you generated a non-specific people link, just click on the Trash icon next to the link, to delete it
