How to share a SharePoint Site externally
What I am going to cover in this article has been somewhat of a matzo ball in SharePoint Online for many years. I am, of course, talking about the external sharing of a site. Unlike file and folder sharing, which I described earlier, site sharing has a bit different authentication mechanism, and I will admit it – is confusing the hell out of everyone. So in this post, I would like to explain how external sharing works and how to successfully share a site in SharePoint externally without resorting to swearing and badmouthing of SharePoint.
Site Sharing vs. File/Folder external sharing
File and Folder external sharing that I explained earlier relies on different types of links you can generate to the content. The user can share either:
- To specific external emails they type in (Specific People link type), in which case the recipient would need to enter a temporary 8-digit passcode to validate their identity
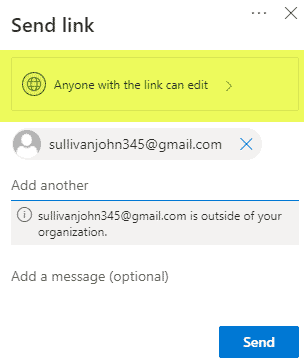
- Anonymously (Anyone with the link link type), if enabled, in which case, the recipient does not need to type in any passcodes at all and just needs to click on a link to access shared files or folders.


No matter which option you choose from the ones above, the process is pretty painless and straightforward for both the originator and the recipient.
Which brings me to SharePoint Site External Sharing. It kind of requires you to have a Ph.D. in SharePoint to understand and use. Unlike the file and folder sharing, when you share a site externally in SharePoint Online, you can’t do so anonymously. In other words, the recipient has to prove their identity in all cases. Moreover, instead of temporary 8-digit codes sent to the users, they have to authenticate with a Microsoft ID/email address. And once they do and accept the invitation, the end up in the User Directory in Office 365/Azure, clearly identified as a guest.
So I would like to explain to you the process of how to properly share a SharePoint Site externally and what actually happens behind the scenes. So grab some popcorn and alcohol (trust me, you’ll need it) and let me clear this up for you.
SharePoint Admin Center External Sharing settings
Before we dive into the end user experience, make sure external sharing is enabled in the SharePoint Admin Center. I explained how to check and set this up in this post. So check it out first.

Site External Sharing vs. Group External Sharing
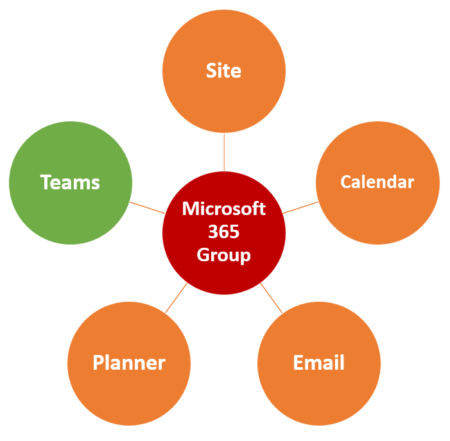
Now, I want to be clear first, that in this article, I describe how to share just the SharePoint site. The reason I mention this is that most of the sites provisioned these days in SharePoint Online are not just the standalone SharePoint sites. They are Team Sites that are part of the Microsoft 365 Group membership.
In this article, I only focus on how to share just to the site itself! If you would like to find out how to invite external users to the whole group, please check out this post.
Experience for the Originator
With the above being said, the experience for the originator will depend on whether the site being shared is a standalone SharePoint site (i.e., a Team Site without a Microsoft 365 Group or a Communication Site). By the way, since it is super important to understand what the hell it is you are sharing, check out this post to learn about all those types of sites I am talking about.
External sharing of a standalone SharePoint Site
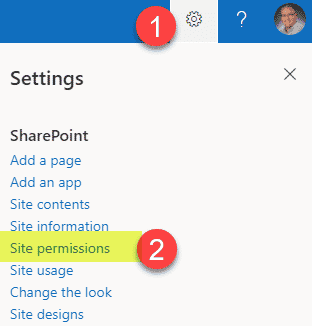
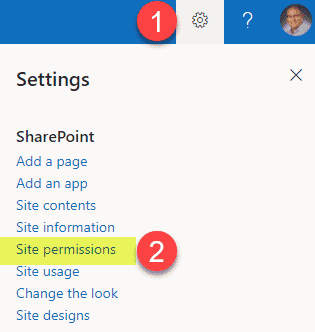
- Gear Icon > Site Permissions
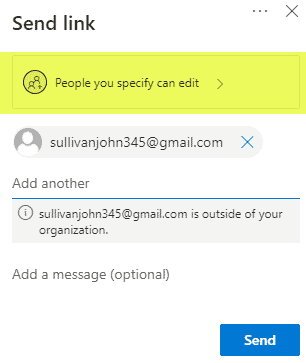
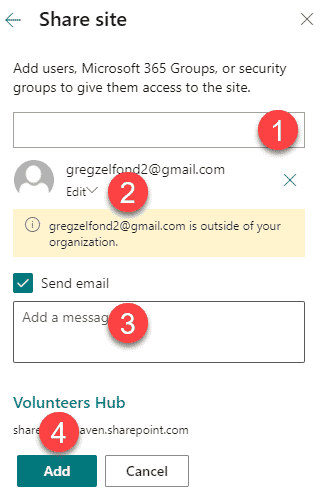
- Type in the external email address of a user you are inviting, assign proper permissions level (Read, Edit, Full Control), type in the personal message (optional), and click Add


External sharing of a Team Site connected to a Microsoft 365 Group
- Gear Icon > Site Permissions
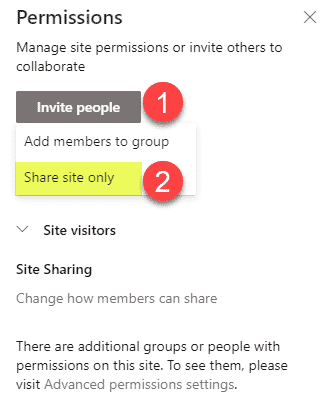
- Invite people > Share site only
- Type the email address of an external user, set proper permission level, click Add


What happens once the invitation is sent
Once you share a SharePoint Site externally and the invitation is sent, the recipient has 90 days to accept the invite. You can see the status and whether or not the user accepted your invite by following the instructions below. You will not see their email appearing under the Members Group or whatever group you added them to until they accept the initiation and authenticated in your environment.
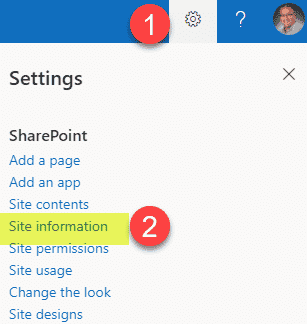
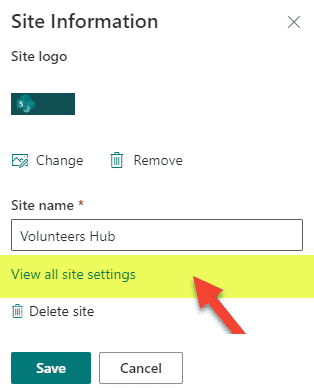
- Gear Icon > Site Information
- Click on View all site settings
- Click on Access requests and invitations
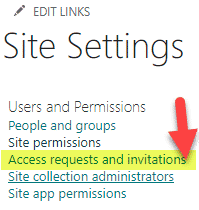
- You will now see the invitation status


Experience for the recipient
- The external recipient receives an email just like this (sometimes might go to the Spam/Junk folder, so please advise your guests to check in there as well)
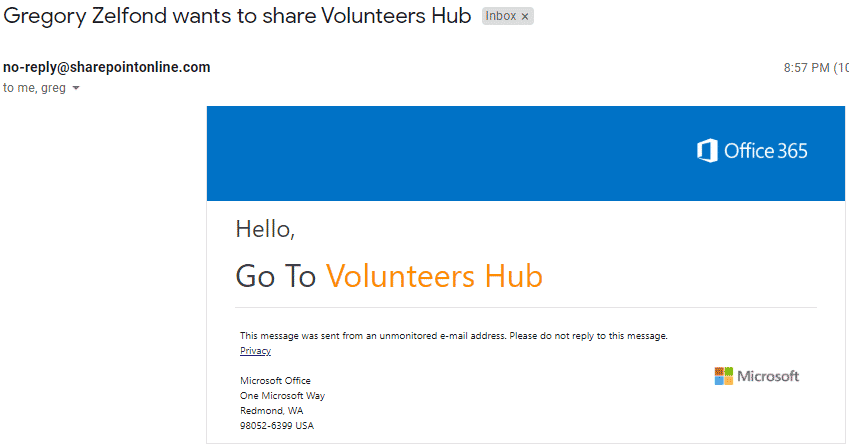
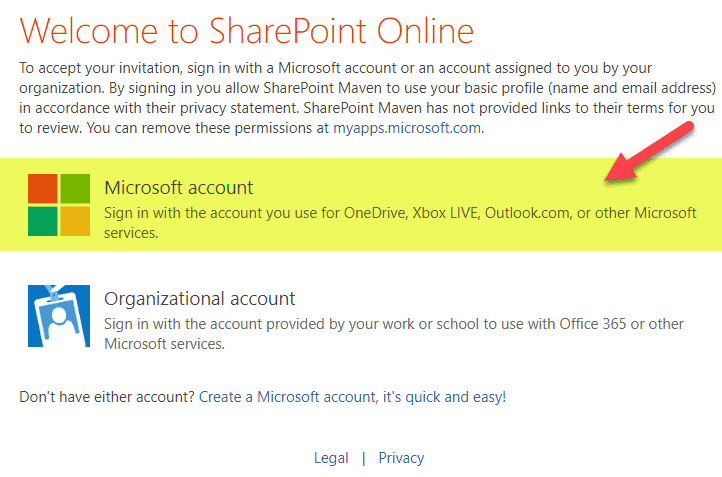
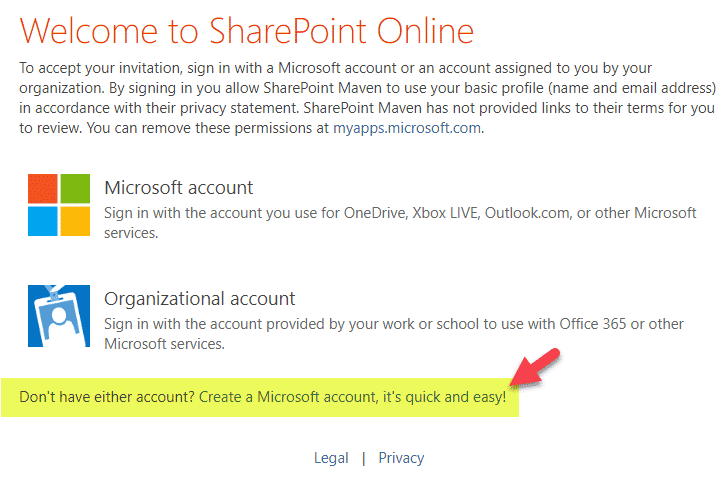
- Upon clicking the link from within the email, they get this screen

- After this, the experience for the recipient varies, depending on how they choose to authenticate. There are three choices available to them; instructions for all are described below.


Option 1: The recipient has and existing Microsoft 365 Account from their organization
This refers to a scenario where the recipient is part of the organization that also happens to have an Office 365 (Microsoft 365) subscription. For example, if you decide to share your SharePoint site with me, I could use my User ID to log in to your site since I have an Office 365 (Microsoft 365) in my company.
So at this point, the external user will just click on the Organizational account, type in the Microsoft 365 credentials, and that’s it!

Option 2: The recipient has any existing Microsoft account
In case the recipient does not have an Office 365 account, he/she can use any Microsoft email or account. Maybe the user is an avid gamer and created an xbox.com or Outlook.com account at some point. Or maybe the user created a Hotmail.com account when dinosaurs walked on the planet. Any of those examples count towards an existing Microsoft account and can be used for authentication.
- The user click on Microsoft account
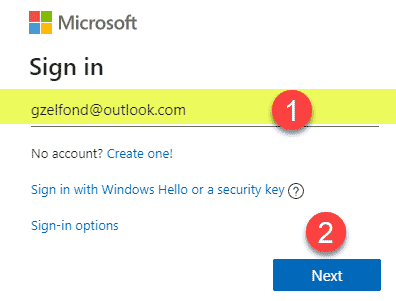
- The user types in the email address associated with Microsoft. Clicks Next.
- The user types in the password, click Sign in
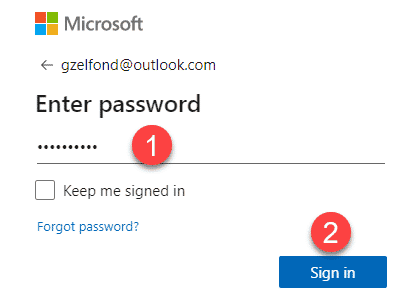
- And the user will now have access to the site!


Option 3: The recipient does not have any existing accounts
Lastly, if the user does not have any of the existing accounts described above, one can be created on the fly.
- The user clicks Don’t have either account? Create a Microsoft account, it’s quick and easy!
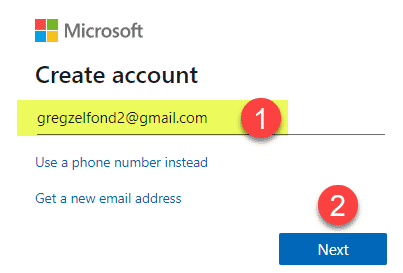
- The user supplies an email address for the account (any email address can be used, probably would make sense to use the one invitation was sent to, to avoid the confusion). Clicks Next.
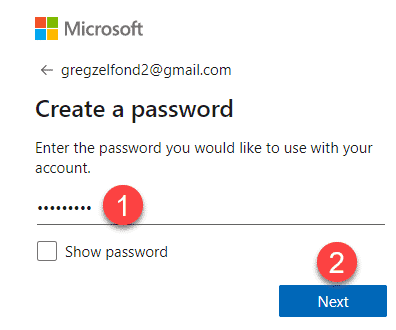
- The recipient chooses a password. Clicks Next.
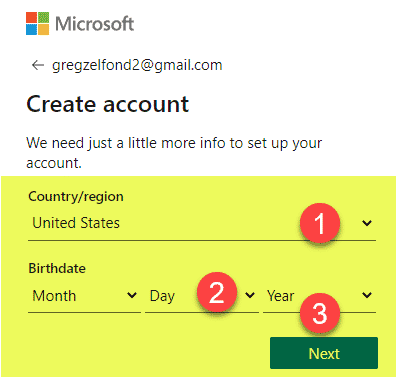
- Some additional verification info needs to be supplied. Click Next.
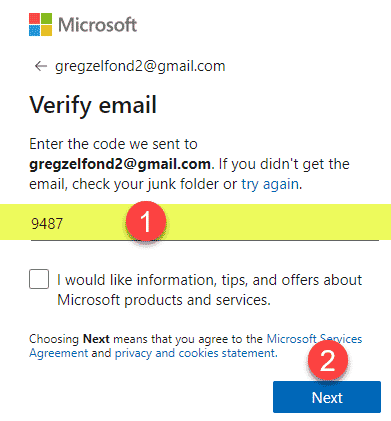
- After that, Microsoft will send the recipient a temporary verification code. The user types it in, then click Next.
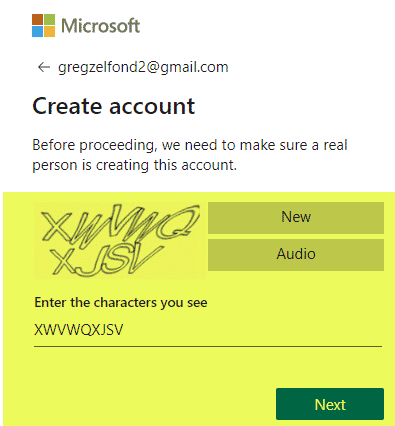
- And one more step to making sure this is a real person (which reminds me, that I really need to get a new set of prescription glasses). Click Next.
- And access is finally granted!


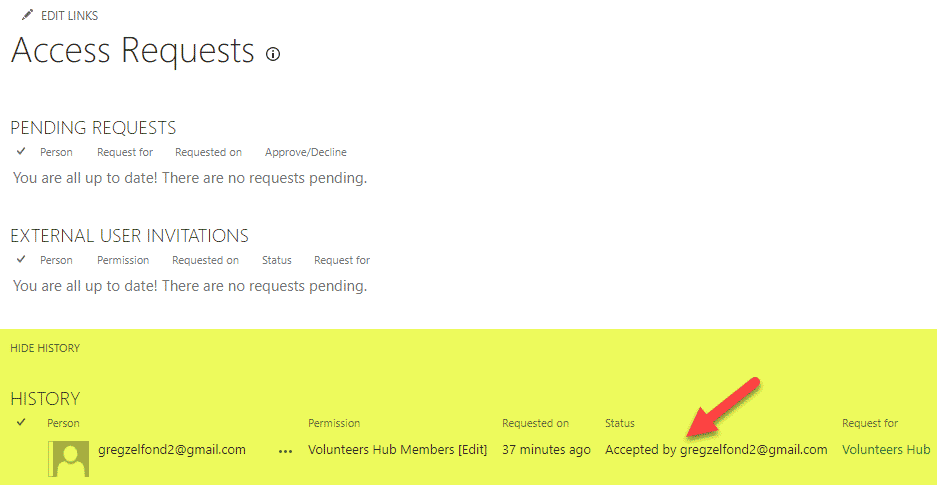
What happens after the recipient accepts the invitation
- You will see the user accepting the invitation in the Access Requests described above
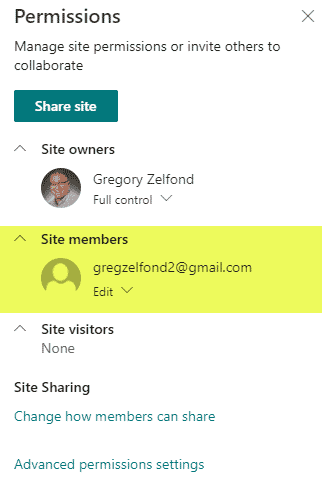
- The user will appear in the proper security group you added them to (when you sent out an invitation)
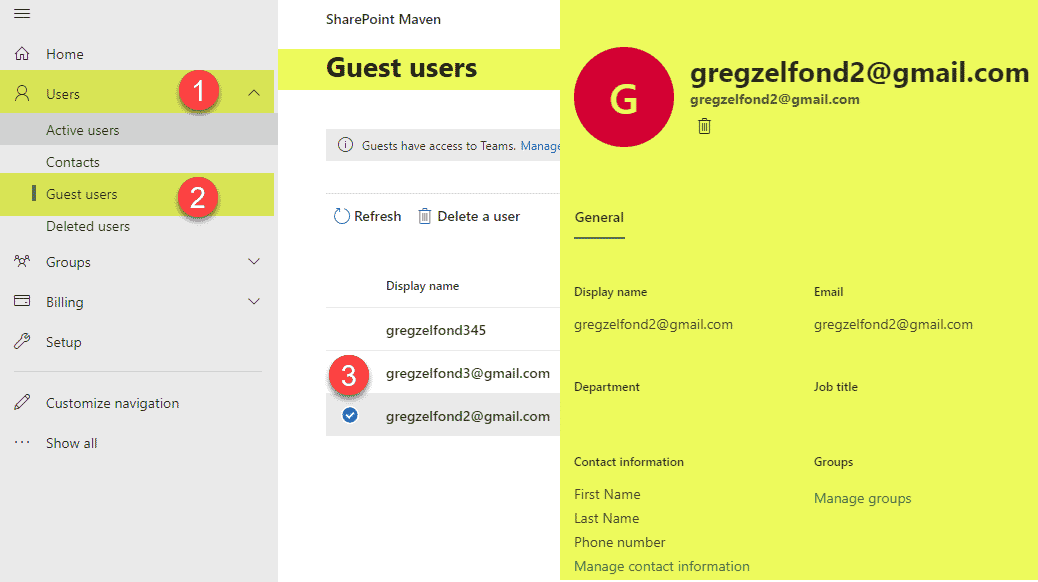
- The user will formally end up in your directory in Microsoft 365 and identified as a guest user
- Lastly, as the user is already in your directory, she/she will get invites that look like this when sharing additional sites in your environment (since the user is already in your database and no longer needs to create IDs, etc.)

- If you navigate to the Active Users list in Microsoft 365, you will see which email users used to accept the invitation


Share Article