How to import Terms into the Term Store in SharePoint
Whenever I explain metadata on my blog or during a training session, I show how easy it is to create metadata values on the fly just by typing them in. However, what if you have many terms, like tens, hundreds, or even thousands of terms? Well, we can easily import them, however, only if you use the Term Store. So, let me help you save some time and explain how to import terms into the Term Store in SharePoint.
What is the Term Store?
If you are unfamiliar with the term store, I suggest you check out this article. A term store is a central repository of terms that can be used and reused across multiple sites, lists, and libraries.
How to add Term Store Values manually
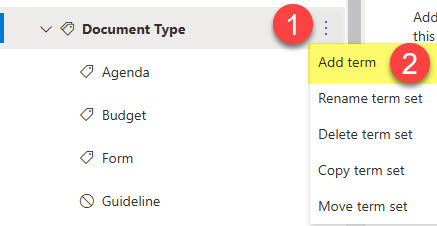
Adding values manually within the Term store is pretty straightforward!
However, say you have hundreds of terms to add (a list of locations, company names, vendors, projects, etc.). For this, we can import the values via an Excel file.
How to import Terms into the Term Store
Step 1. Download the Import CSV file
When you upload terms to the term store, they must be imported in a special format. That is because terms are not just a list of terms. The Term Store, or managed metadata, as we call it, also contains some properties that need to be defined upon import, like term name, term description, whether the term is available for tagging, and whether there is a hierarchy of terms.
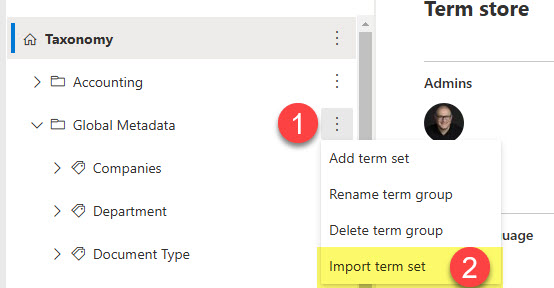
- To download the Import CSV file, click on three dots next to a term group and then choose Import term set
- You will then see a CSV file you can download. Click on it to download it to your computer.
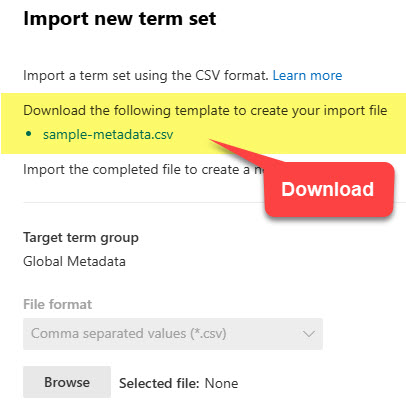
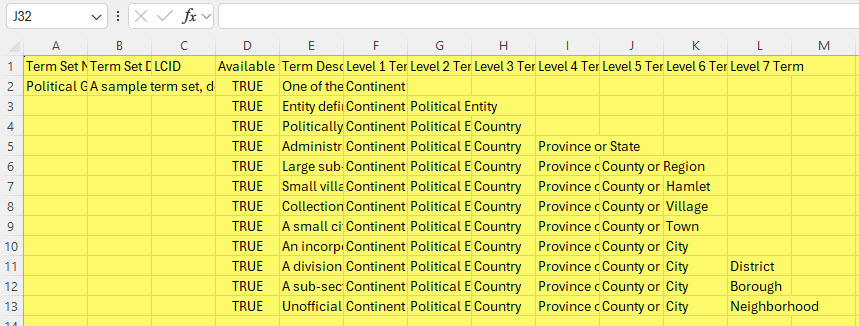
- If you open the file, it will look like the image below. Microsoft provides you with a simple use case for how to fill it out.
Step 2. Fill out the CSV file
Once you download the CSV file, you must fill it out. The file already contains an example from Microsoft. However, it might be confusing to read and understand, so let me explain how it should be formatted using a few use cases.
Use Case # 1: A simple list of terms
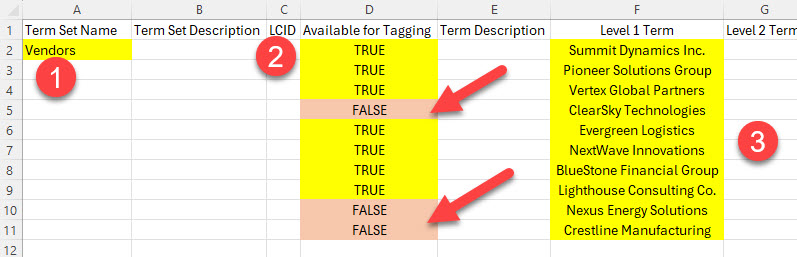
If you just have a simple list of terms (i.e., Vendors, Document Types, Projects), you only need to fill out the three columns highlighted below. Term Set Name (Vendors in my case), Available for Tagging (TRUE or FALSE), and list of terms itself (Level 1 Term). The other columns are optional and not required for the import to work. Available for Tagging (TRUE or FALSE) refers to whether or not the term will be selectable or grayed out, as explained in this earlier post.
In the example below, I am importing a simple list of Vendors. I designated most terms as available for tagging (TRUE label) and some not available for tagging (FALSE label).
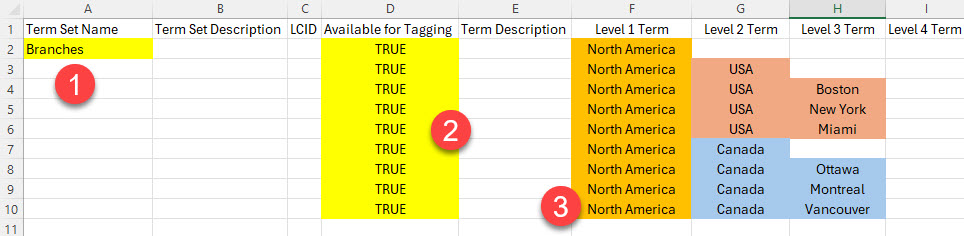
Use Case # 2: A list with hierarchy of terms
On the other hand, if you have a hierarchy of terms, something I explained in this article, in addition to the mandatory columns above, you must also correctly fill out the Level Term Columns as shown below. In other words, to correctly capture parent-child term relationships, fill out the Level 1 Term column, Level 2 Term Column, and so on, depending on the depth of your hierarchy.
If you wish to download the sample import CSV files I presented above, you can do so here:
Step 3: Import the CSV file into the Term Store
Once filled out, the final step is to import the CSV file. To do so:
- Click on three dots next to a term group and then choose Import term set
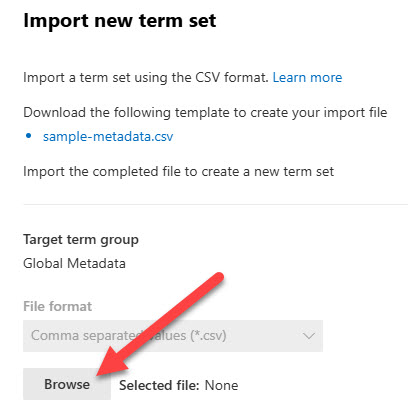
- Click the Browse button to upload the CSV file from your computer
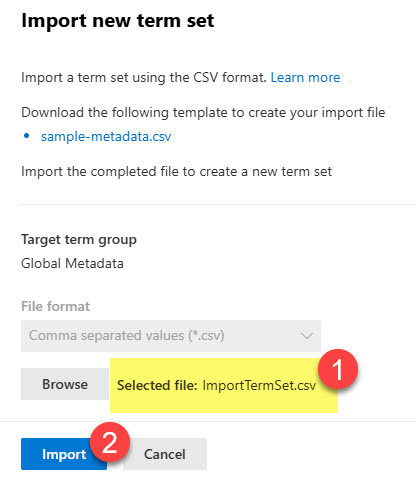
- Choose the file from your PC, then click the Import button
- You will get the confirmation message below

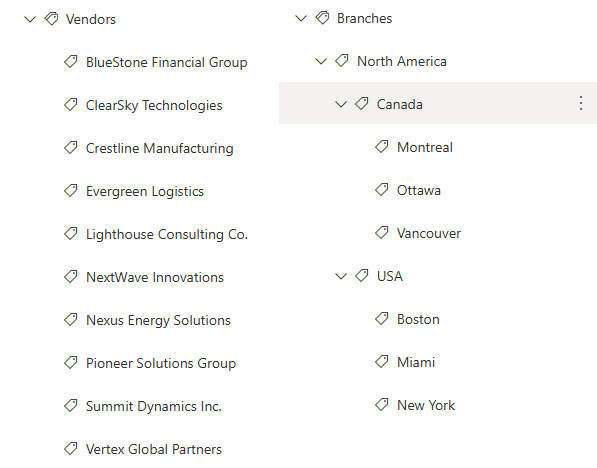
- Once imported, this is how the imported terms sets will render in the Term Store.
Limitations of the Term Store Import
- You can only import the term set once. In other words, say, for example, you imported 1,000 terms (list of clients) and then want to add another 100 – you would need to do so manually. There is no way to reimport into the existing Term Set.
- If the Term Set imported into a Term Group has the same name as one of the existing terms sets within the Term Group, the import will go through, but it will add 1 next to the name (i.e., Vendors1)
- Only one (1) Term Set can be imported at a time per CSV file.

Share Article