How to create a Document Acknowledgement System in SharePoint
Many years ago, I had a client who wanted to create a document acknowledgment system in SharePoint. Essentially, they wanted users to read the various company policies and acknowledge that they read the document (name, date, timestamp). I remember back then, it was quite an extensive effort with custom workflows, entry forms, etc. I also had another client just a few weeks ago who had a similar request. Luckily, I built them a solution completely out of the box this time. This became possible with the recent new capabilities and features added to SharePoint. So, in this article, I would like to document what I did for them – you will 💖it, I promise!
For this post, let’s assume we have some Human Resources Policies that employees must read and acknowledge, such as the Employee Handbook, Sexual Harassment Policy, Social Media Policy, etc.
Step 1: Create a Site
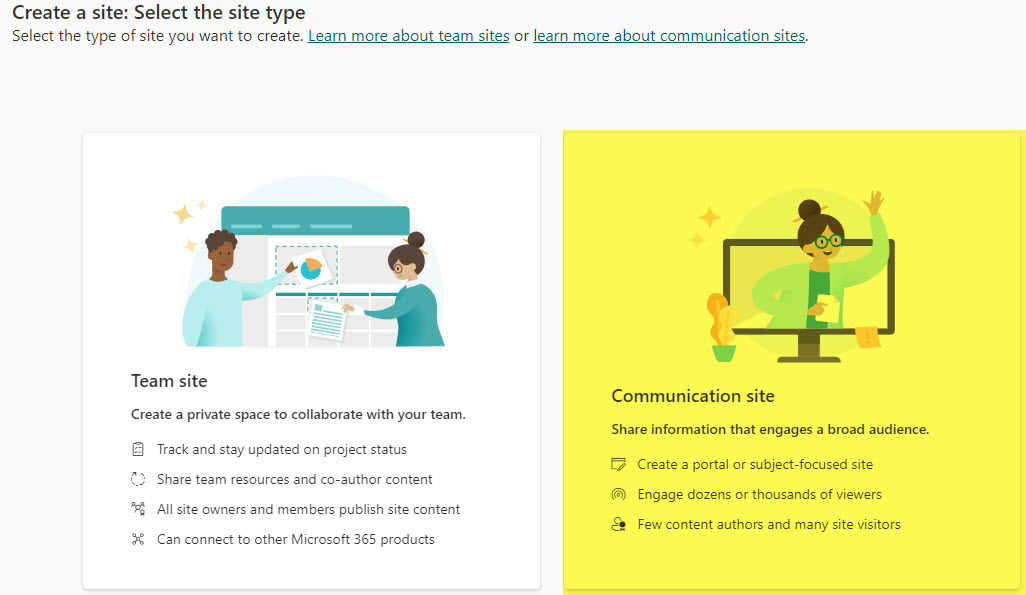
The first step is to create a site to house the documents. Quite likely, you already have one. If not, I suggest creating a Communication Site so that you can post your documents there. So I do not repeat myself here; check out this article on how to create a Human Resources Communication Site.
Step 2: Create a Document Library
All sites already have a document library created by default. If you want to create a brand new library, that is fine, too. One important thing about the library is that we also need to add a Hyperlink column to store the acknowledgment link (this will become obvious later).
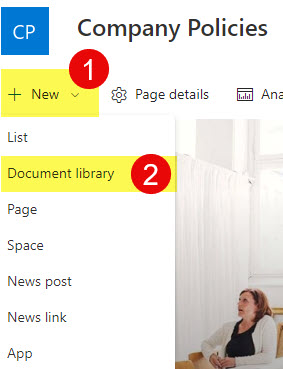
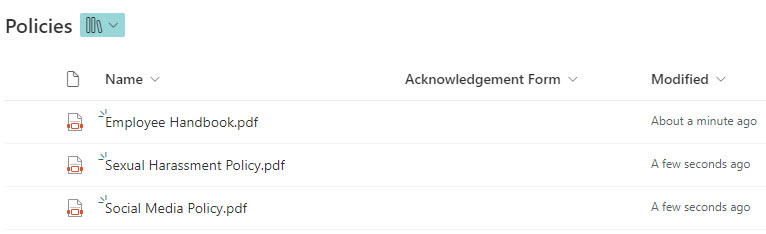
- From the SharePoint Site Homepage, click New > Document Library
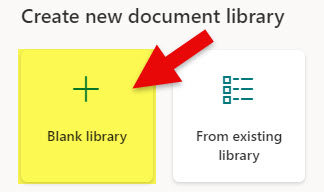
- Click on Blank Library
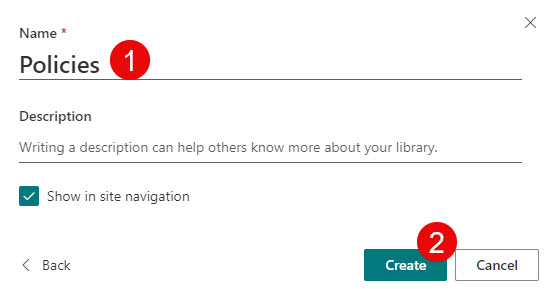
- Give your library a name and click Create
- Once the library is created, we need to create a Hyperlink column (this is where we will store the link to an Acknowledgment Form)
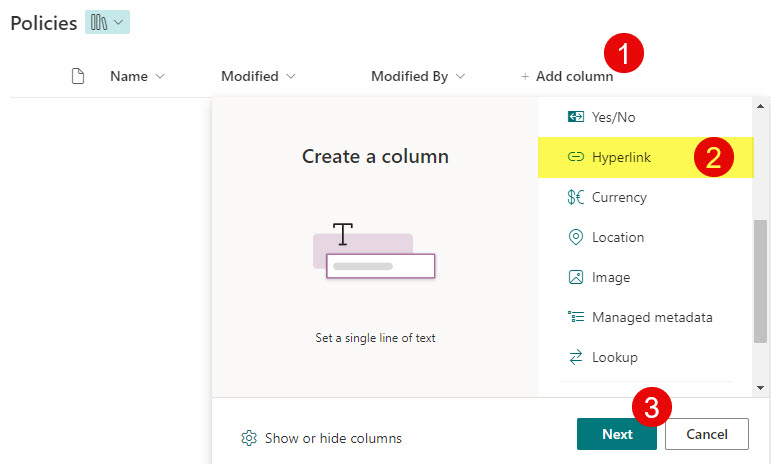
- Give the column a name and click Save.
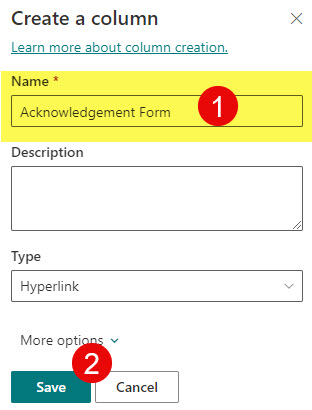
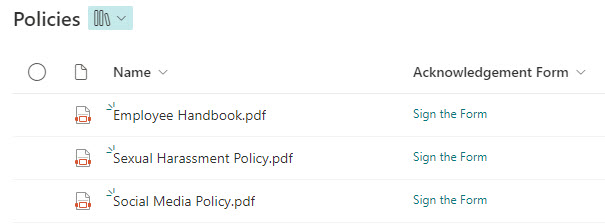
- This is what the end result looks like once the column is created and some policies are uploaded.
Step 3: Create a List
The big idea behind the document acknowledgment mechanism is that we will rely on the new Forms/List integration we now have. So, we must first create a List with the corresponding columns. Since users submitting the Form do not need access to the list itself, the list with tracked acknowledgment can reside on some other site (i.e., Private HR Site). For this article, I will create it on the same site where the Policies reside. Here is what we are going to do.
- From the SharePoint Site Homepage, click on New > List
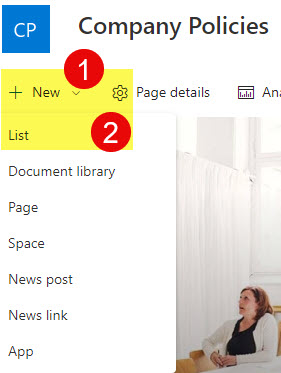
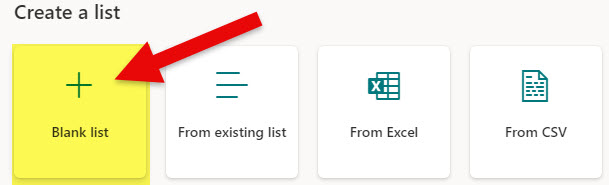
- Choose Blank list option
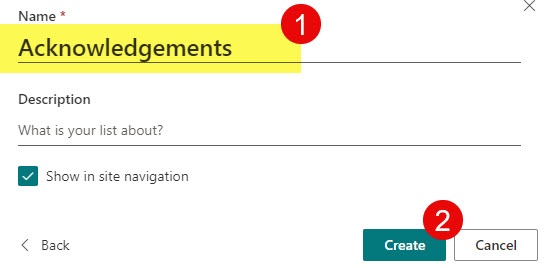
- Give it a name, click Create
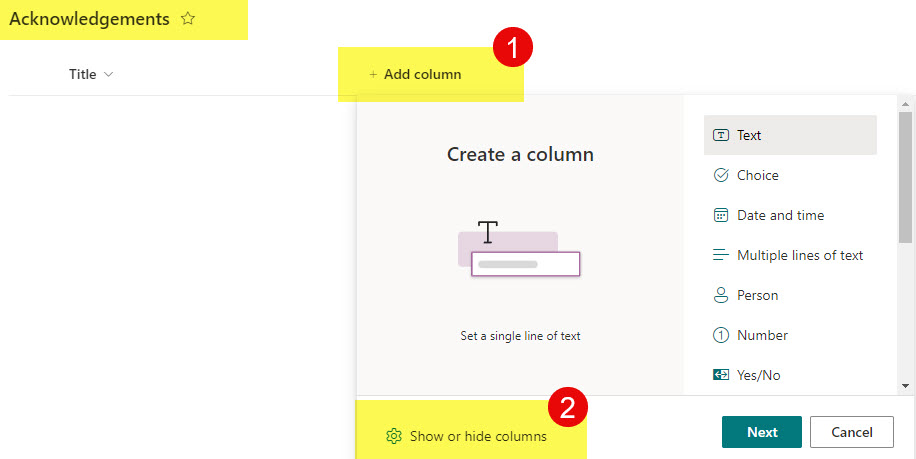
- We now need to show some built-in/system columns (which we will rename in the following step). Click on +Add column, then Show or hide columns
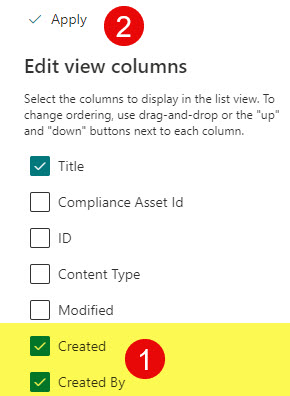
- Check the boxes next to the Created and Created By columns and click Apply
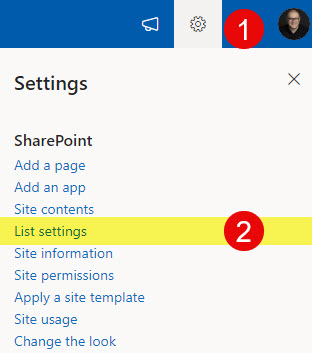
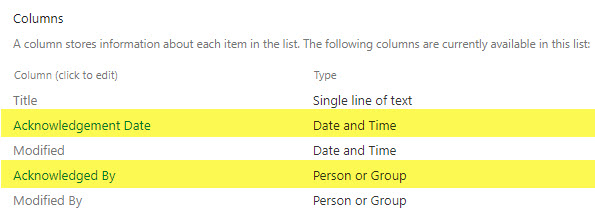
- Next, we will rename the built-in columns: Created and Created By. Those capture when a row in a list is created (or, in our case, when the user submits the Document Acknowledgment Form). So we need to rename those as such: Created → Acknowledged Date, Created By → Acknowledged By. For this, we need to go behind the scenes. Gear Icon > List Settings.
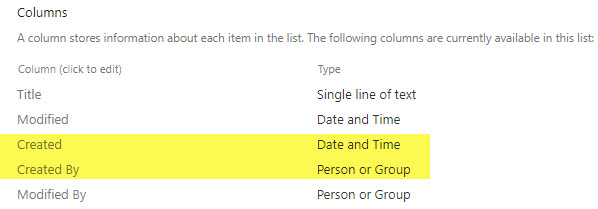
- By default, you will see the built-in columns. Click on them to change the name.
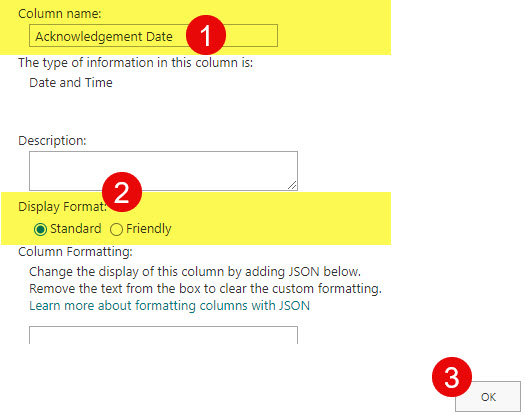
- In the screenshot below, I am changing the Created to Acknowledged Date. I also recommend changing the Friendly Date format to Standard.
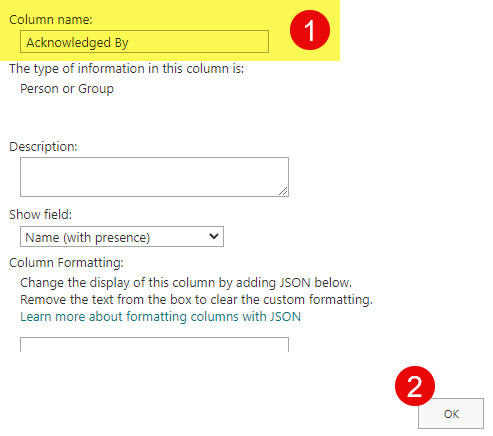
- Same with Created By – I am changing it to Acknowledged By.
- This is how it will look after the changes are made
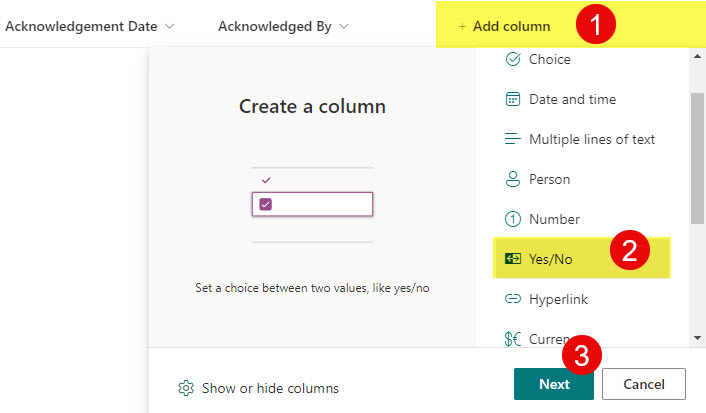
- Next, we need to add an Acknowledgment Question to the List. Click on the +Add column, Yes/No Column, and click Next.
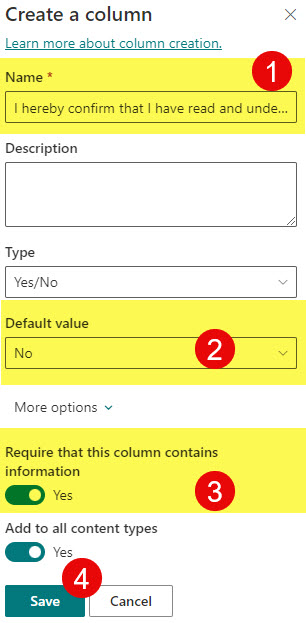
- In the column name, you can add the Column Name that would be the Acknowledgment question the user will “sign.” In my case, I am adding the following: “I hereby confirm that I have read and understood this policy manual.” Choose “No” as the default, make the column required, and click Save.
- That’s all – we are done with the list build-out – here is what it will look like (by the way, you can hide the default Title Column – we don’t need it).

Step 4: Set up Site Permissions
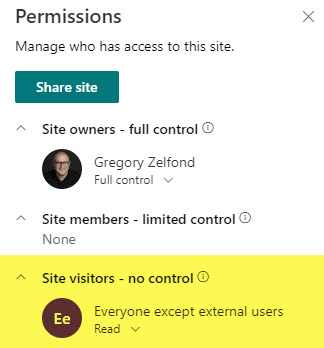
Next, we need to set up permissions to the Site. Since we want users to be able to read the policies, we need to give them Read Access.
Step 5: Create a Form
Next, we will create a Form based on the columns we have. I explained how to do this here.
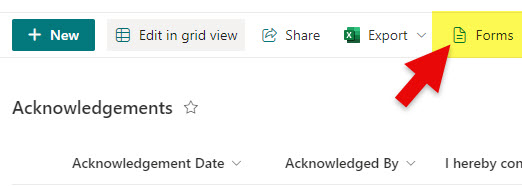
- From the List we created in the previous step, click on Forms
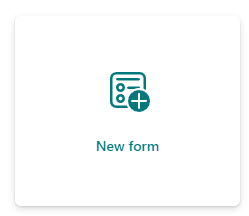
- Click on New form
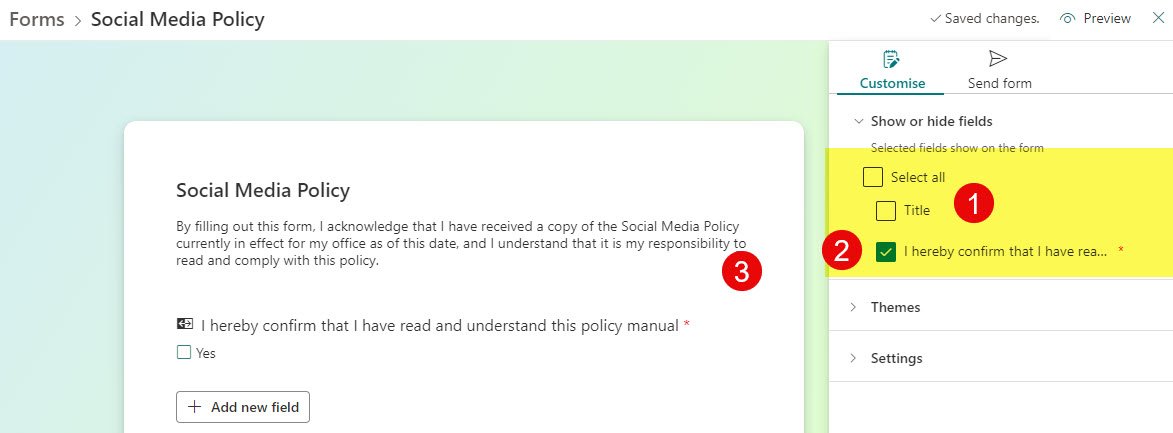
- Select the Column we created in the previous step so it would be the only column displayed on the Form. You can also give your Form a name (Social Media Policy, in my case). Below, you can add additional “legal” verbiage explaining what the user is acknowledging. In my case, I added the following paragraph: “By filling out this form, I acknowledge that I have received a copy of the Social Media Policy currently in effect for my office as of this date, and I understand that it is my responsibility to read and comply with this policy.”
Step 6: Generate a Form Link
Once the form is created, we can generate a URL for it and add this to the document library with policies.
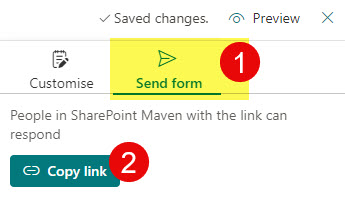
Step 7: Add a Form Link as metadata to the document in a document library
In this next step, we are populating the Hyperlink column within the library we created in Step 2.
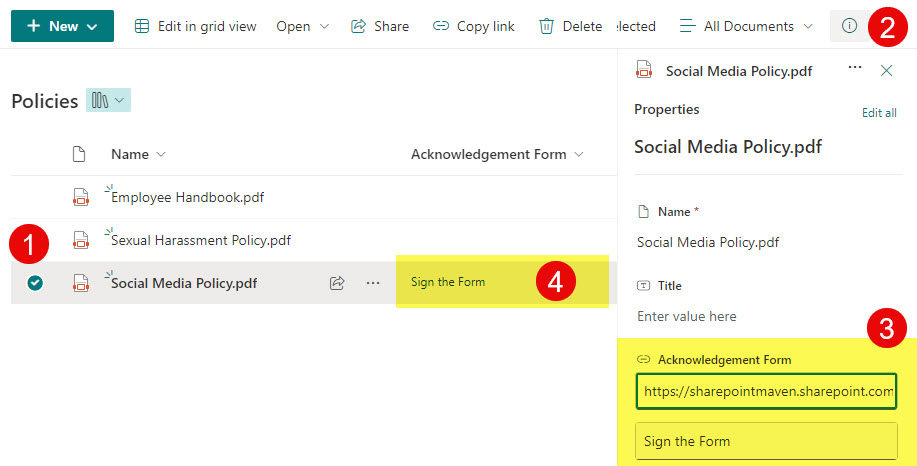
Step 8: Submit the Acknowledgement Form
We are now ready to test. Once the user clicks on the Form link from the above library, they will need to complete the form
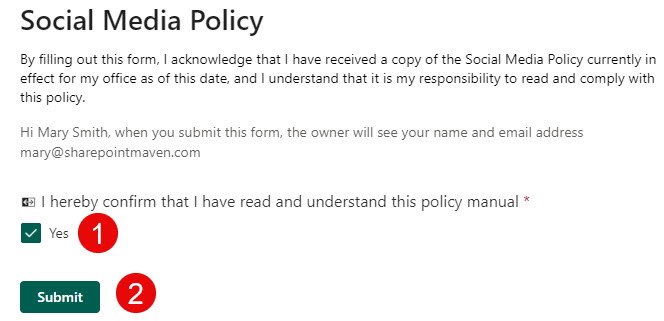
They will then receive the confirmation message.

Their entry will be populated in a list as shown below!

Step 9: Set up Alerts
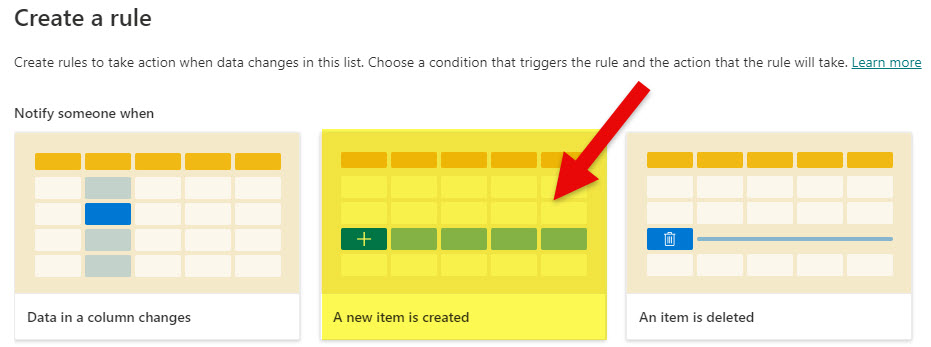
This is an optional setup. If you want to be notified when you get a new entry in a list, you can create Rules. I went over this in this article.
Step 10: Set up Item Level Permissions
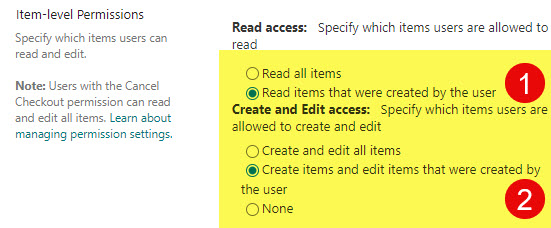
This is another optional step, but it is necessary if you want users to be able to see their submitted acknowledgment forms. To do this, you need to go to List Settings. I explained this concept here.
Below is how you should set up Item-Level Permissions on an acknowledgment list.
Additional Notes
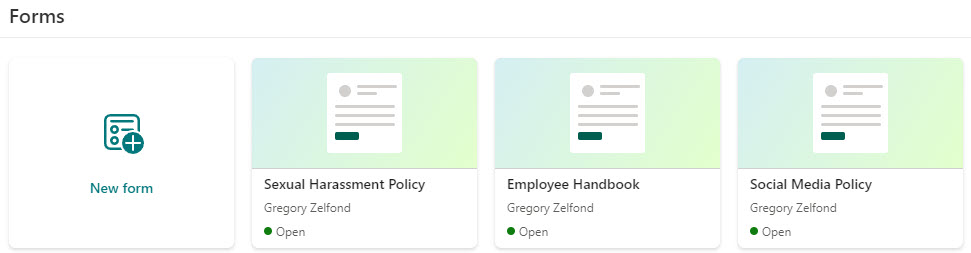
- The beauty of this option is that you can create multiple submission forms from the same list. So, create additional forms and populate form URLs in a Policy Document Library. To distinguish between different forms on the same list you can either create a unique version of the acknowledgment column for each form (i.e., add a document name into the column) or create an extra column (i.e. checkbox) with the name of the document they are signing that the user has to check on each form upon submittal.
- In case you decide to use the same list for multiple forms/documents, it will create a separate row for each entry/acknowledgment; you can group it by the “Acknowledged By” column to have an entire record for each employee.
- You can also get creative with color-coding/formatting to easily see and track acknowledgment forms submitted.
I added some images of the Document Acknowledgement Forms and accompanying lists to my LookBook 365 portfolio website. Check them out.


Share Article