How to create a Copilot Agent in SharePoint
I have already written several articles on Copilot and how it can help increase productivity by enabling you to analyze and summarize information stored in SharePoint and OneDrive. One of the recent features rolled out in SharePoint is the ability to create your own custom Copilot Agents. In this article, I would like to explain what the Copilot Agent is, how to create one, and its use cases.
What is Copilot Agent in SharePoint?
In the context of SharePoint, think of a Copilot Agent as your personal assistant that helps you make sense of content stored in SharePoint. Using natural language prompts, it can help you summarize the content stored in SharePoint (documents, pages, lists) and answer specific queries about it. The idea behind the custom SharePoint Copilot agent is that you can customize its behavior and functionality by specifying the exact sources for information (i.e., specific files and folders), among other properties.
4 Locations where you can create/source a Copilot Agent
As of the writing of this article, the Copilot Agent on a Site can be grounded (sourced on) 4 locations:
- Site (Copilot Agent created by default)
- Document Library(ies)
- Folder(s)
- File(s)
Site Copilot Agent (Default)
Every SharePoint Site in SharePoint has a default Copilot agent whose scope is the entire site. To access the Site Copilot Agent, click on the Copilot logo in the top ribbon. The default site agent will be listed first in the menu.
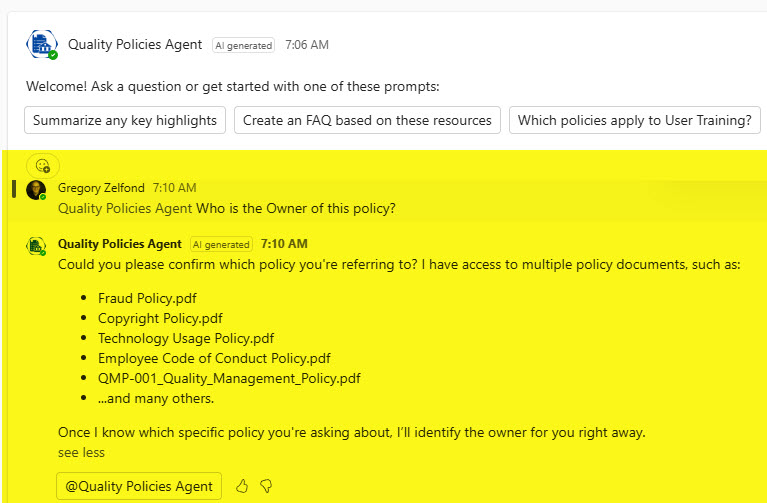
- As an example, I have a Quality Department SharePoint Site with various information related to Quality/QMS

- Once you click on the Copilot logo, you will see the default Site Copilot agent listed with sample chat prompts. Of course, you can also type your own questions as well and interact with it via the chat window.

- Below is a sample response from the Copilot Chat to one of the queries

Nuances about Default Site Copilot Agent
- A Microsoft Copilot license is required for this to work
- Each SharePoint site has a default Site Agent – it cannot be altered or deleted
- In case the site is registered as a Hub, the default Site Copilot Agent’s scope is the entire Hub
- Anyone with Site Visitors or above can interact with the default site copilot agent
- Site agent understands pages and document libraries (but not lists, as of the writing of this post)
How to create a Copilot Agent on a Document Library, Folder, or File
- To create a custom Copilot agent for a library, folder, or file, simply click on Create an agent from the document library
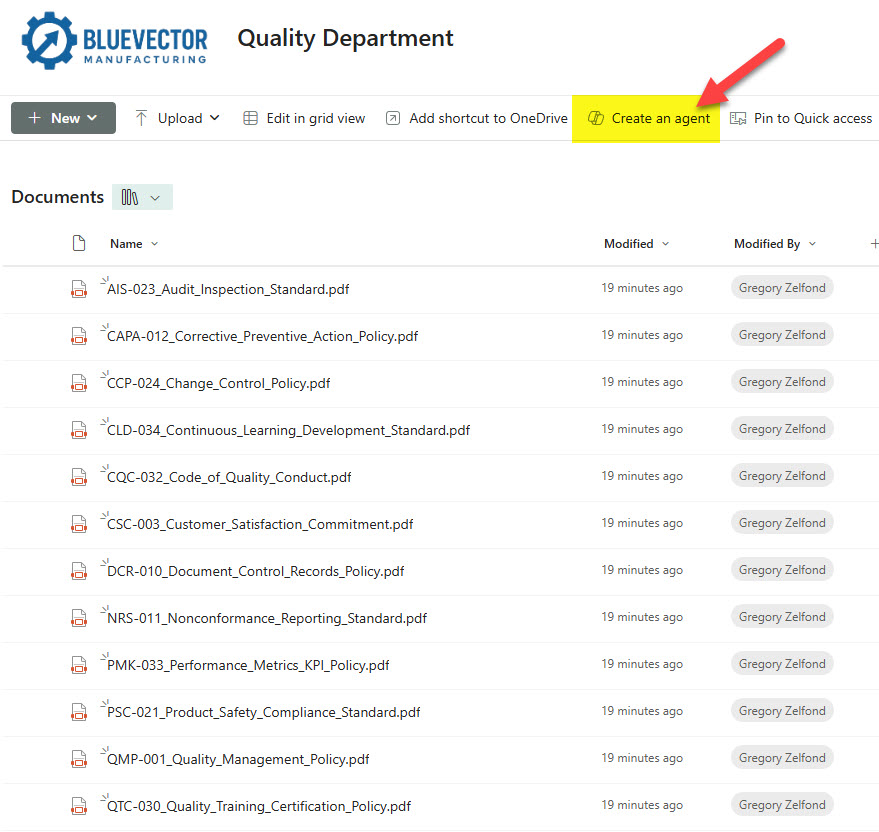
- The custom Copilot agent, grounded for the entire linbray, will be immediately created; however, you can customize it further by clicking the Edit button.

- This is where you can customize some important aspects of the Agent. For example, under the Overview Tab, you can change the title, logo, and purpose of the agent (this will provide invaluable information to users on what to expect from the Agent).

- Under the Sources Tab, you can add additional libraries, folders, or files that will be the extra sources for the Agent. For example, some of your documents/policies might be residing on a different site/library altogether!

- Under the Behavior Tab, you can customize the initial chat prompts the user will see. You can also provide some sample instructions for the Agent on its tone (i.e., serious, professional, humorous) when it responds.
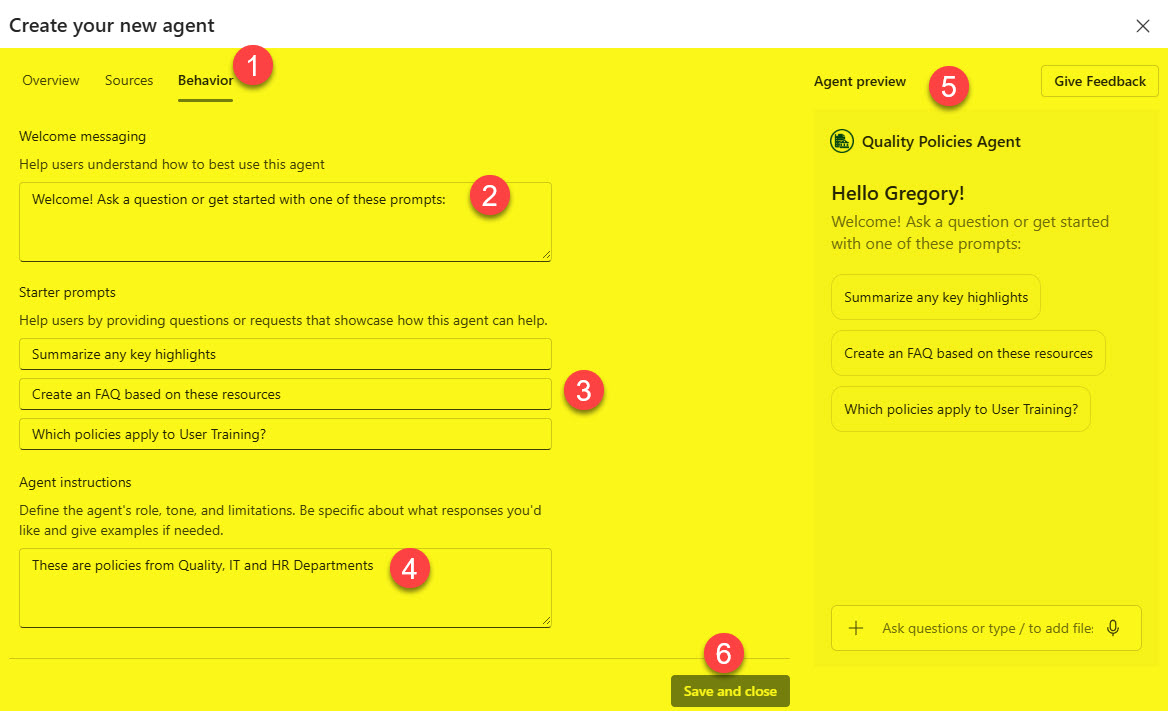
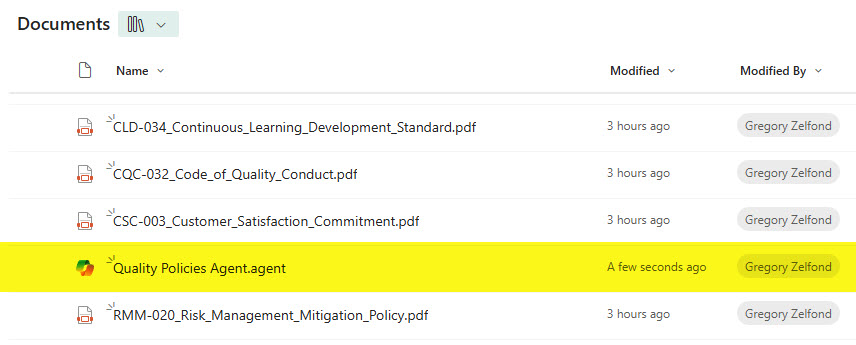
- Once you Save the changes, you will notice the Agent file appear in a Document Library, along with the other files.
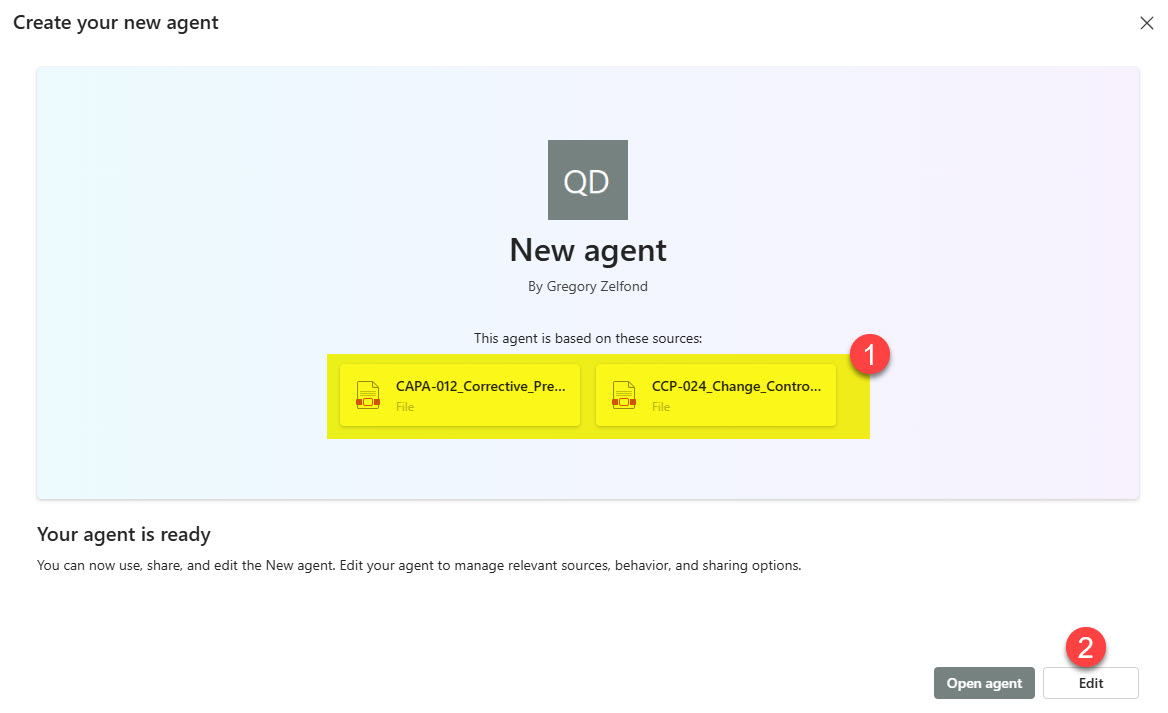
- Just as we created a Copilot Agent for the entire library above, we can also create a Custom Copilot Agent for a select few files.

- The Process from that point forward is identical to what we covered above

- And finally, the process is the same for a folder too

Approving Custom Copilot Agents
Once the agents are created, they reside within the source document library. However, if you want those Agents to be available from the Site Copilot drop-down menu for all the users, you must approve them. To do so:
- Navigate to the Copilot Agent you want to make available to all the users

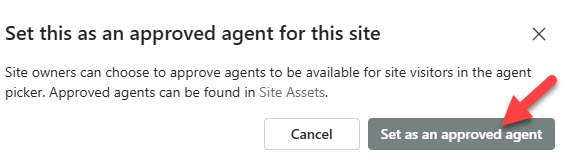
- Once chosen, click the 3 dots next to it and select Set as approved

- On the next screen, confirm by clicking Set as an approved agent button
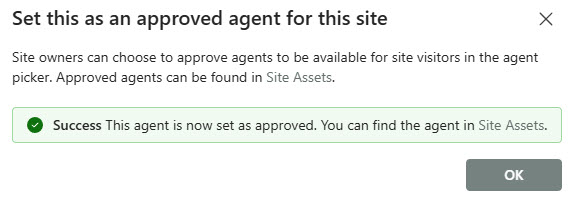
- You will then receive a confirmation message
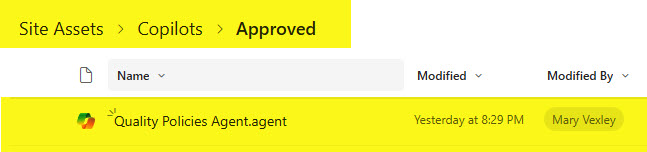
- The above steps will make the Agent available from the drop-down menu to all the Site Visitors

- You will also notice that the Copilot Agent file for this approved agent disappeared from the document library. It has actually been moved to the Site Assets Library, inside Copilot > Approved Subfolder
Sharing Custom Copilot Agents
- Since Copilot Agents are just *.agent files, they can be shared with others, just like any other file
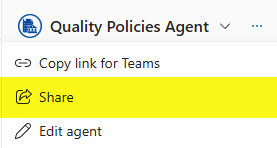

- You can also share an Agent with the Teams Channel
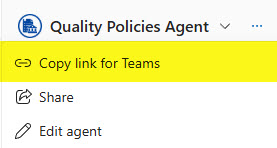

- The above step allows you to paste the Agent within the Teams channel

- This allows users to interact with the Agent using the @ mention.
Nuances about Custom Copilot Agents
- A Microsoft Copilot license is required for this to work
- Custom Copilot agents can be created for entire document libraries, specific files, or folders
- For custom agents created for the document library, folder, or file, anyone with Site Member (Edit) or Site Owner (Full Control) can edit the agent
- Up to 20 sources can be chosen for each custom agent

- Once created, the agents reside as .agent files within the location where they were created. If you create an agent for the entire library or a file/folder within the root of the document library, it will also reside there. However, if you create an agent for a file or folder several levels deep, the agent will also reside there, within the exact location where the source content resides!

- Once approved, agents are moved inside the Site Assets Library, inside the Copilot > Approved subfolder
- Users must have proper access (read-only at a minimum) to the Agent sources for the Agent to work (also known as Security Trimming)
- To approve the Custom Copilot Agent, you must be the Site Owner (Admin) of the Site
- You can change the default Copilot agent that loads on a site, too, by replacing the Site Default Copilot Agent with the custom one you created

- Since Copilot Agent is just a file within a document library, it supports Version History. That means you can restore an older version of the Agent if necessary.


Share Article