How to add SharePoint metadata to Word documents using Quick Parts Document Properties
If you use metadata in SharePoint, you might want to carry the values inside the document library to the document itself. An example could be a library of Contracts, where you have metadata fields such as Amount, Status, and Owner, and you might want to list those within the actual Contract document to minimize double-entry. Luckily, there is a way to achieve it, and that’s what you will learn today – how to add SharePoint metadata to Word documents.
Which Office Apps are supported?
The only application where you can add SharePoint Metadata is Word. Moreover, you will also need to open the Word document in the Native Desktop application, not in the browser version).
How to add SharePoint metadata to Word documents using Quick Parts Document Properties
Step 1: Create Metadata on a document library
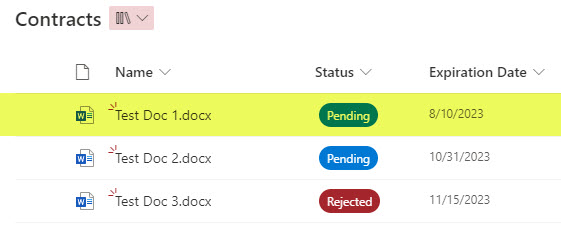
The first step, of course, is to create a document library with appropriate metadata. In the example below, I created a document library with 5 types of columns: Status (Choice), Expiration Date (Date), Owner (Person), Amount (Currency), and Notes (Multiple lines of text).

Step 2: Add Quick Parts to Word
- Open the document in the Desktop application.
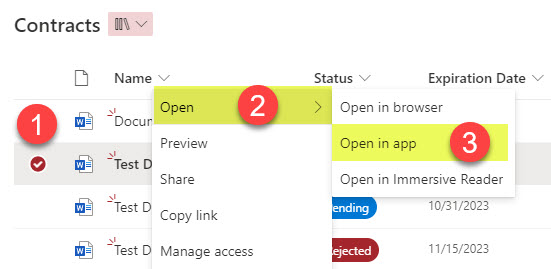
- Click Insert > Quick Parts > Document property. Then, choose the properties you would like to add to the document. You will see a long list of properties that exist – those are default properties that exist in the Word application and are not associated with SharePoint. The ones you create at the library level will also be listed here.
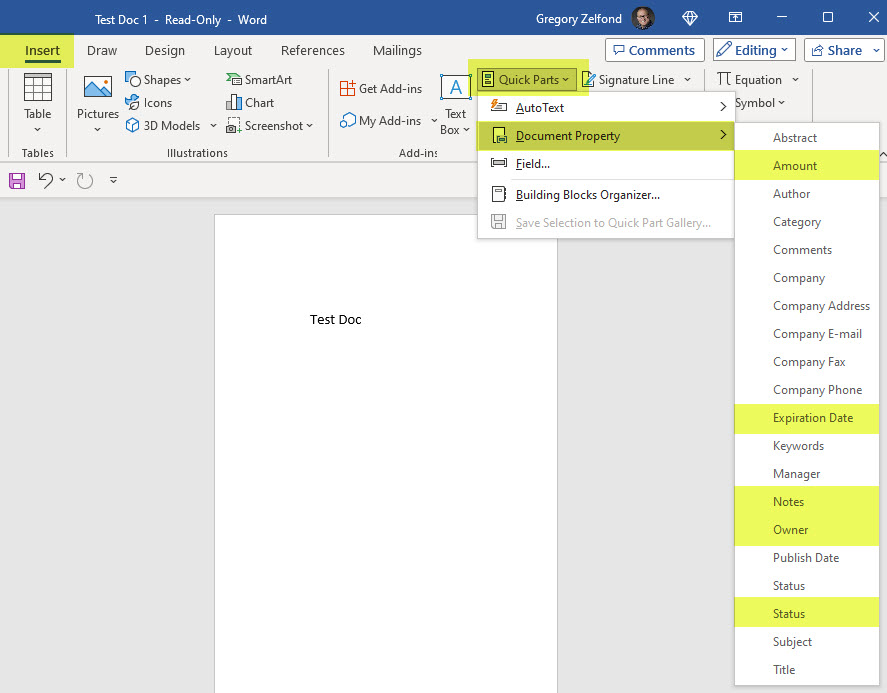
- This is how those added fields will be displayed in your document.
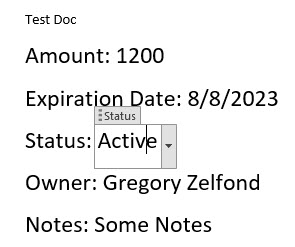
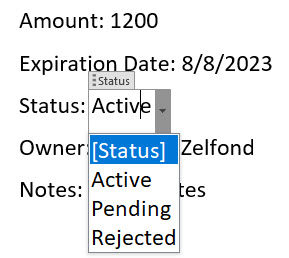
- You can even change the values right from a Word document. Below, I changed the Status from Active to Pending.
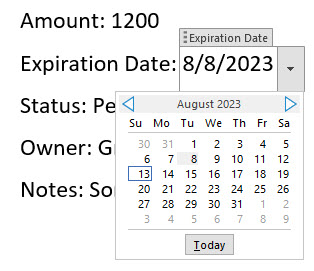
- I also changed the Expiration Date as well, all within the Word document!
- After I save and exit the document, the metadata changes are reflected in the document library!
