How to access Planner, Teams and Group Calendar from your SharePoint Site
I mentioned the trick I am about to describe a few times on my blog and YouTube channel. However, I never provided step-by-step instructions for it. So today, I am making up for my sin and publishing instructions on how you can quickly and easily access Planner, Teams and Group Calendar from your SharePoint Site navigation. You will love it!
Background
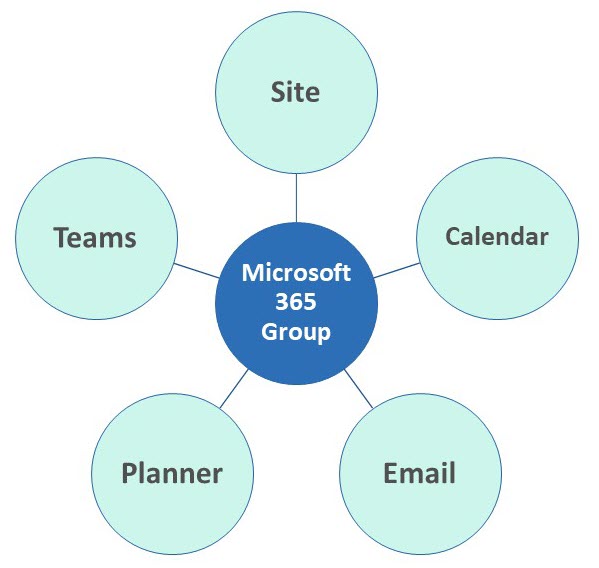
First, let me explain what this is all about. When you create a Team Site in SharePoint, you get more than just a site. Of course, you get a site, but you also get a Microsoft 365 Group and other applications provisioned and attached. I am talking about Group Calendar and Planner. The diagram below depicts the typical structure of a Microsoft 365 Group.
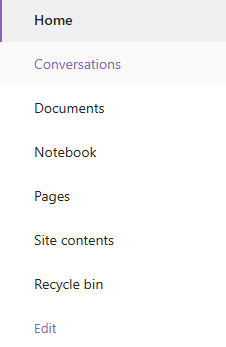
So, say you create a Team Site, start configuring it, and make it nice and pretty. One of the things you probably would do is clean up and edit its quick launch navigation (the one on the left-hand-side)
You can also add navigation links to any other content (pages, folders, documents, SharePoint sites, or external resources) – essentially anything with a URL. However, what if you want your team members to quickly find and navigate the other assets that were created when the Team Site/Microsoft 365 Group was established – like Group Calendar in Outlook or Plan in Planner? You can obviously navigate to, say, Planner, find the corresponding Plan, copy its link, then go to the SharePoint site and add it to the navigation. But there is a much easier option – let me show you!
How to access Planner, Teams and Group Calendar from your SharePoint Site
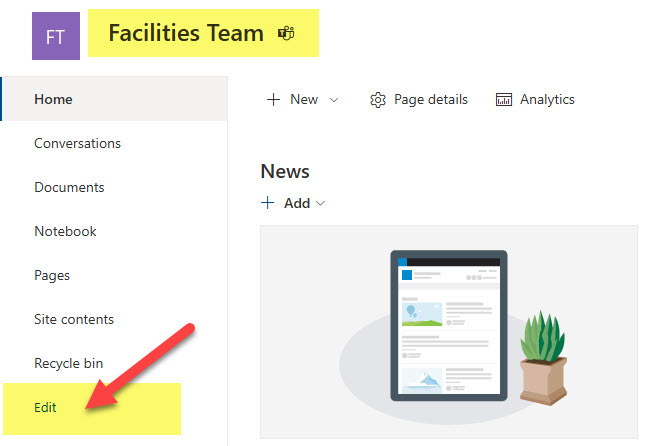
- On a Team Site, click the Edit link on the left-hand-side navigation
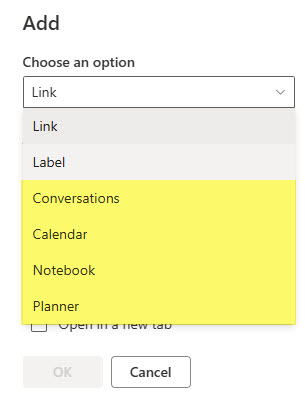
- To add a link, hover over just below one of the existing links and click the “+” sign. You will then be able to click on the Link drop-down.
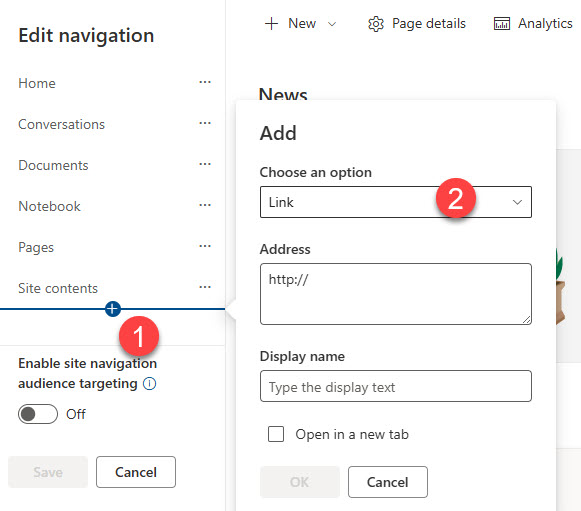
- Once you click on a link drop-down, you will see the default links that are available. Conversations links to the Group Inbox in Outlook, Calendar links to the Group calendar in Outlook, Notebook links to OneNote notebook on a SharePoint site, Planner links to a Plan in Planner, and Teams links to a Team in Teams.
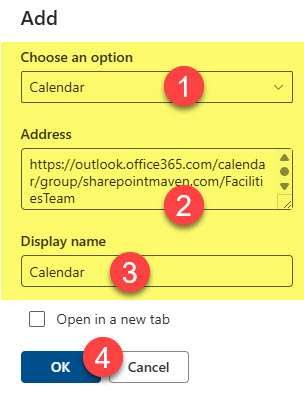
- Choose the asset you would like to add (i.e., Calendar). Specify the Display name and click OK. Note that the URL address for that asset is populated automatically!!!
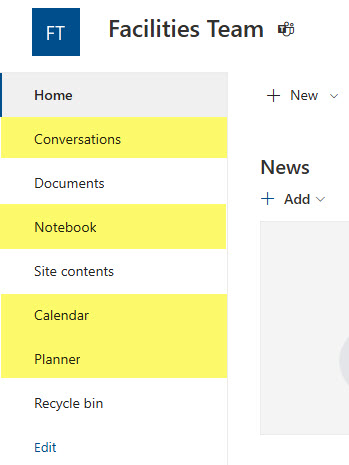
- And this is the end result!
Nuances about Microsoft 365 Group Asset links
- Even though other applications might also be connected to a Microsoft 365 Group (i.e., Forms, Loop, Power BI workspace), the selection of “default” links is only limited to the five mentioned above (Conversations, Calendar, Notebook, Planner, and Teams)
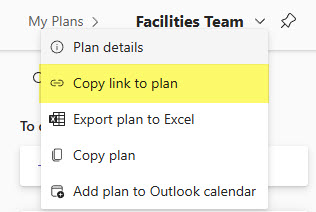
- If you have several plans connected to the same Microsoft 365 Group, the Planner default link will link it to the most recent one created. If you would like to create links to other plans, you would need to manually grab the URLs of those plans from Planner and paste them into the SharePoint navigation.
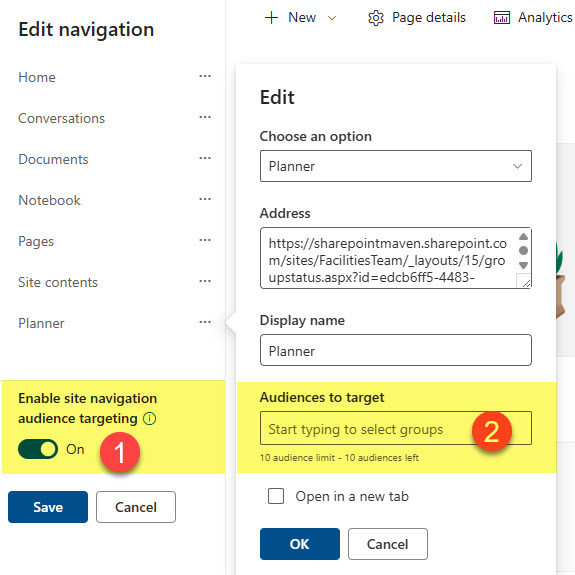
- Just like with the “regular” links and labels, you can also set up audience targeting on those app links as well. This will allow you to show or hide those links/labels based on who is logged in.
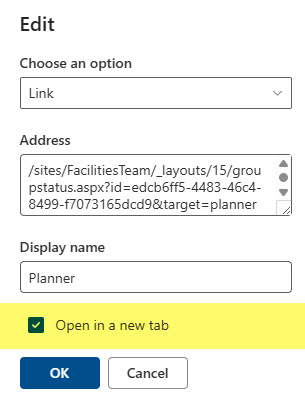
- I highly recommend that you check the “Open in a new tab” checkbox so that apps you click on open in a new browser tab and do not overwrite the SharePoint site you are on.
- The trick explained in this article only works for Team Sites. It does not work for Communication Sites or Team Sites without a Microsoft 365 Group since they do not have a Microsoft 365 Group or other apps attached to them.

Share Article


