How OneDrive Sync works
One feature that confuses the hell out of everyone is OneDrive Sync available in SharePoint Online and OneDrive. So today I would like to clarify what it is and how it works. I have written a few posts previously on how to install it. Still, since Microsoft has made a few significant improvements over the last few years, I would like to start from scratch and explain to you, my loyal blog followers what OneDrive sync is and how to get the most out of it.
What is OneDrive Sync?
OneDrive sync is an application that you install on your computer that takes care of a two-way synchronization of files and folders between SharePoint document libraries and your computer (i.e., C: Drive) as well as your own OneDrive files and folders and your computer (i.e., C: Drive).
Why do we need OneDrive Sync?
By making the files available on your computer, the idea is that you can access them without logging in to SharePoint Online. Moreover, you can access them without an internet connection (offline). OneDrive sync “remembers” the changes and synchronizes them automatically when the Internet connection is present, so you always get the latest and greatest copy of the files in either SharePoint Online or your computer.
How is OneDrive Sync related to OneDrive for Business?
OneDrive for Business is your personal storage place in Office 365, as explained further in this post. OneDrive sync client is a separate application you install to synchronize the files and folders. They just happen to share the name “OneDrive”. And what adds to the confusion is that, as I described above, OneDrive sync client syncs files and folders from your private OneDrive for Business (within the company’s Office 365) as well as SharePoint document libraries. I know, I know, that’s why I wrote this post.
How to install OneDrive sync client
OK, so now that we got terminology part behind us, let me describe to you how to install and configure OneDrive Sync client. I provided similar instructions in a previous post, but I would like to repeat it here again to make sure you get the latest and greatest instructions.
- Navigate to either your OneDrive for Business or any SharePoint Document Library
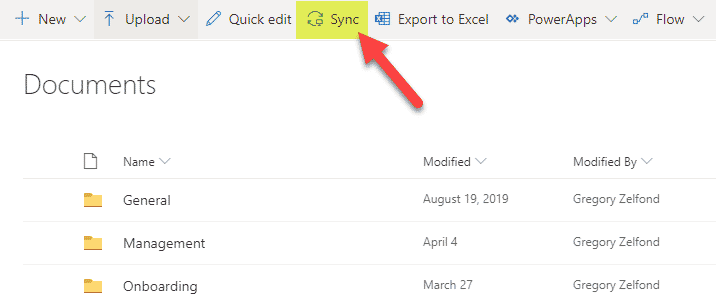
- Just above files and folders, click the Sync button.
- You will get a pop-up that looks like this and OneDriveSetup.exe file downloaded to your computer automatically.
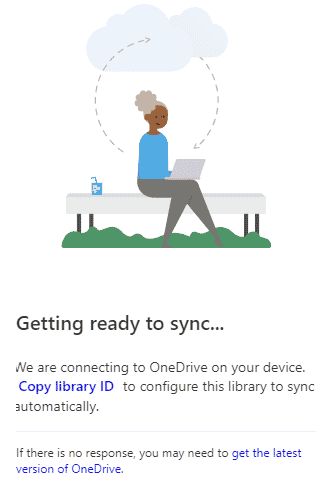
- In case if OneDriveSetup.exe does not start automatically, you might need to click get the latest version of OneDrive.
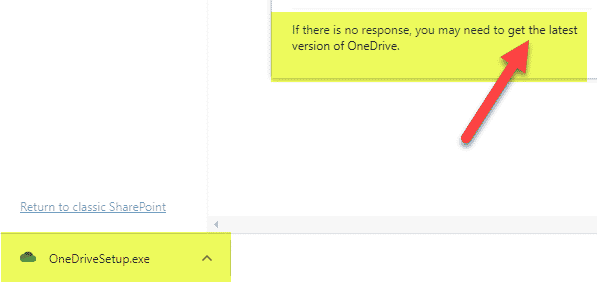
- Go ahead and run/open the executable file.
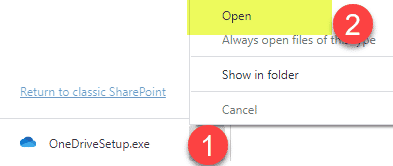
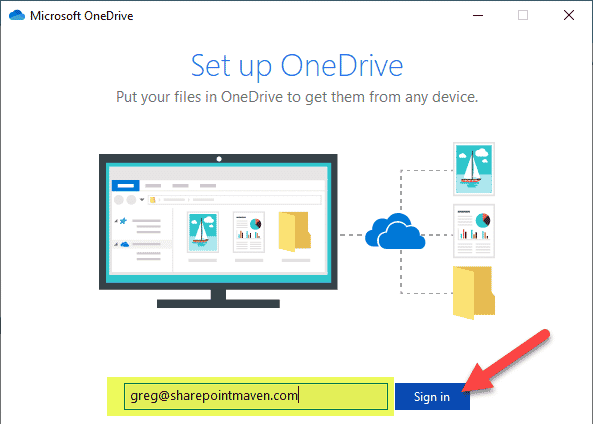
- Next, it will prompt you to enter your email address. Please make sure to enter your Office 365 User D (email address) and click Sign In
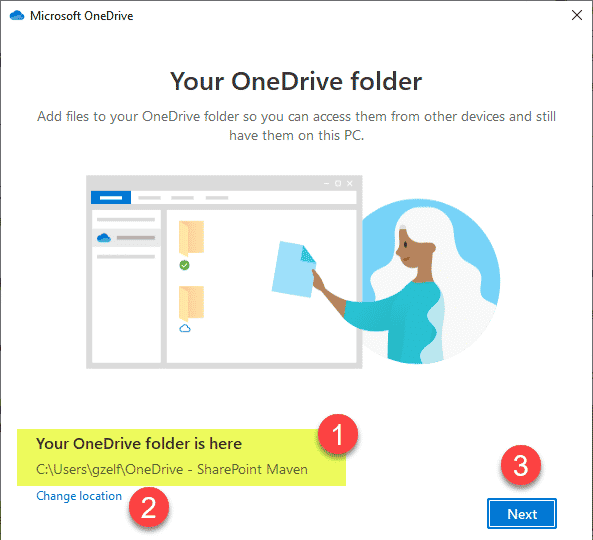
- It will ask you the location where you want to store the synchronized files and folders. I suggest you leave as-is, but you can optionally change the location. Hit Next
- And that is it! You will now get a notification that the files and folders synchronized to your computer.

What does it look like in Windows Explorer?
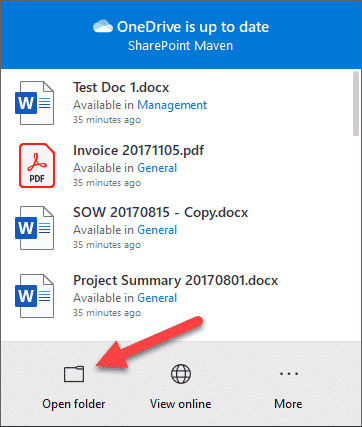
- You can navigate to your synchronized files and folders by clicking on a blue cloud icon in the taskbar

- And then click Open folder.
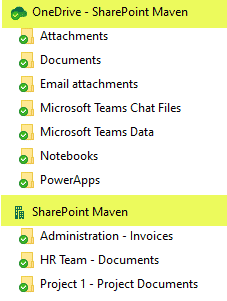
- You will now notice all the synchronized files and folders. Your personal files from OneDrive will reside under OneDrive-[Company Name] section, while all the document libraries will reside under the [Company Name] section, next to a building icon
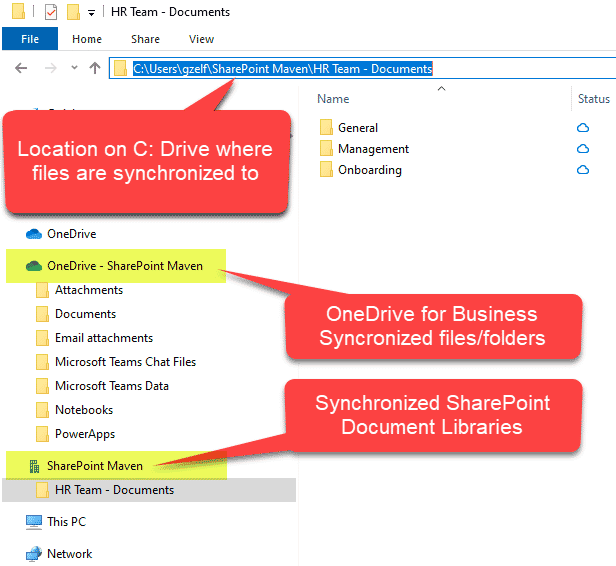
It is imperative to note the naming convention for the synchronized SharePoint Document libraries. The naming convention is as such: [Site Name] – [Document library name].
How to configure OneDrive Sync
Now that we installed OneDrive sync, it is time to configure it. You have a few options, depending on how you work.
Files On-Demand
Remember when I told you earlier that all the files are copied over to your C:Drive? Well, that is not 100% accurate. If you were to stop right here and not configure this any further, you would use what’s called the Files On-Demand feature. This is a new feature that was rolled out relatively recently. Its purpose is to save space on your hard-drive. The idea is that it does not download the physical files and folders to your computer. Instead, it just downloads the names of files and folders as well as the hierarchy of folders. So it looks like you have them on your computer, but you don’t. It only downloads files and folders when you click on them.
In the image below, you can see the cloud icons next to all the files, except for one (green checkbox). This indicates that I opened the file on my computer, and it was physically downloaded to my computer at that time.
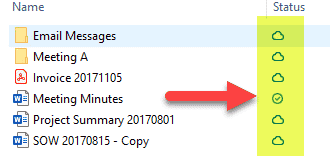
Files on your computer
The above setup works well when you want to save storage on your laptop, but if you do not have WiFi and need to access the files, it won’t work. In this case, you need to disable Files On-Demand. To do this:
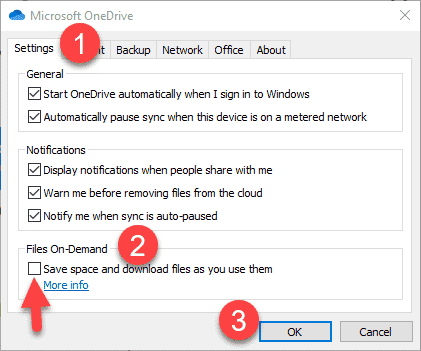
- Click the Blue Cloud Icon > More > Settings
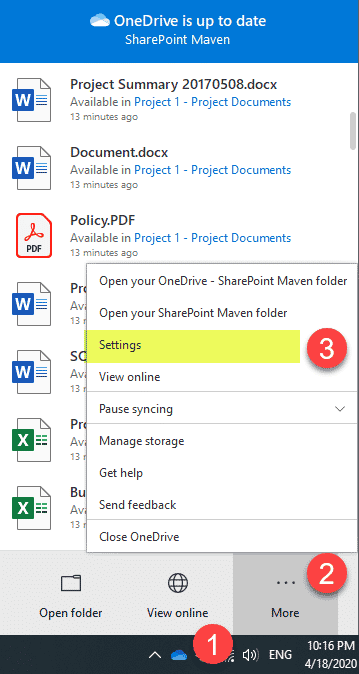
- Under the Settings Tab, uncheck the box next to Save space and download files as you use them.
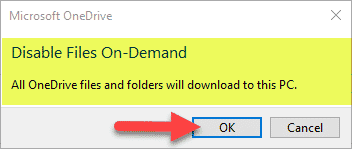
- You will get a confirmation message, just hit OK.
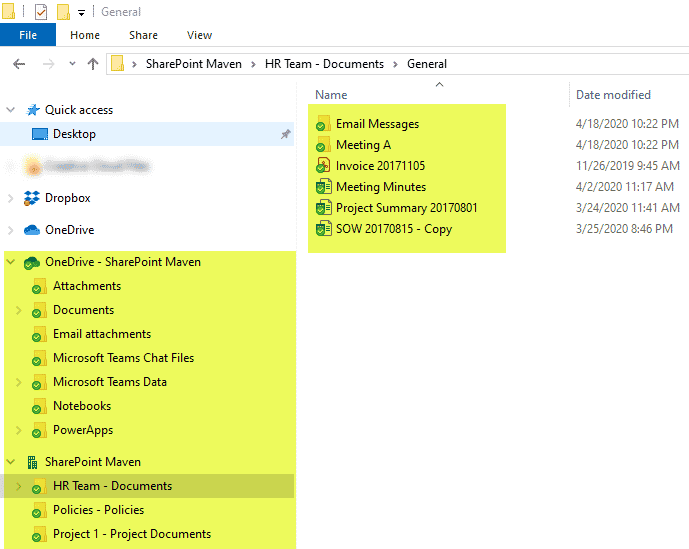
- When you go back to Windows Explorer, you will now notice a bunch of green checkboxes, meaning that the files have physically been downloaded and synchronized to your computer.
How to stop sync of files and folders
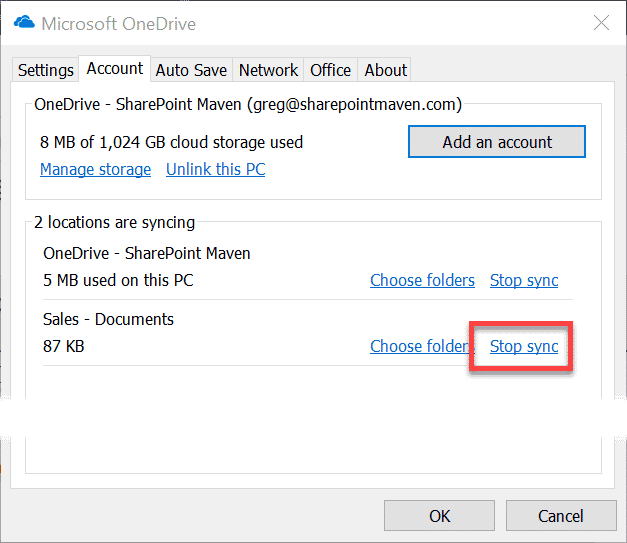
It is crucial to note that once you synchronize your OneDrive or SharePoint document libraries, it establishes a constant 2-way connection between OneDrive/SharePoint and your computer. So any change you make in one place (i.e., deletion) will immediately happen in the other location. If you need to break that link – you need to stop the synchronization. To do this – follow instructions in this post.
How to disable OneDrive sync
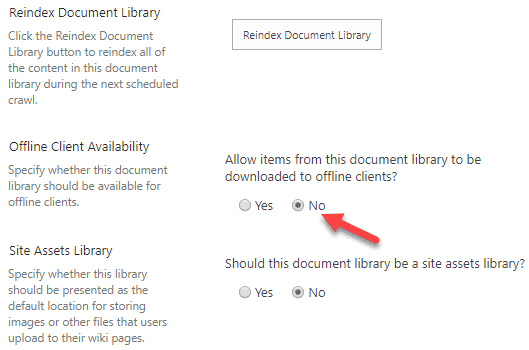
Sometimes, you just do not want your users to sync anything to their computer (i.e., highly sensitive information). In such cases, Site Owners can disable Sync option. I describe the steps in this article.
Additional OneDrive Sync Nuances
OneDrive Sync and Required Metadata
In case your library contains metadata columns that you made required, you will notice a lock icon appearing next to the files. That means that all the files and folders became read-only, and you can no longer edit them from Windows Explorer.
If you try to open and edit a document, you won’t be able to.
The reason for this – there is no SharePoint metadata in the Windows Explorer – and since it is required, you will need to navigate to SharePoint to fill it out.
OneDrive Sync and Required Check-Out
The same thing will occur if you enable Check-Out on the document library. Since this is a strictly SharePoint feature, it will lock down all the files, just like shown above, in the synchronized folder on your PC. Because again, it expects you to go to SharePoint to check out a document first before making any changes.
OneDrive Sync Icons
In case you want to get to know all the possible icons and Statuses in OneDrive sync, check out this helpful summary from Microsoft.

