3 ways to build multiple conditions in Microsoft Flow (now called Microsoft Power Automate)
I had an interesting dilemma to solve for one of my clients the other day. They had a document library with various types of documents and different approvers depending on the document type. What made it a bit complicated was the fact that they had way too many document types and separate approvers for almost every type of the document. So below I would like to explain various options on how to build multiple conditions in Microsoft Flow.
Option 1: Nested Condition Control
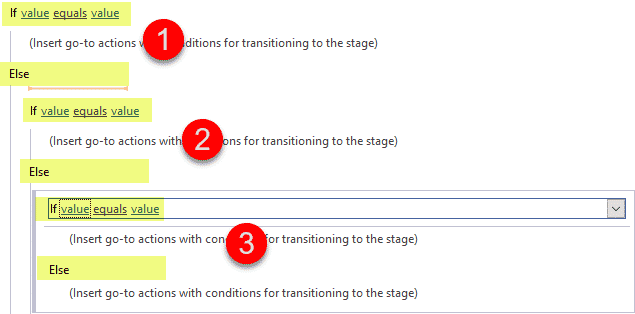
This is the option we used with SharePoint Designer. Remember nested “If-Else statements“? For those of you who are sentimental, I include a screenshot below.

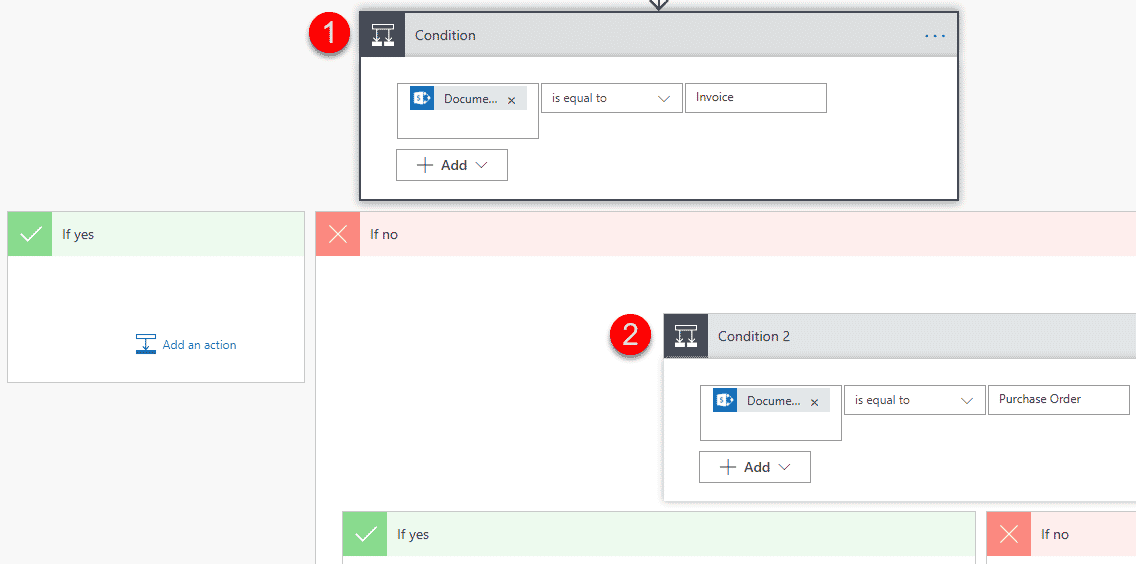
The idea here is the same. Essentially you build nested conditions using Condition Control. Below image depicts sample logic.

Pros
- Resembles “If Statement” in SharePoint Designer
- Easy to understand
Cons
- Not practical if you have a lot of conditions – might be hard to visualize on a screen
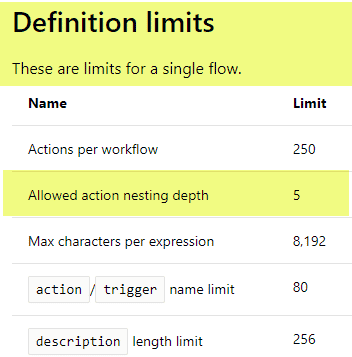
- There is a limit of 5 nested conditions (as of the writing of this post). Check this reference for more info + screenshot from official Microsoft documentation

Option 2: Switch case Control
A more elegant option would be to create multiple conditions in Microsoft Flow using the Control called Switch Case. It is kind of similar to Option 1, where using single Control you can set up different scenarios for different cases (think “if statements”).

Pros
- Easy to set up, just like Option 1
- No limits on the number of Cases
- Easy to visualize on the screen
Cons
- Switch Case action only accepts string and integer when it compares values. So in case you have a date field or other column types, you would need to first initialize a Variable and set it to be either a String or an Integer.


- Switch Case only works for cases when you have to compare against specific values (i.e. Document Type = Purchase Order). In case you need to compare against a range (i.e. Cost is more than $5,000 but less than $10,000), you need to get creative and utilize Variable action described above
Option 3: Multiple conditions within the same Condition Control
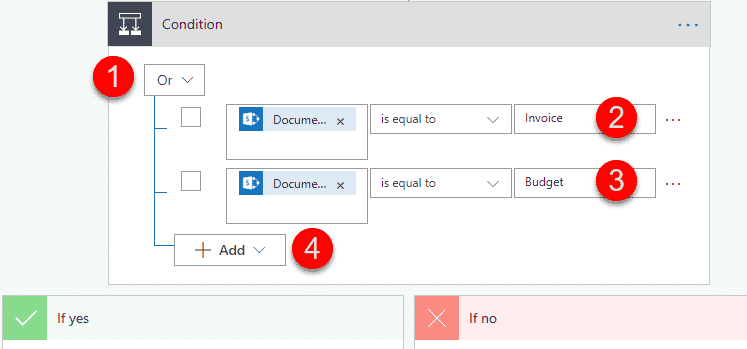
This is kind of a special case of Option 1, but if you have a scenario where you have multiple conditions with the same outcome, you can utilize the new functionality available within the Condition Control where you can add multiple rows of conditions. For example, if we have one approver for 2 or more document types, you can just build one condition and set multiple scenarios (rows) within it. See the example below.

Pros
- Easy to set up, just like Option 1
- You can build complicated conditions this way without the need to do nested conditions
Cons
- Can’t think of any, it does not need to be always negative, you know :-)


