< All Articles
How to display Office address in the Footer of a SharePoint Site
I recently worked with a client who had asked me to add addresses & contact information for each of their global offices/locations. I initially added it to the Homepage of the Intranet, but it took way too much valuable real estate on the screen (they have five offices across the globe). It was at this time that I was hit with the Eureka moment… the SharePoint Site Footer!
Usually, you would use SharePoint Site Footer to add secondary navigation links. However, the extended layout of the SharePoint footer allows us to add multiple “rows” of information and plain text instead of a navigation link. Here is how I could add an Office address in the Footer of a SharePoint Site:
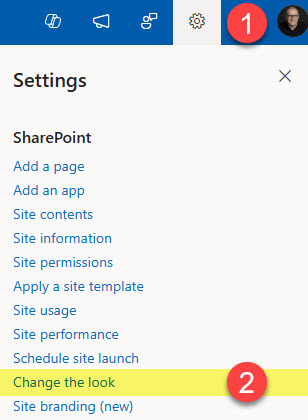
- Click the Gear Icon > Change the look
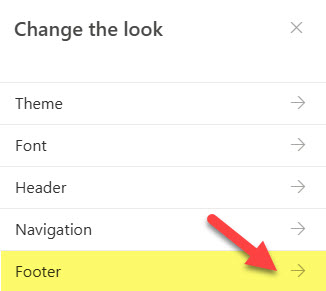
- Choose Footer
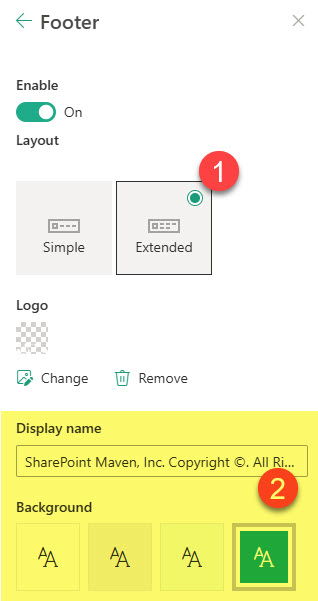
- Change the layout to Extended – this is necessary for us to fit all the necessary text information. You can also add a company logo and display name if need be.
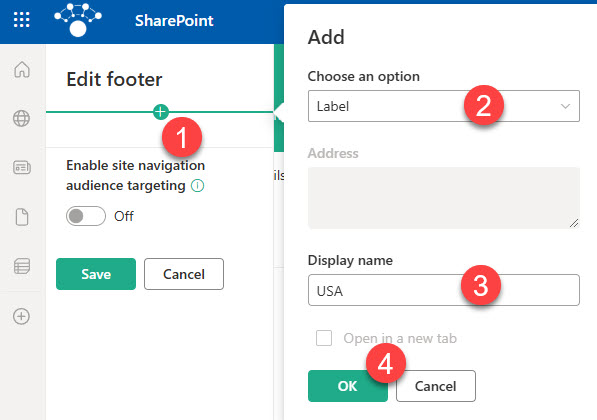
- Click Edit on the lower right-hand corner of the footer

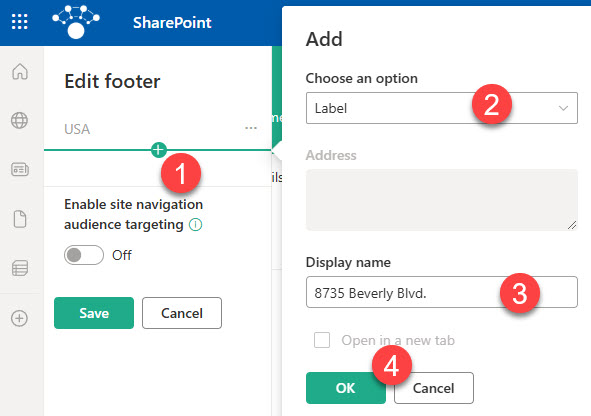
- On the next screen, we can start adding the address information. It defaults to navigation links, but make sure you choose Label instead. Give your Office location a name (USA, in my case) and click OK.
- Add the street information right underneath the previously created label. Make sure to always choose the Label option (not Link)
- Repeat the same for the remaining address information
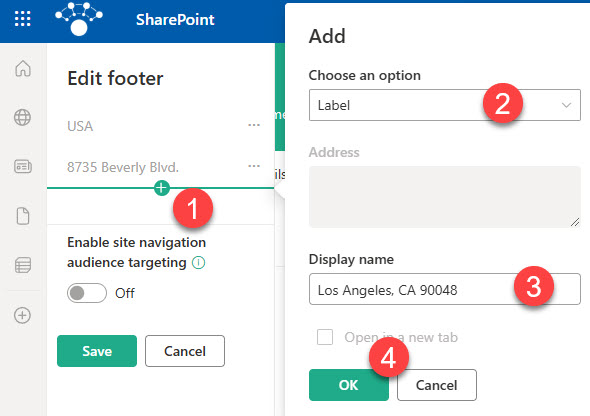
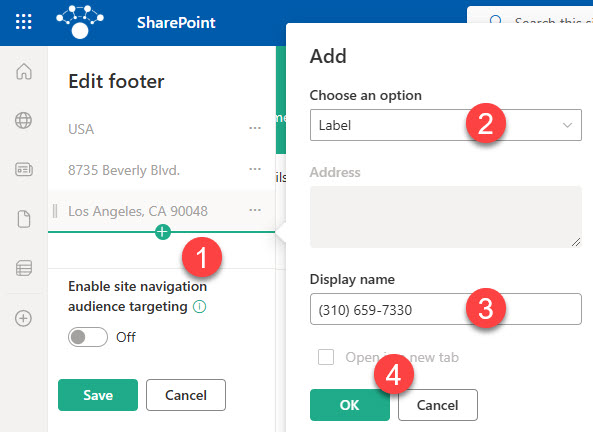
- In my case, I also have Phone # for each location as well
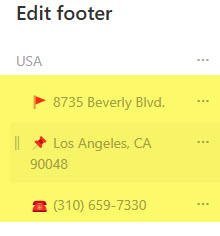
- Next, the most crucial part – for this information to display correctly/make sense, we have to turn the address info into sublinks.
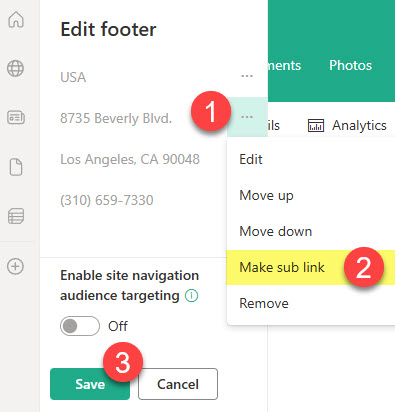
- Repeat the above step for all the “rows” under a given office location
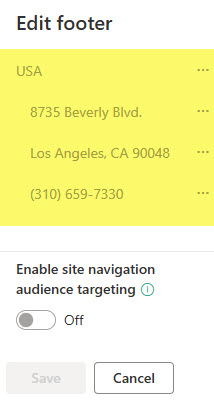
- Once you click Save, this is what the Footer will look like for a single address/location

- Next, we can add some emojis to the boring text – I usually do this by clicking the Windows logo key + . (period) (as described in this Microsoft article)
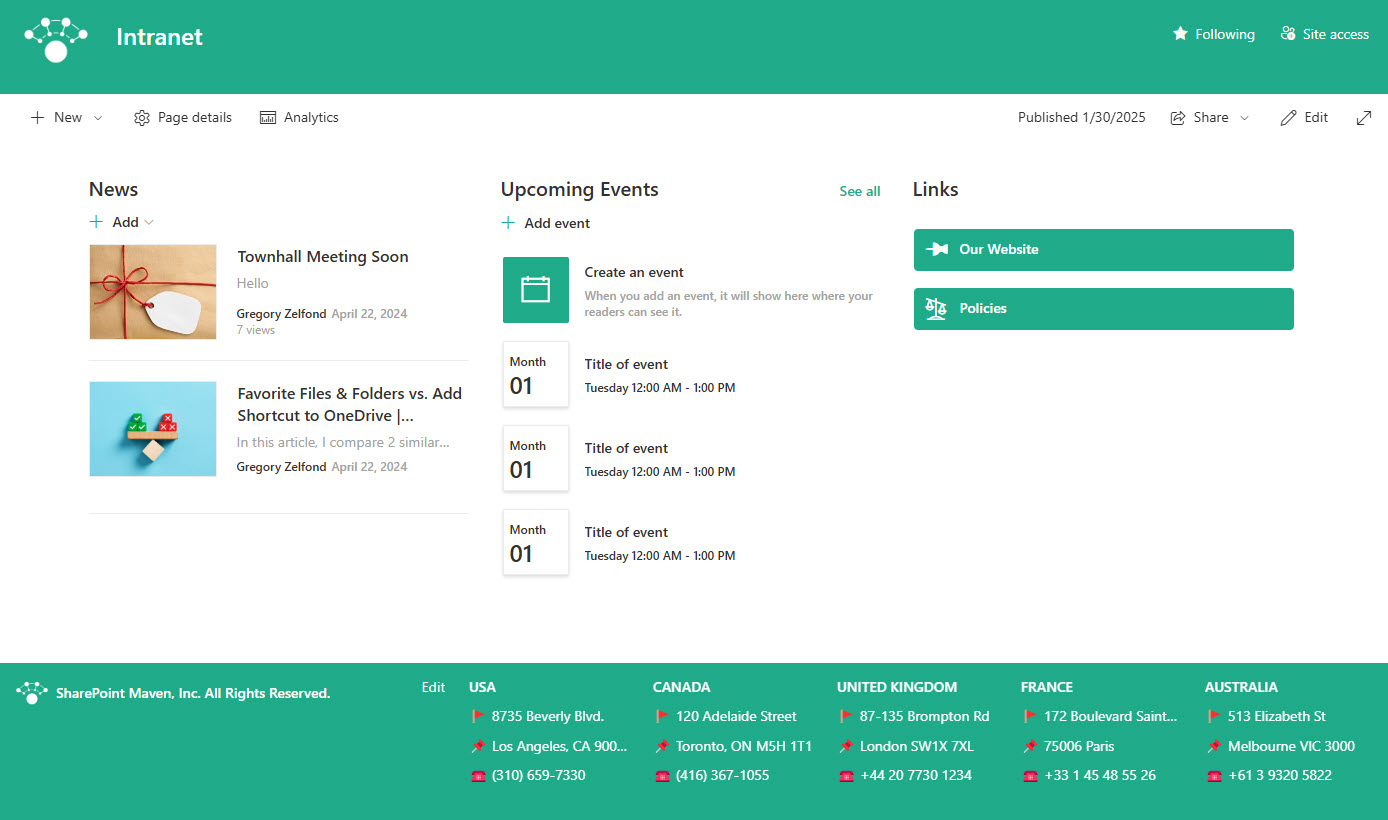
- Repeat the above steps for the other office locations. Once all set and done, this is what the Footer will look like.

- Below is an image of the whole Intranet Homepage with the Footer included so you can see the complete picture. Isn’t it a nice trick? My mom was right; I am a genius 🤣
Important nuances to be aware of when adding an Office address in the Footer of a SharePoint Site
- As documented in an earlier post, you can only display a max of 8 parent links/labels within the Footer. So, if you have more than 8 locations, this won’t work.
- There is a character limit on the amount of text you can add to a Label within the Footer navigation, so labels will be cut off if your locations have long street addresses (you can see this in the screenshot above for the France location). To resolve this, you would add additional rows for addresses and split the text.

Share Article