How to create a Client or Vendor Portal in SharePoint
One of the most frequent requirements in SharePoint is the ability to create a Client or Vendor Portal Site. This is not surprising as you always have to share, exchange, and collaborate on the information with your clients, customers, vendors, partners, consultants, and anyone else who is external to your organization. I wrote an article on this topic back in 2020. However, there were a few new features and improvements rolled out over the last several years that convinced me that I needed to refresh the instructions with updated capabilities. So below, please find step-by-step instructions on how to create a Client or Vendor Portal in SharePoint.
Step 1: Decide on the objective/what you plan to share
When I hear about the requirement to create a client portal, I always clarify what exactly that means. From my experience, I observed the following 3 scenarios:
- Scenario 1: Though the name might sound fancy, many really just imply the ability to share a few files and folders externally with the client or vendor. In that case, you would simply share a few files or folders from a dedicated “Clients” Site. Where each folder might represent a different client.
- Scenario 2: In cases where you need to share more than just a few folders and would like the client to have a permanent location to obtain information and content, you might want to create a site for each client, make it pretty, and add other content such as News, Links, etc.
- Scenario 3: In some cases, you only need to request files from the Client and Vendor in a one-way fashion, not necessarily share or collaborate.
In this article, I will cover how to achieve all 3 scenarios above.
Step 2: Decide on Site type
This is another important step. As you probably already know, we have 3 main site types in SharePoint.
- Team Site with a Microsoft 365 Group Connected
- Team Site without a Microsoft 365 Group Connected
- Communication Site
While any site type can be used for our purpose, the one that makes the most sense is a Team Site without a Microsoft 365 Group connection. This will get us a site without Teams, Planner, and other apps since the objective here is primarily to share documents externally. I explained this type of site here. It will also be easier permission-wise. The other added benefit here is that should you decide to add Teams capability down the road, you will have a chance to do so.
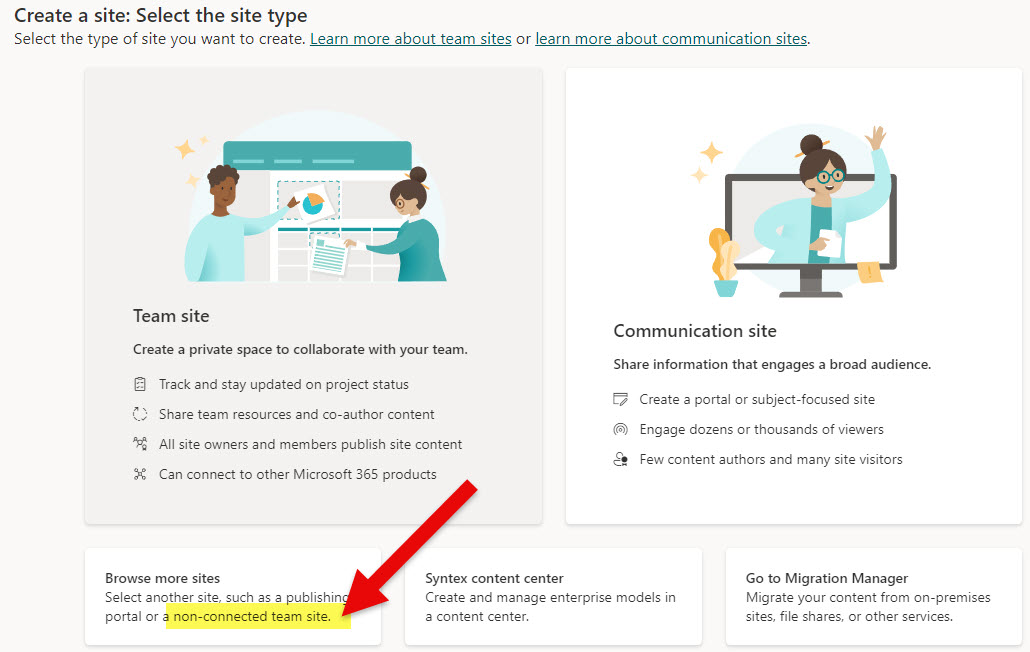
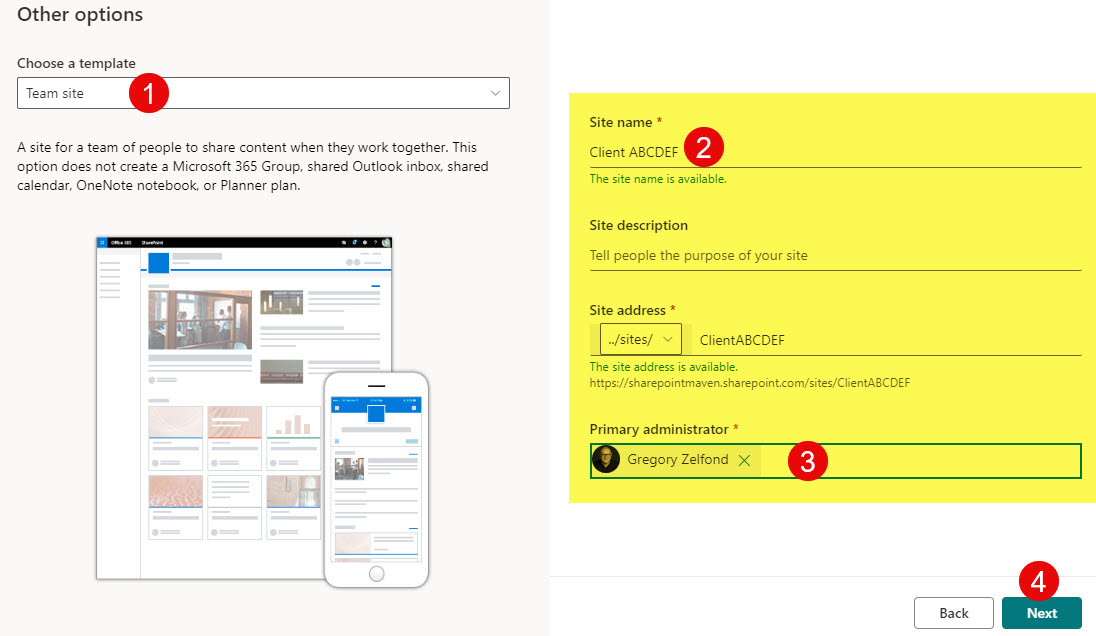
Step 3: Create a site
Now that we have determined the type of site, let’s create one. Again, I explained how to do this step-by-step here.
Step 4: Enable External sharing
Next, before we forget this, we must enable external sharing on the site. This is done from the SharePoint Admin Center.
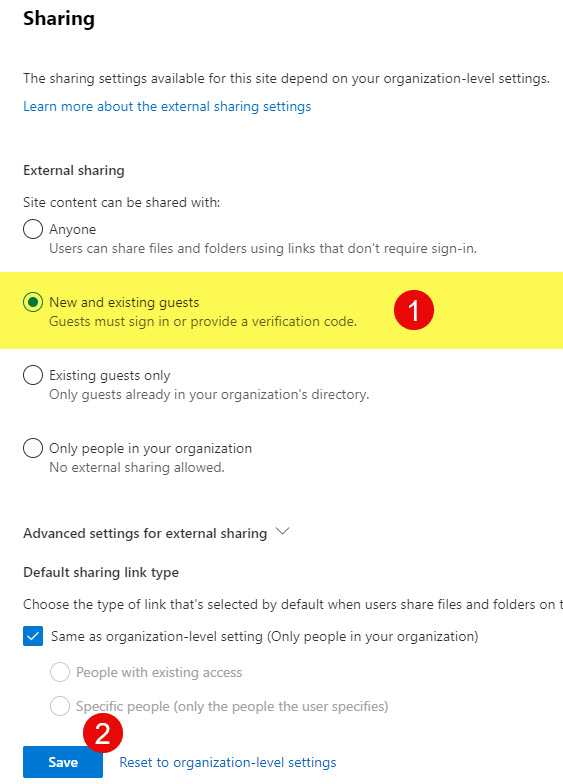
- Once in the SharePoint Admin Center, click on the radio button next to the site and click Sharing
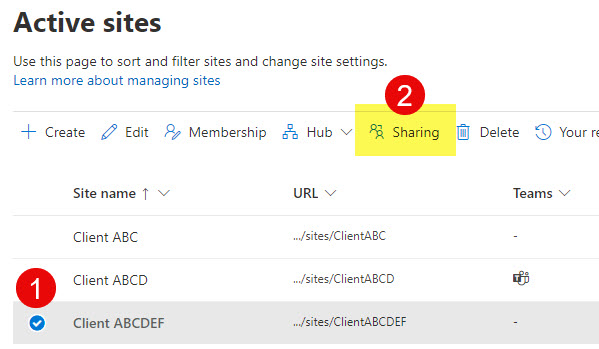
- External sharing is off by default on this type of site. Make sure to choose New and existing guests and click Save.
Step 5: Customize the Look & Feel
This step is optional and depends on the extent of what you want your site to be. Since we are sharing the entire site, you probably want the client to have a nice, smooth experience in terms of navigation, links, and the ability to find information. So I recommend you do the following in this step:
- Customize the Page. Adjust the layout, and add other web parts you might need (quick links, news, etc). You may reference this article for page design best practices.
- Adjust branding and upload Client Logo. Each SharePoint site can have its own theme and logo, and it probably makes sense to upload a client’s logo to make the site welcome for the client or vendor. I explained how to do this here.

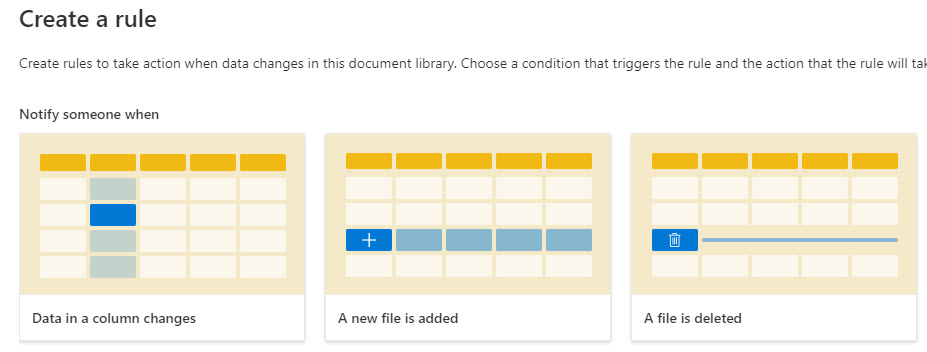
Step 6: Set up Rules/Alerts
This one is important. You probably want to know when a client uploads or deletes anything on a site, correct? In this case, you can easily set up the Rules (alerts) to do so. I explained how to do this here. Once set up, you will receive an email instantly when something happens within a library. Most importantly, it is super easy to set up. No PhD or High IQ is required 😊!
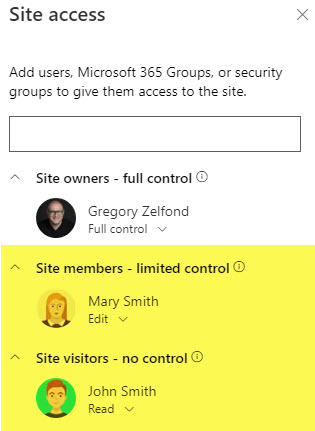
Step 7: Set up Permissions
The next step is to set up proper permissions. This is just for internal access to the site; we will add external users in the next step. In this step, we must use the 3 built-in SharePoint groups to add Visitors, Members, and Owners. I explained how to set up Site Permissions in an earlier article.
Step 8: Share Content with the Clients
Now, the exciting part. We are ready to share stuff with the Client. I will cover all 3 scenarios from Step 1.
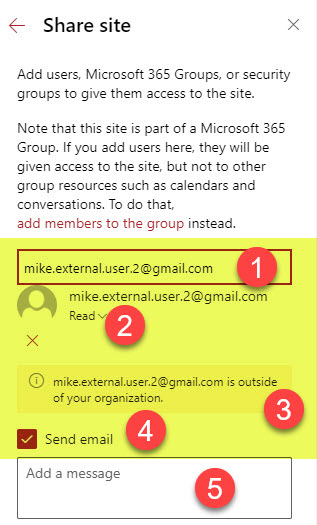
Scenario 1: Share the whole Site Externally
Well, now we are ready to share externally. Remember, the assumption here is that we are sharing a whole site. I documented the entire process, including the recipient’s experience, here, so check it out.
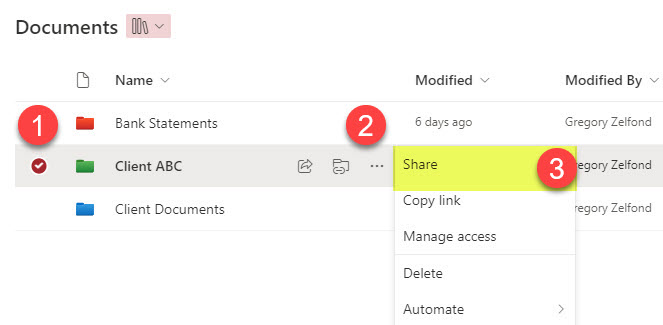
Scenario 2: Share files and folders externally
I also have instructions here for sharing just a file or folder rather than the entire site.
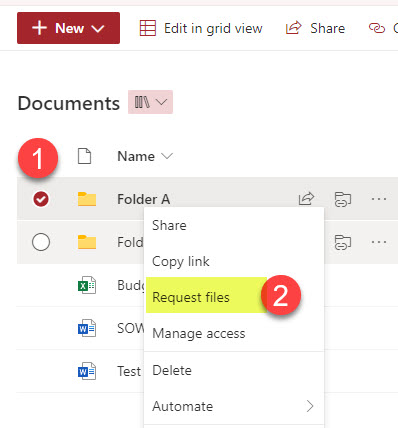
Scenario 3: Request Files
The third scenario is appropriate when you do not want to collaborate with external parties. Instead, you just want to request some files into a specific folder. It is important to note that for this option to work, you would need to enable Anyone (anonymous) sharing within the SharePoint Admin Center. I explained that + how to request files here.
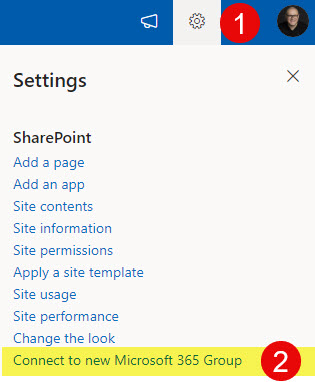
Step 9: Upgrade to Microsoft 365 Group
This step is optional, but I still want to show this to you. In case, down the road, you decide that you need more than just a site – maybe you also want to collaborate on Plans in Planner or chat in Teams, you can connect (upgrade) the site to a Microsoft 365 Group Team Site. This will add a Group, Planner, and Outlook calendar to the site. You can optionally connect a Team to it as well. I explained all this here.
Step 10: How to remove client access to the portal
In case you need to remove external user’s access to the Client Portal, you have a few choices:
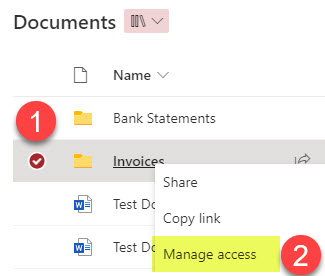
- If you shared a file or folder, you would remove them via Manage Access.
- If you shared the entire site, you would review them from Site Permissions
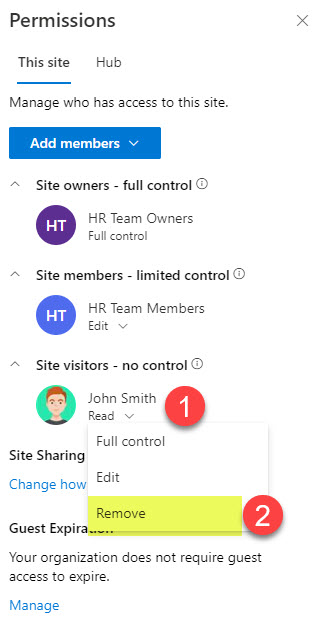
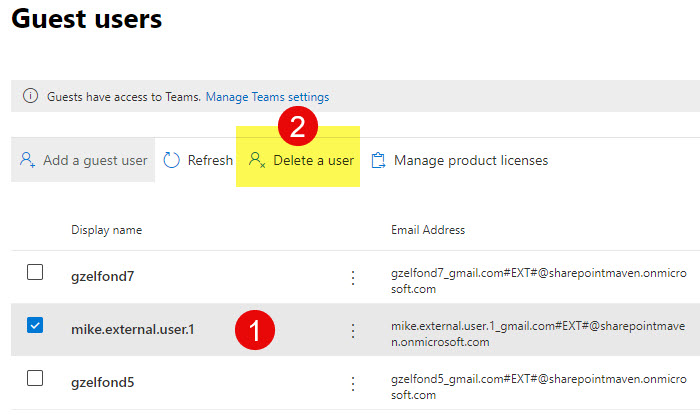
- With the option above, removing a user from a site just removes them from a site but leaves their ID within your Microsoft Entra ID. If you are absolutely sure you will never do business again with a specific vendor or client and want to permanently remove them, from your directory, you can do so from Microsoft 365 Admin Center or Entra ID
I summarized all the ways to properly remove users from a Site, Files/Folders here.

Share Article