How to use a Hyperlink column on a Custom List to organize links to SharePoint sites
Today I want to share a cool trick with you, which you can use to organize your SharePoint sites. For most of the operational types of sites, I am sure you will build some sort of Hub Navigation. However, let’s say you also have sites that are temporary in nature that you only use for a period of time. I am talking about Project Sites, Legal Case Sites, Client Sites, etc. Something with a definite start and end date. You might have tens or even hundreds of these sites. Creating links on the global Hub Navigation is not practical, as the drop-down navigation menu will be impossible to manage and navigate. Luckily, we have an alternate way to organize such links via a Hyperlink column on a Custom List.
Step 1: Create a Custom List
There are many different ways to create a custom list in SharePoint. Please reference this post to learn about all the options. For my example, I created a list to track Projects, so I created the following columns:
- Project Name (Text)
- Project Manager (People)
- Client Name (Choice)
- Status (Choice)
Step 2: Create a Hyperlink column on a Custom List
We now need to create a Hyperlink column that will capture the URL of a Project site. Here is how to do this:
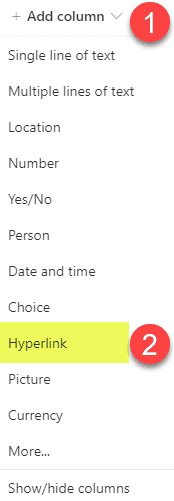
- Click +Add column > Hyperlink

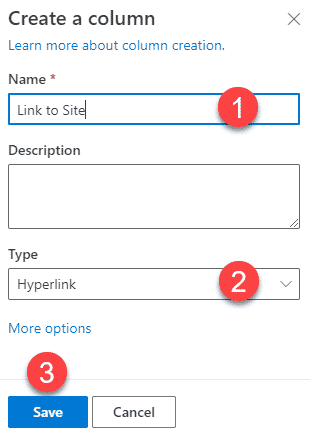
- Give your column a name, click Save

- Re-arrange the order of the columns on your Custom list by dragging the column left or right
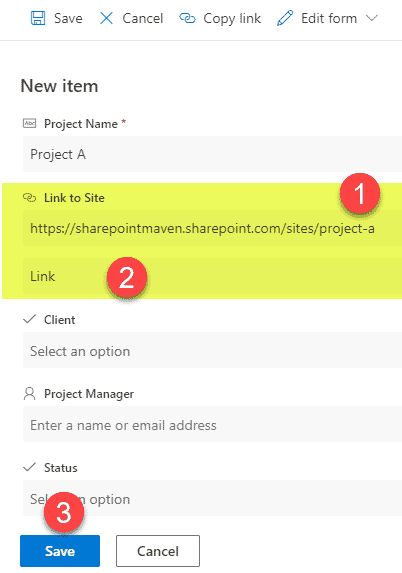
- Add a new entry and populate the URL for the site, the text description for the link. Click Save.

- Repeat for the other rows in your list. This is what the finished product looks like when some data has been entered. Now, when users click on a link, it will open up a site for that project or row entry.

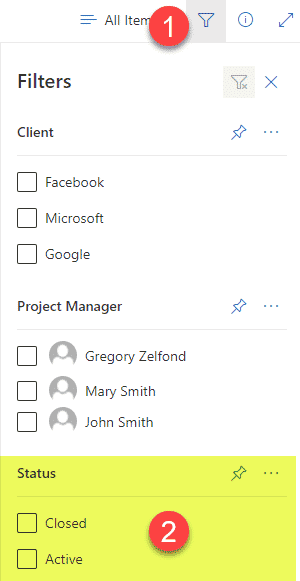
- And of course, the whole reason why we created the custom list for this is so that we can filter our sites by Status and other metadata

