How to create a Help Desk Ticketing Solution in SharePoint
The last time I wrote a post about this topic was in 2017. That was in the “classic” era of SharePoint when we still had classic web parts, classic look and feel, and did not even have many modern applications we have today (Lists, Forms, Planner, etc.). So, the proposed solution back then was pretty primitive. Luckily, many new cool features were added over the years, allowing us to create more robust and sleek solutions using out-of-the-box functionality.
In this article, I will explain how to create a simple Help Desk Ticketing Solution in SharePoint. The crux of this solution is the new Forms/Lists integration.
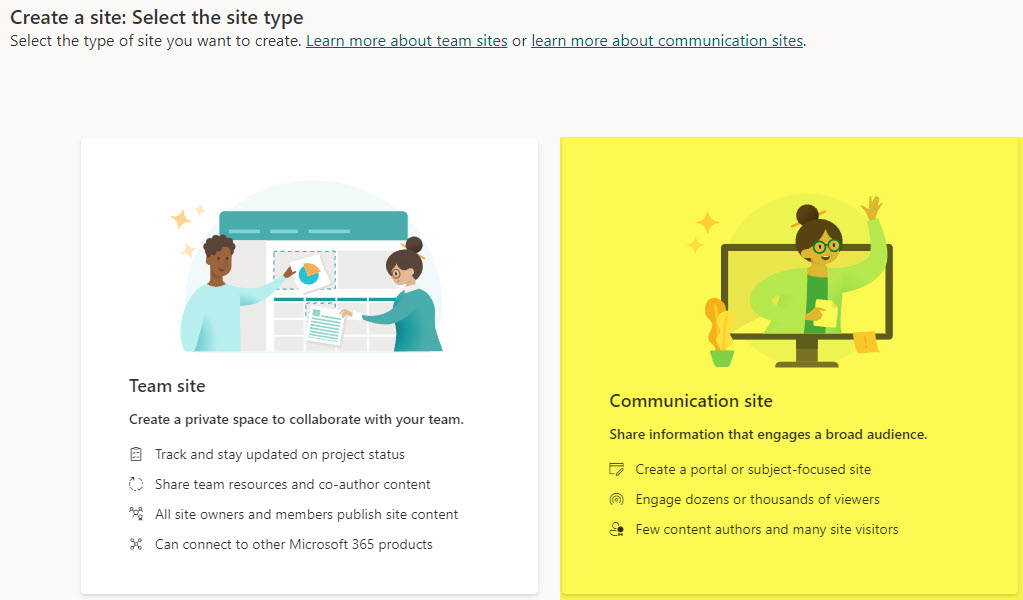
Step 1: Create a Site
The first step is to create a site to store the Help Desk issues. I suppose you already have an IT site. If not, just go ahead and create a Communication Site.
Step 2: Create a List
The next step in the process is to create a List that will allow you to receive and track Help Desk tickets. There are a few ways to create a list; I documented them all here. For this article, I am going to create a list with the following columns:
- Brief Description of the Issue (Single Line of Text)
- Detailed Description of the Issue (Multiple Lines of Text)
- Category (Choice)
- Assigned To (Person)
- Status (Choice)
- Submitted Date (Date) – this could be a System Created Column, just renamed accordingly
- Submitted By (Person) – this could be a System Created By Column, just renamed accordingly
- Resolved Date (Date)
- Resolution Notes (Multiple Lines of Text)
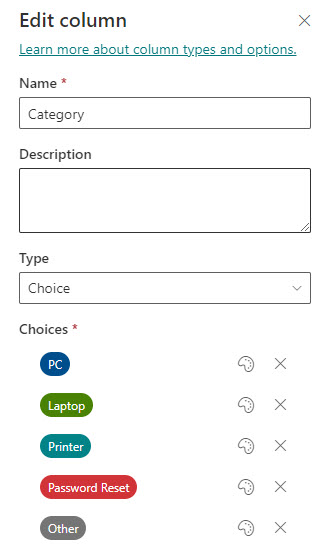
It is important to note that some of these columns will be filled out by the user submitting the ticket, while some will be later filled out and revised by the IT staff.

Step 3: Set up Permissions
Next, we need to set up permissions for our site. Our site will house information on the IT Help Desk, the link itself, and a list of tickets submitted by users. We want users to have read-only access to the site. Don’t worry about the user’s ability to see submitted tickets; we will customize that later in the article. To set permissions on a site, please follow this post.

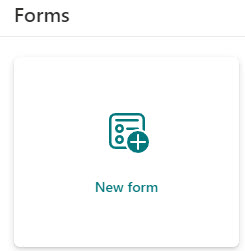
Step 4: Create a Form
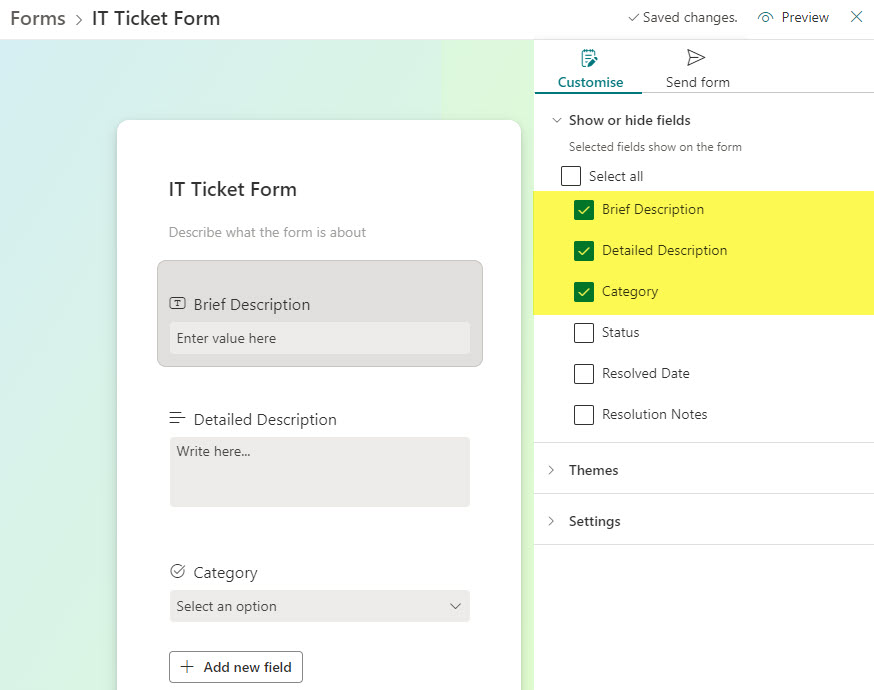
The next step is to create an intake form for the users to fill out with ticket information. Instead of creating a separate Form, we will create one from the list/fields above. I explained how to do this off the list here.
- From the List Header section, click Forms

- Click on New form
- Choose the fields you would like to appear on the intake form. Note that you must deselect the fields that will later be filled out or completed by the IT staff.
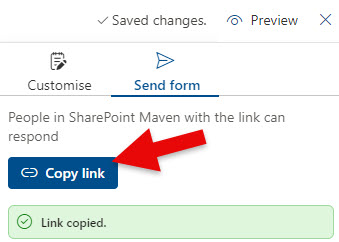
Step 5: Generate Form URL
Once the form is created, we need to generate a link so users can fill it out.
Step 6: Design the Homepage
Next, we need to make our main IT Page attractive. Most importantly – add the Form link front and center so users can submit tickets. I provided some instructions and best practices here.
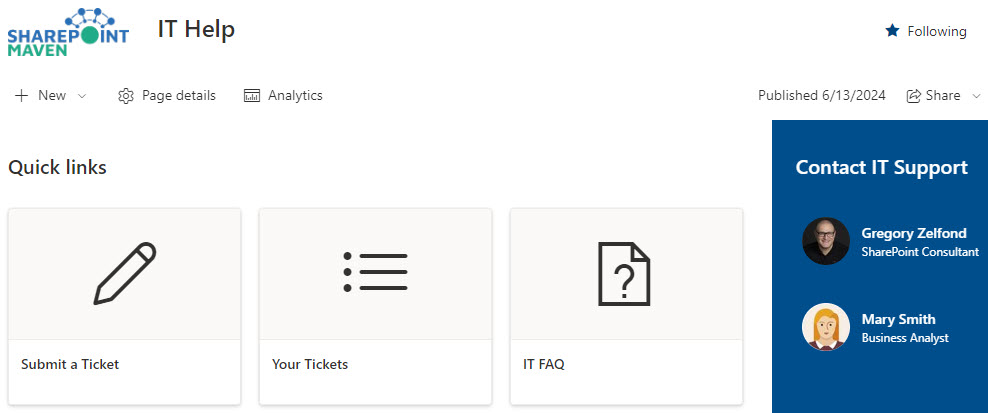
Example of Help Desk Ticketing Solution in SharePoint
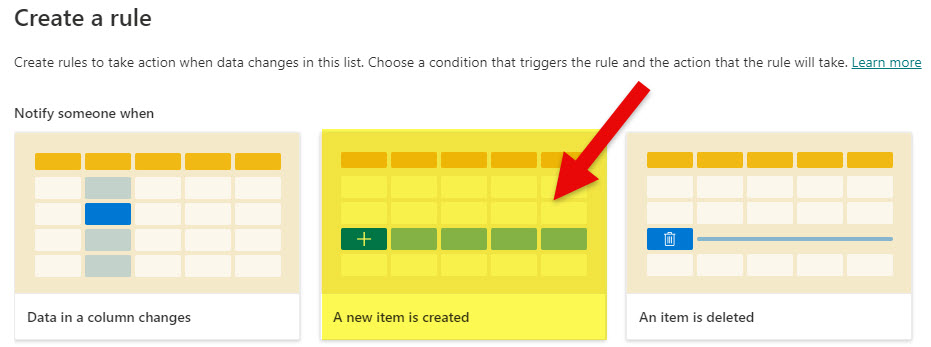
Step 7: Create Rules
Next, you might want to create some rules to be notified about submitted tickets. So, I suggest you create a Rule on a List, as explained here.
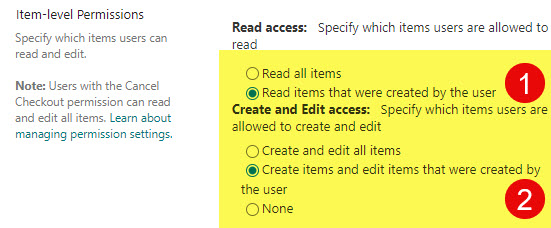
Step 8: Set up Item Level Permissions
This is an optional Step. You would need to set it up only if you want users to have access to submitted tickets to see their resolution status. For this to work, we would need to rely on the good old Item-Level Permissions functionality we have had since the classic days of SharePoint. It still works like a charm. I wrote a detailed post on it back in 2017. This is how you would need to configure the settings.
Nuances and Limitations
Despite the fact that this solution does the job, there are a few unfortunate limitations.
- As of the writing of this post, no attachments are allowed with this type of Form (though users can later adjust the entry in a list and upload an attachment)
- In case you allow users to see their submitted tickets, there is no way to hide columns from the users’ view (those filled out and adjusted by the IT staff)
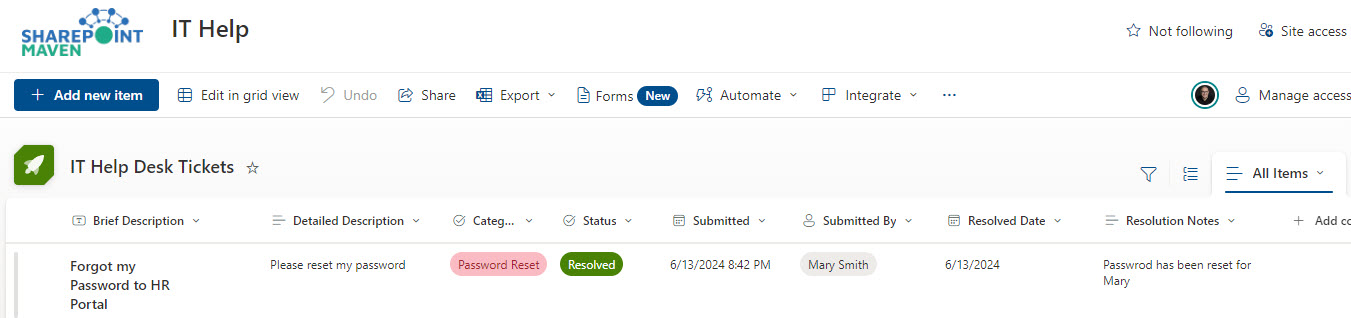
Help Desk Ticketing Solution List once tickets are submitted and revised by IT

Share Article