How to create an approval workflow for SharePoint pages using Power Automate
If you are part of a larger organization and have multiple contributors to the content of SharePoint pages, you might want to create some sort of approval process such that changes to the page can be reviewed prior to publishing. In this article, I explain to you how to create an approval workflow for SharePoint pages using Power Automate without a single line of code.
Out of the box page publishing
By default, any member of a SharePoint Site can add/edit/delete pages on a SharePoint site. In the case of a Team site – this is OK. However, if you have some sort of Communication site being accessible by the whole organization, you might want to control and approve the content prior to it being published. An example could be a Home Site or HR Employee Site where information shall be checked before being available to the masses.
Power Automate Out of the box workflow for Page Approval
Luckily, we have an Out of the box workflow we can create using Power Automate to streamline the process. What I mean by out-of-the-box workflow is that Power Automate already got a built-in template that we can add to our pages. In order to use Power Automate and build serious automations, you need to be comfortable with code, but with the out-of-the-box templates, we don’t need to worry about it (music to my ears, as I only focus on OOTB stuff).
How to create an approval workflow for SharePoint pages using Power Automate
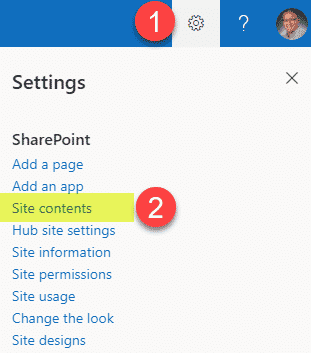
- Navigate to the Site Pages library by going to Gear Icon > Site Contents
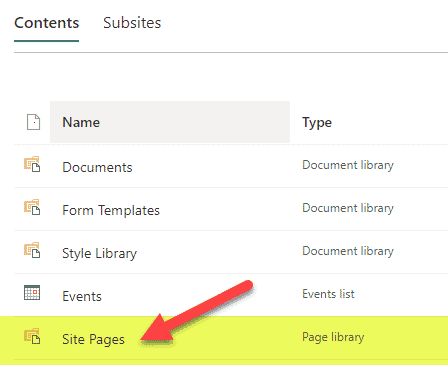
- Click on the Site Pages Library (this is where all the pages reside)
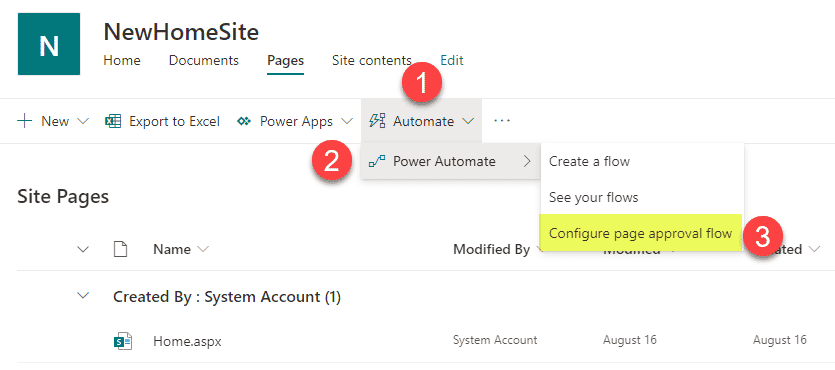
- Click on Automate > Power Automate > Configure page approval flow
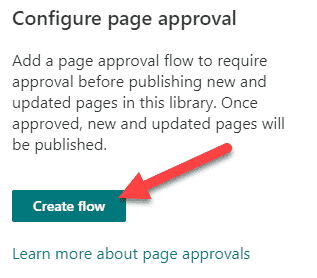
- On the side-panel on the right-hand-side, click Create flow
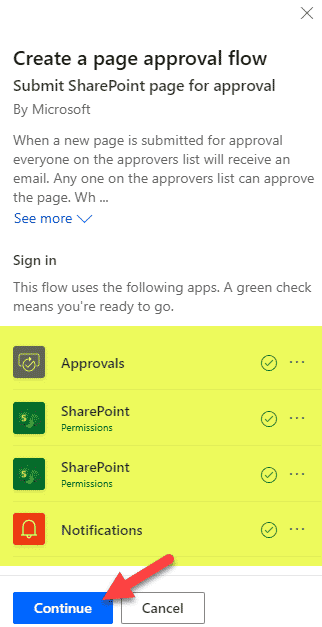
- By default, it will use your credentials to sign-in to the various services/actions necessary for the workflow to complete, so it will double-check you have the proper license to all. Click Continue
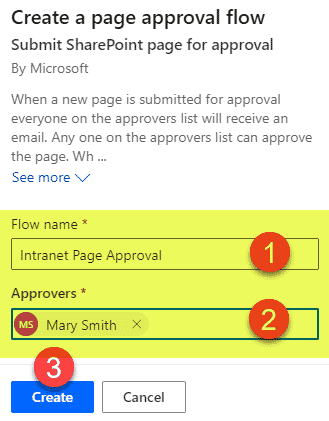
- On the next screen, specify the name of your workflow as well as approver(s) for the site pages (you can specify one or multiple approvers). Click Create.
- You will now receive a confirmation that the workflow has been created

User experience
Contributor
Next time a site member edits the homepage or creates a new page, the page will be submitted for approval.
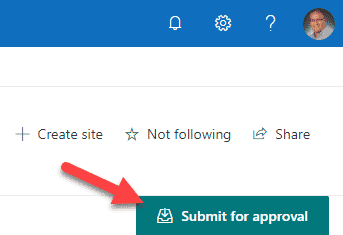
- Instead of a Publish/Republish button, the user will see Submit for approval button
- The user will be able to type in a personal message to the approver with the additional information/changes made
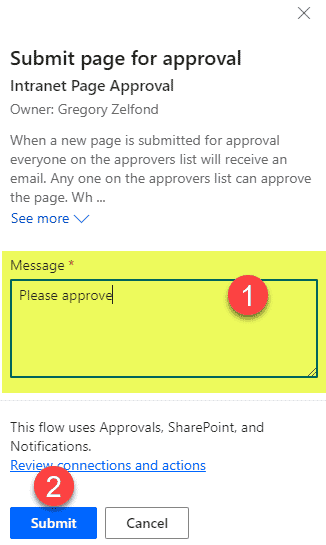
- The revised page will not be published/visible to anyone else until the Approver approves the changes
Approver
There are three places where the approver can approve the request from. In all three cases, the approver can approve, reject, or re-assign the approval to someone else in addition to providing approval/rejection comments .
- Approve from an email: Approval email that is automatically routed to the approver(s)
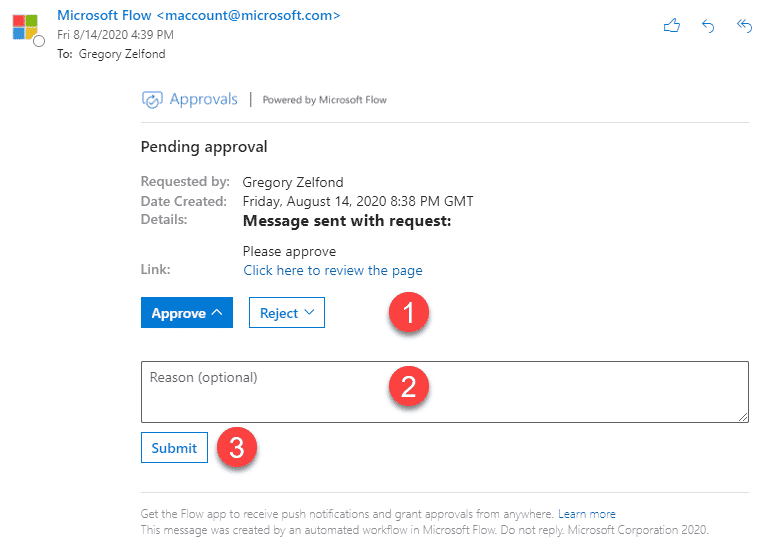
- Approve from the page: SharePoint Page itself for which the approval is requested for
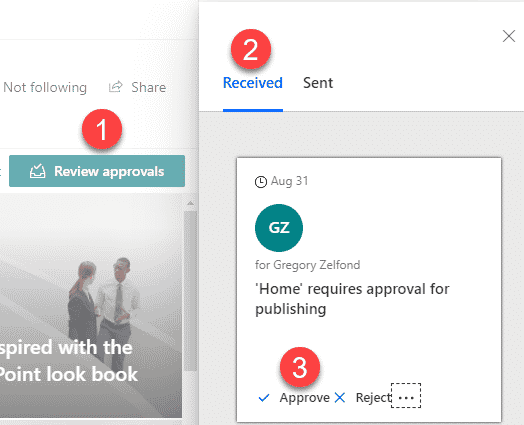
- Approve from Power Automate: Power Automate Approvals Section
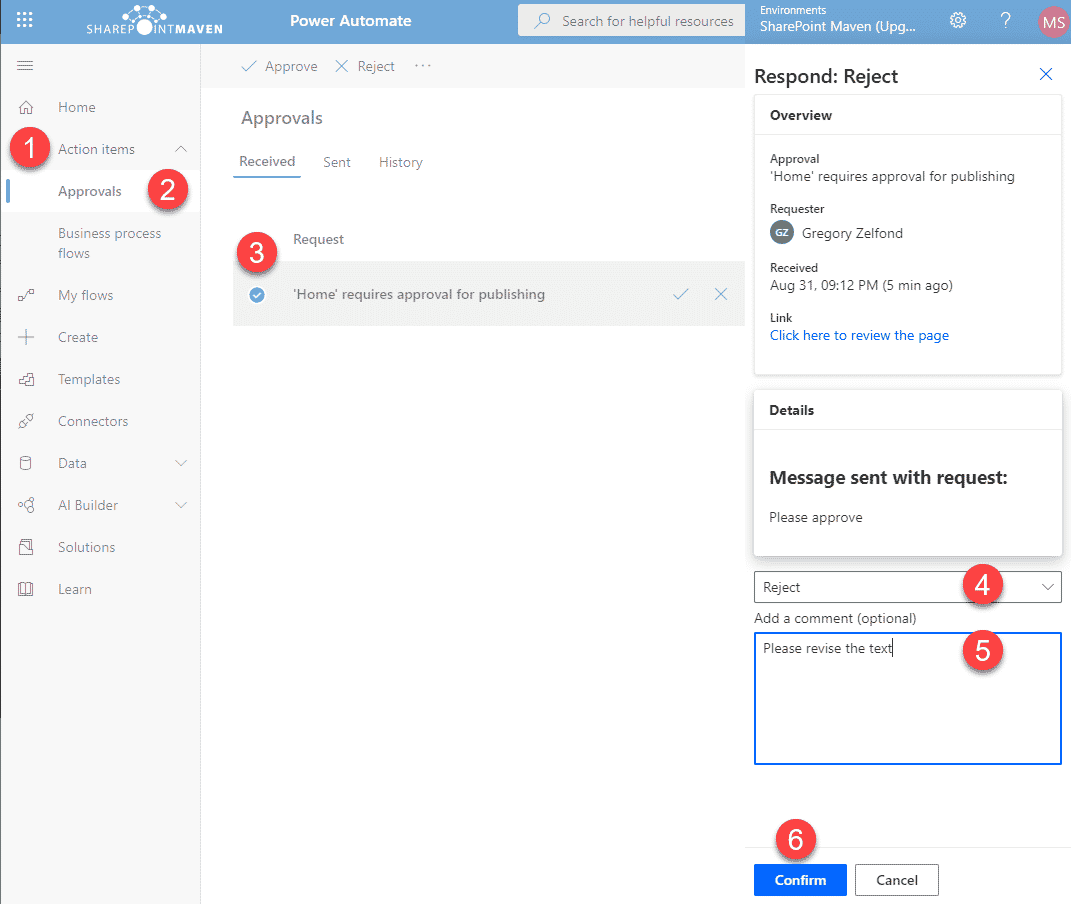
How to adjust Power Automate workflow logic once it has been created
If you are happy with the approval logic OOTB, then you can just keep using the workflow you created. However, there might be a need to customize it. For example, you might want to adjust the approver(s) at some point or add another step in the process (i.e., send another notification email or customize the text of the existing one). In such cases, you will be able to adjust the workflow logic by going to Power Automate.
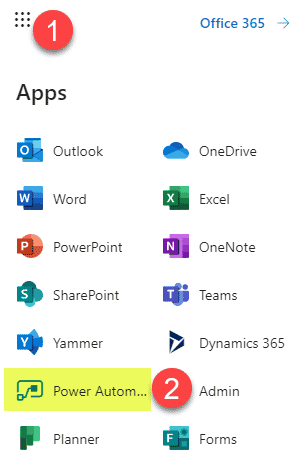
- Office 365 App Launcher > Power Automate
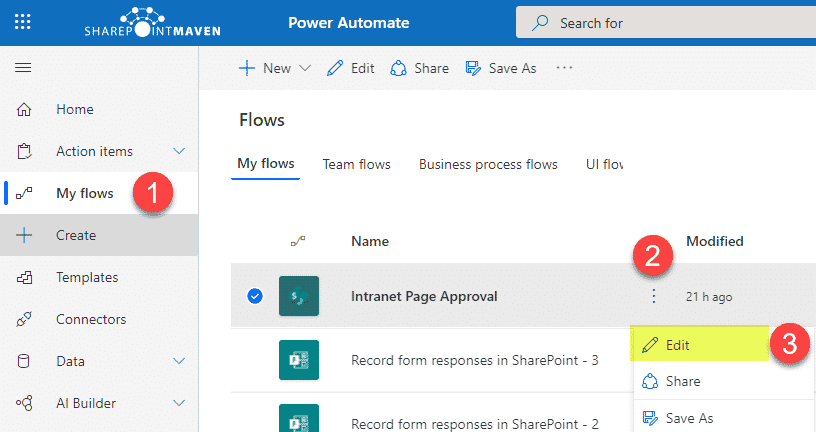
- Under My flows, click three dots next to the workflow you would like to adjust, then click Edit
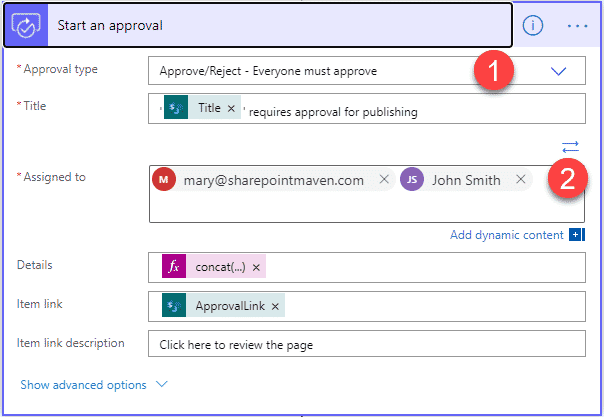
- On the next screen, you can adjust the workflow as necessary. For example, as shown in the screenshot below, I added an additional approver and changed the logic such that everyone must approve before the page is published. Likewise, you can add an action for an additional email notification once the page is published, etc.
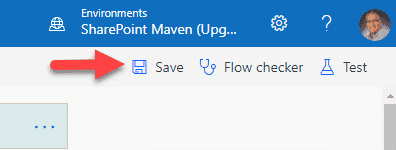
- Click Save once the workflow changes have been made
