How to build a simple CRM in SharePoint Online
What I like about SharePoint is that sometimes it feels like a Swiss Army Knife. It can do it all; you just need to configure it properly. One of the common requests I have been getting over the years from clients and my loyal blog followers was the requirement to use SharePoint as CRM (Customer Relationship Management) software. I will be upfront; if you are looking for sophisticated functionality, workflows, etc., you will be better off using a third-party CRM. However, if you just want to store and organize basic information on your contacts, clients (customers), and deals/opportunities, you can use SharePoint, with a bit of configuration. So, below, I would like to outline the steps on how to properly set up a CRM in SharePoint Online by using just the out-of-the-box features.
Want to see how this might look when built? I’ve got more visual examples on my LookBook 365 Portfolio site.
Step 1: Understand the limitations
For our CRM “solution” to work, the lists we will create in the next step need to reside on the same site. There is a reason for that since we will be connecting them together, and since we are only relying on SharePoint out of the box here, all lists need to be on the same site.
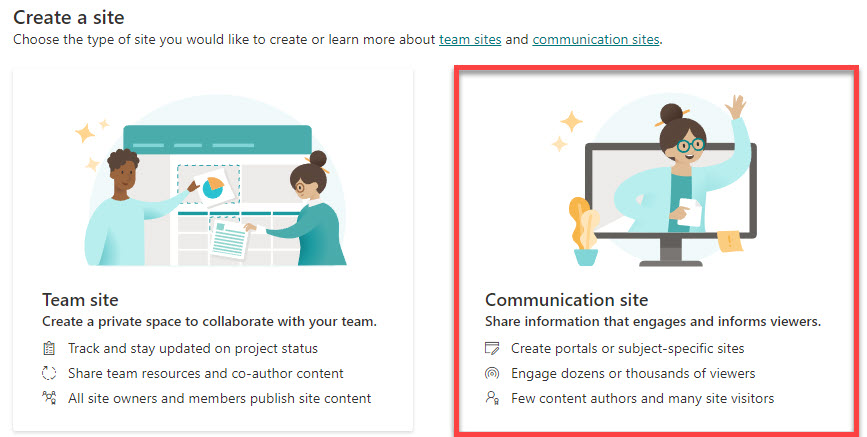
So go ahead and create a site that will house your lists; I recommend a Communication Site.
Step 2: Create lists of Clients, Customers, and Deals
Once the site is created, it is time to create lists. I documented lists extensively previously; here is a link to an article that describes different ways to create lists.
Go ahead and create three lists: Clients, Customers, Deals
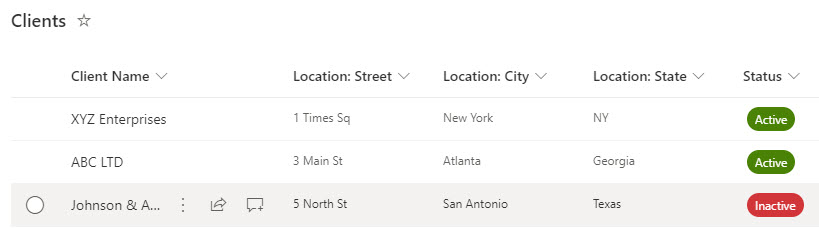
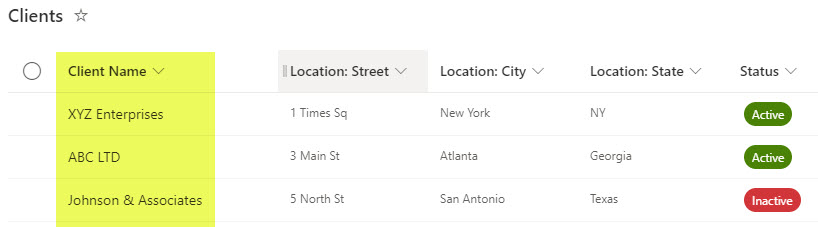
Custom List of Clients
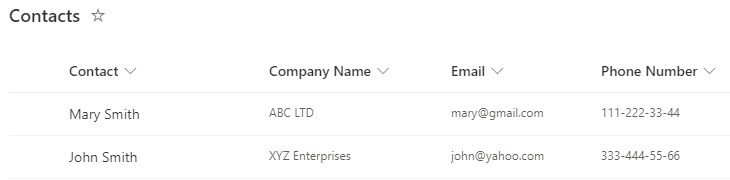
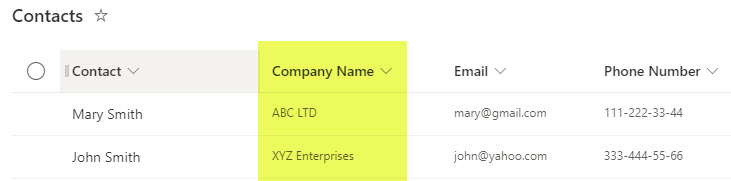
Custom List of Contacts
Make sure to use common columns in all lists
For our future CRM to work, we need to have the same column of information in any two lists to tie the two together later. For example, if you have a list of companies and then a separate list of contacts within a company, that second contact list needs to have a column that contains Client names as well (so we can tie it/associate it to the Client list).
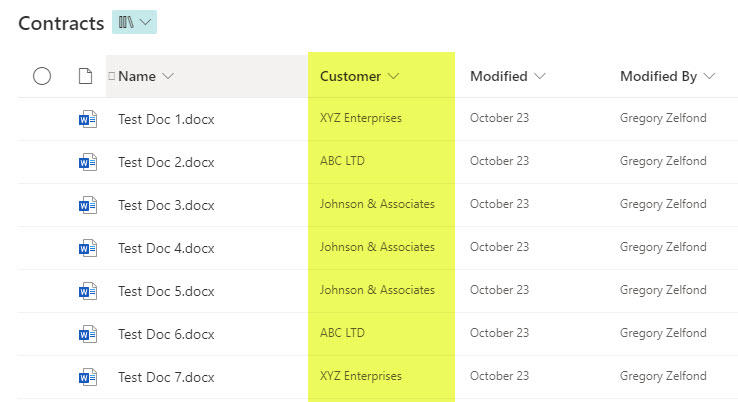
Step 3: Create a Document Library for Client Documents
This step is optional, but if you also want to tie documents stored by a specific client or contact, we can do that too. Just like with the list above, make sure that the Document Library has a column containing the list of clients so that all documents can be tagged against a client name and this library can once again be associated with the other lists.
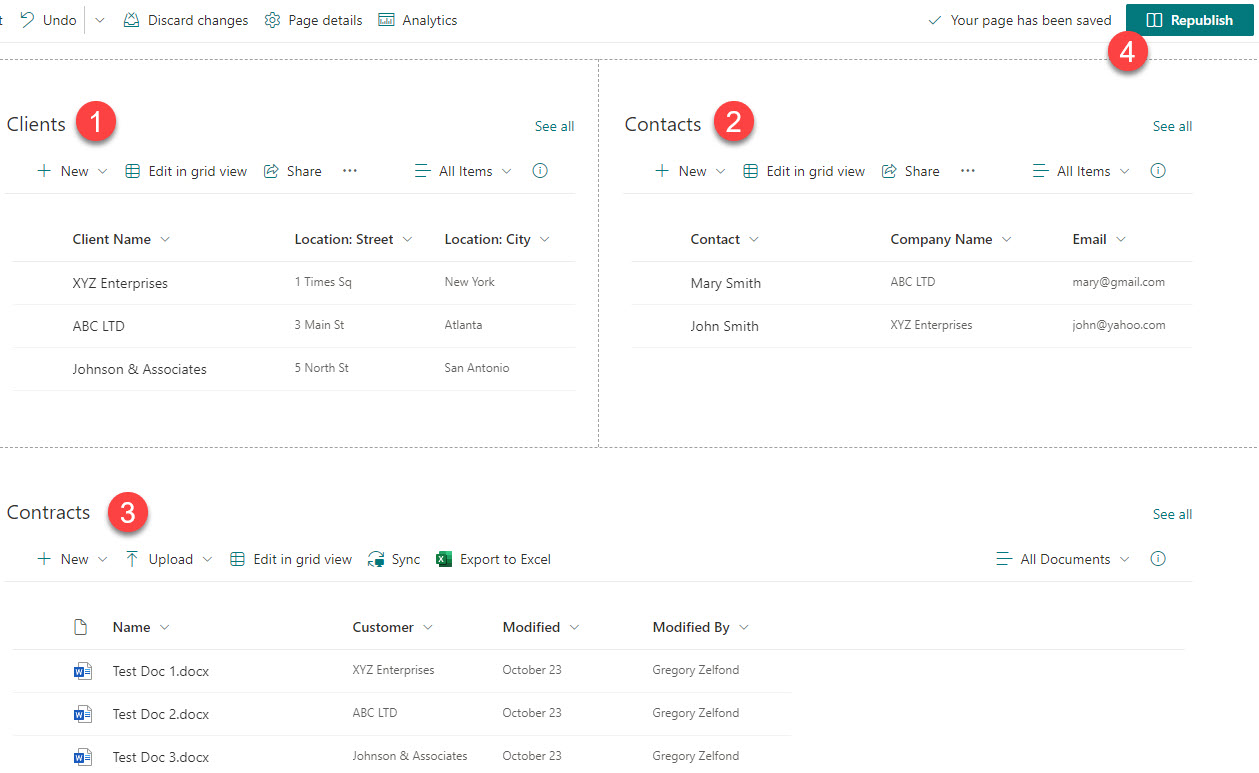
Step 4: Embed all the lists and libraries onto the same page
Not only do all the lists and libraries need to reside on the same site, but they also need to exist on the same page. This is necessary for the next Step (Dynamic Filtering) to work. So go ahead and add all the lists and libraries created above to the SharePoint page.
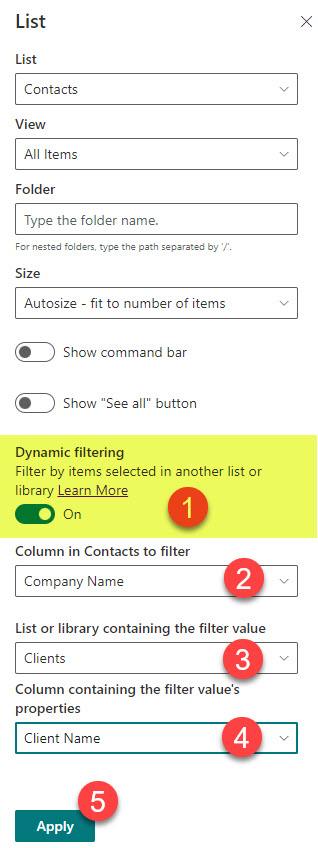
Step 5: Set up Dynamic Filtering
Next, the most exciting step – we need to set up the Dynamic Filtering feature. I explained it in greater detail here. This will allow our CRM to choose an entry from one list (i.e., Client from Clients List) and dynamically filter Contacts and Contracts based on our selection. Once again, check out this article for step-by-step instructions on how to set up Dynamic Filtering.
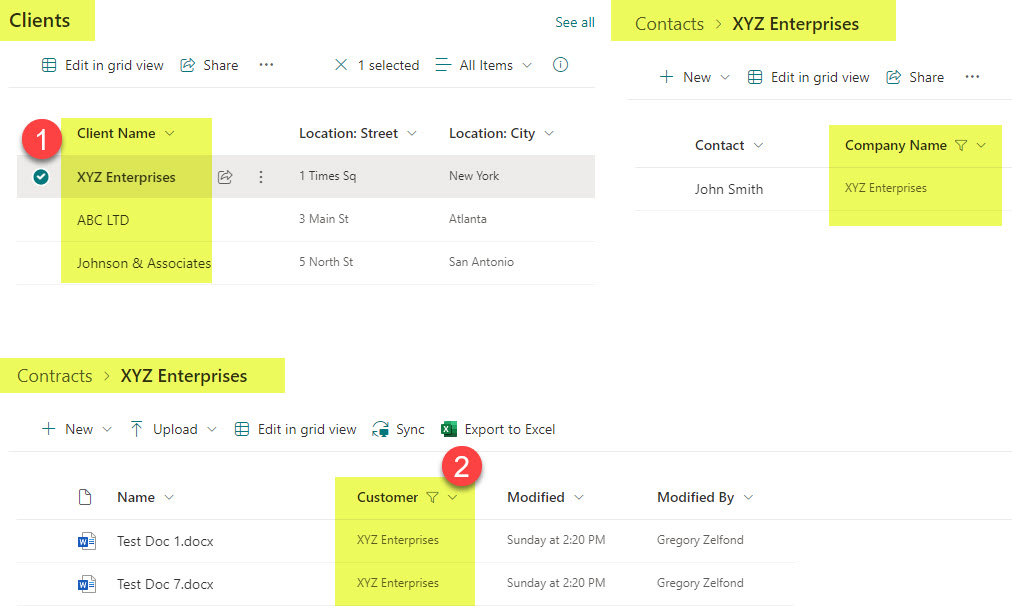
The result
When it is all set and done, this is what a CRM might look like.

Share Article