How to add a custom Tile to Office 365 App Launcher
Can you send me that URL? I bet you hear this question often when your employees start using SharePoint and Office 365. Between Outlook email, OneDrive, Skype, SharePoint and many other Office 365 modules, you want to make sure your employees have a consistent and user-friendly experience and can easily go from OneDrive to Outlook email to SharePoint Intranet. The good thing is that Office 365 has the App Launcher which allows to easily switch between all the different apps. It works like Start Button on Windows, and gives users a one-click access to all applications in Office 365.

But what if you wanted to add your own tile? For example a tile that points users to your nice looking Intranet Site/Homepage? There is a tile called SharePoint (recently renamed from Sites), that contains all the frequently accessed and followed sites.There is a way for IT Administrators to add links to that SharePoint Site that are constant and fixed for all employees, however, that would mean that users need to always land on that SharePoint site first (an extra click!)

Luckily, there is a way to customize that App Launcher and add your custom tile to it. It is pretty straightforward to setup and involves just 2 steps:
- Step 1: Office 365 Administrator adds the tile (makes it available) in Office 365 apps
- Step 2: Each user manually adds a tile to their Office 365 App Launcher
STEP 1: Add custom tile to Office 365 Apps
Prerequisite: You must be an Office 365 Global Administrator to do this
- Find an appropriate image for your icon. The image has to be a 50 x 50 px, PNG (transparent) file type. (Source: Microsoft)
- In this example, we will be building a tile to point to Company Intranet Homepage, so I will be using an icon below (by the way, feel free to download and reuse in your Office 365 environment. Just right-click on the image and save to your computer)

- Upload the icon to the Site Assets Library on your Intranet Homepage. Essentially, it needs to reside in a site/library that is accessible by everyone. Usually, your Intranet Homepage Site Assets Library has read only access to everyone in the organization – hence – it is a great place to upload that icon there
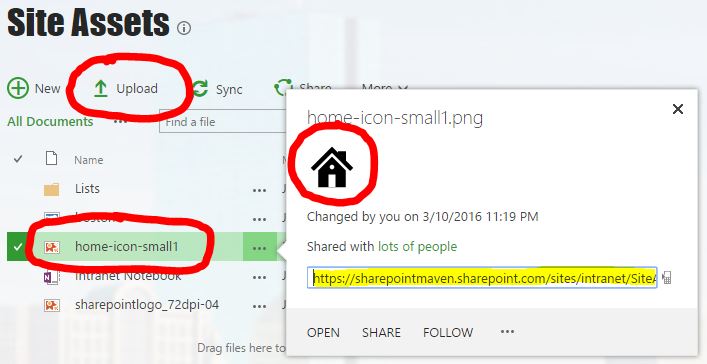
- Copy the URL of the image uploaded. We will need it later on.
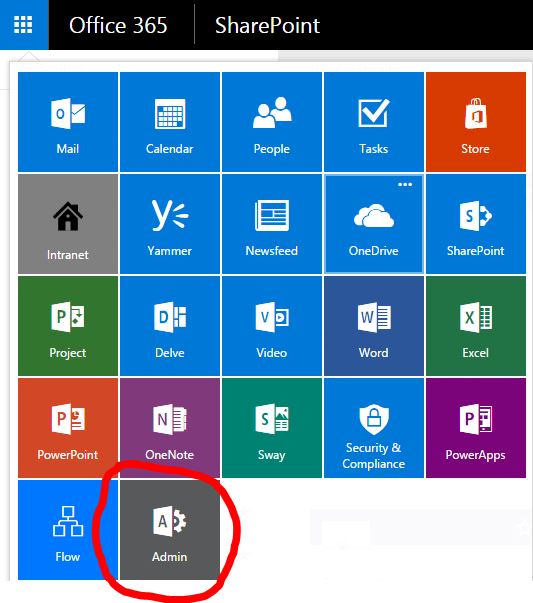
- From App Launcher, select Admin Tile
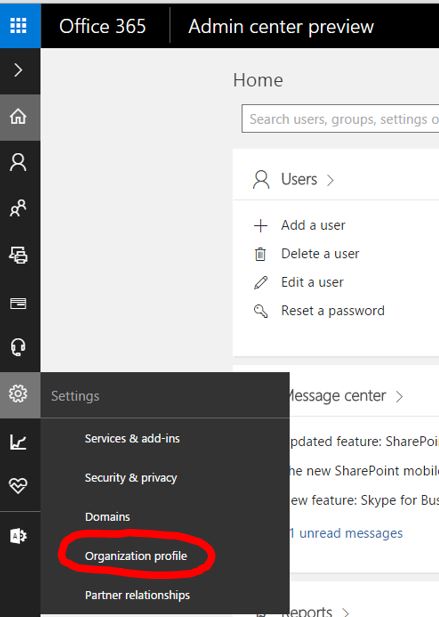
- From the Settings Icon, choose Organizational Profile. (NOTE: I assume that your Office 365 Admin Center has a new look, as shown in the screenshot below. Microsoft has been rolling out the new look gradually, so there is a chance you might have an old interface and might need to access this profile differently)
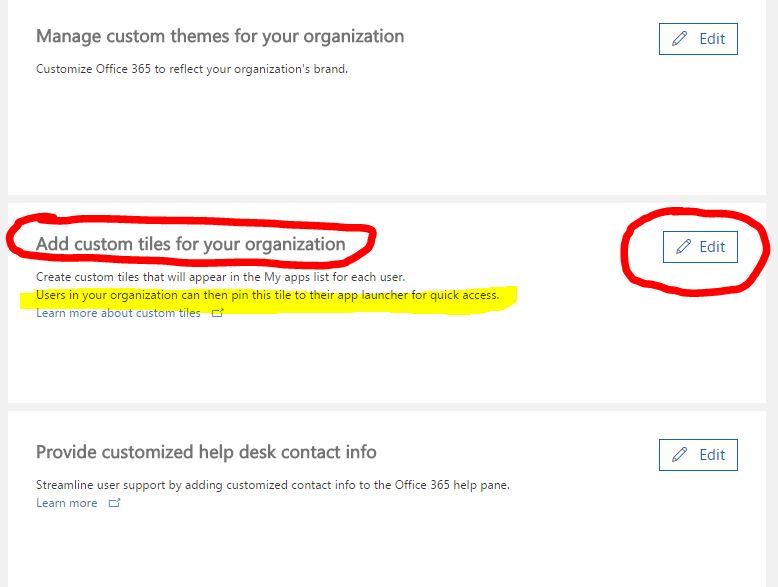
- Scroll all the way down to the bottom of the screen. You will notice a section called Add custom tiles for your organization. Click on Edit button. Please note the text highlighted in Yellow. Just a reminder, though you will be making the icon available in the App Launcher, each user will need to pin it to their own App Launcher manually! It is not automatic or global. This is very important!
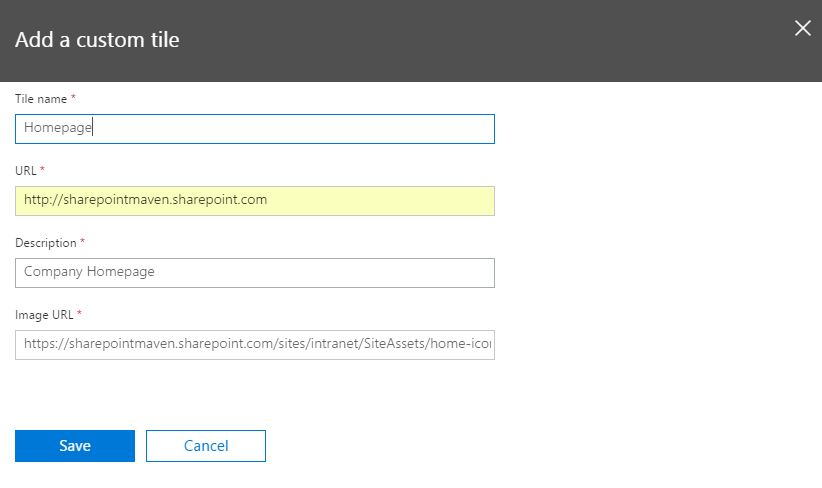
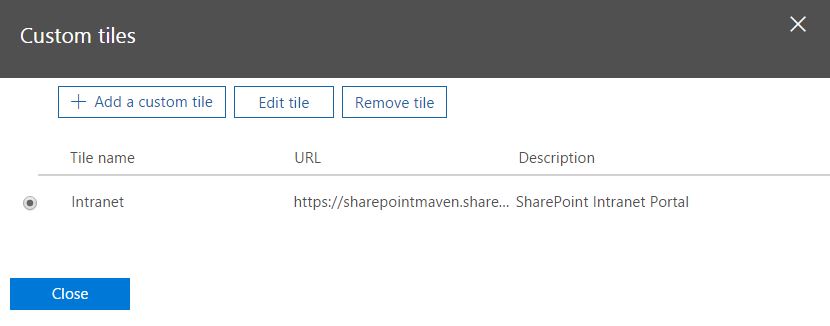
- On next screen, click on Add a custom tile

- On the next screen, fill in the details for your icon. Tile Name will be visible text just below the icon itself in the App Launcher. URL is the website you want to point to. Description is just a brief description of what that tile is all about. And finally. Image URL is that icon URL from Step 4. Click Save
- That’s all for now – the icon is now available for other users to add to their own Office 365 App Launchers. Click Close to exit the screen


STEP 2: Each user to add/pin custom tile to their Office 365 App Launcher
Now that the Office 365 Administrator has added a custom icon/tile to Office 365 apps, it is available for individual users to add (pin) to their own App Launchers. This is a mandatory step and must be performed by each user individually.
- Login to SharePoint/Office 365
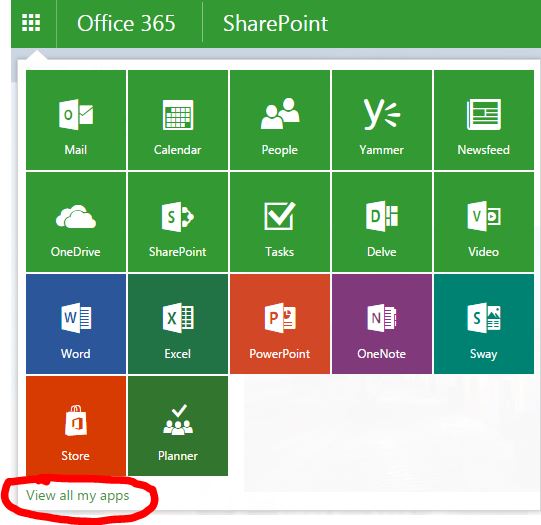
- From the App Launcher, click on View all my apps
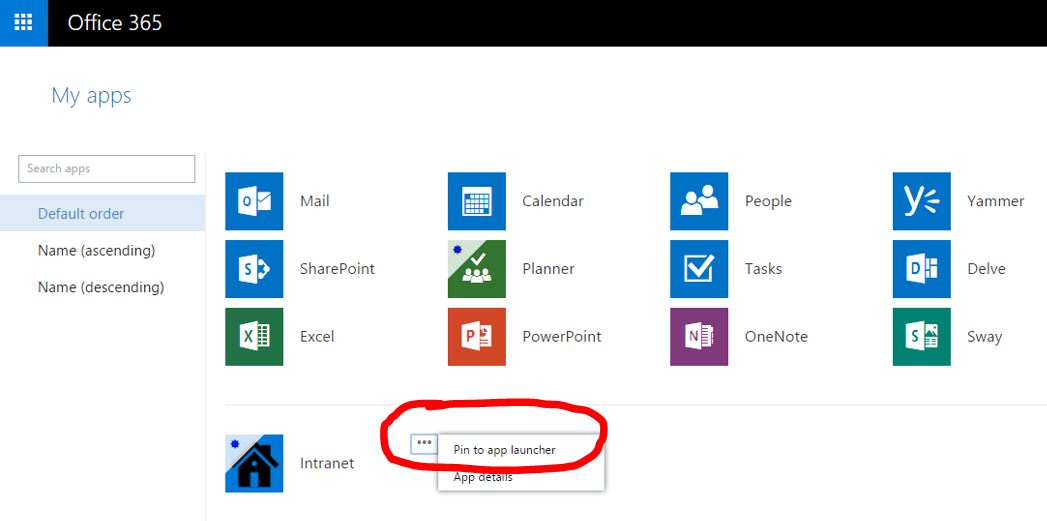
- All the “standard” apps will appear on the top of the screen, while custom apps added by the Administrator will appear at the bottom. To add the app to the Launcher, the user must click on ellipsis (3 dots), then choose Pin to app launcher
- That’s all! The custom tile is now part of your App Launcher!

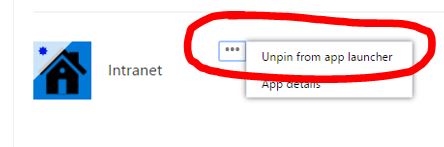
- If you decide to remove the custom tile/app from the launcher, just click on ellipsis again and choose Unpin from app launcher


BONUS: Resize the App
One other cool things regular users can do is resize the tiles. Say, you want an Intranet tile to really stand out. Just click on the Ellipsis > Resize > Wide to make it bigger


Share Article