How to control what employees can view and edit in Delve User Profiles
Are you still trying to make sense of Delve? If so, I published a post a while back on why Delve is the thing – check it out here. I love the tool more and more every day. It is almost like a Facebook feed, except in the context of Office 365. Instead of the picture of what my colleagues ate for breakfast, I get to see the latest documents they have been working on. :-)
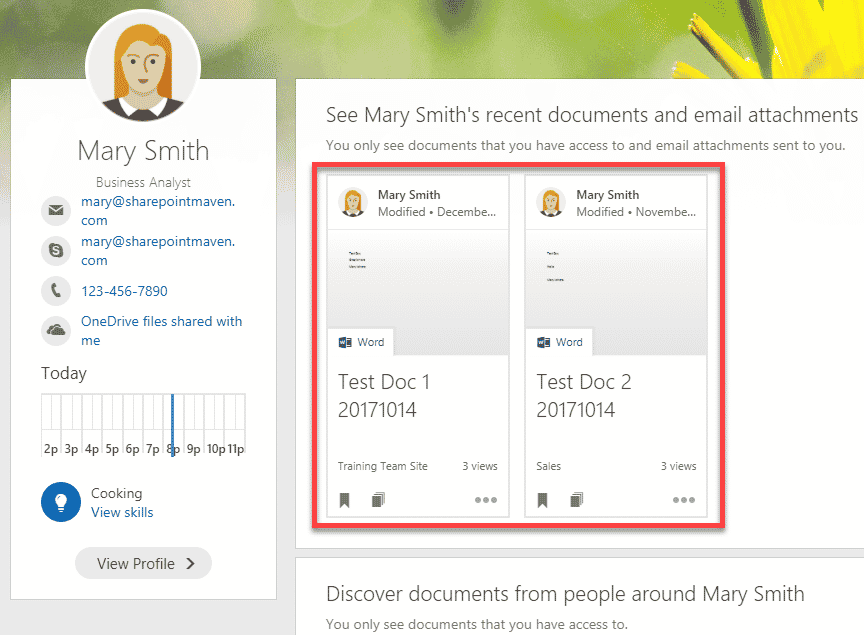
Another vital part of Delve is the user profile information. It contains a photo, title, contact info and other relevant bio sections like projects, hobbies, and skills. Users can update their information, and also specify whether the info will be visible to everyone in the organization or just the user itself.
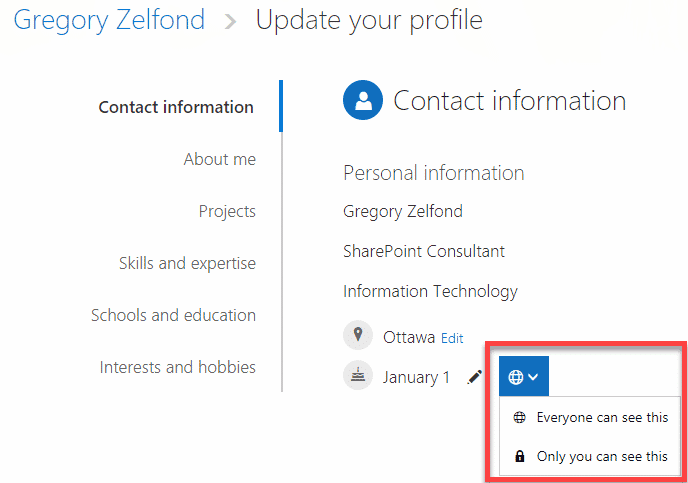
One of the most frequent questions on Delve that I get – to what extent, you, as an Administrator have control over the fields and its content. Say, you do not want users to change their phone numbers and photos, or you do not want birthdays displayed on employees’ profiles (because nobody needs awkward birthday wishes and lousy gifts at work). Whatever the reason is, as a SharePoint Administrator, you have all the privileges to control this information. Let me show you how.
Where is Delve information coming from?
It is a great question. Delve gets all the information from a magical place called SharePoint User Profile Service. Now, the information in the User Profile itself comes from either an on-prem Active Directory, Azure AD or Exchange. For this post, I am not going to bore you with all this tech terminology and not going to explain a very complicated nature of how all this info is synchronized with SharePoint User Profile Service. First of all – it is beyond my expertise and second of all, another consultant, Jeremy Thake, has already done a great job explaining the complicated mechanics in his blog, check it out here.
No matter how the information gets to the User Profile Service, it is the User Profile Service that controls how Delve property settings are displayed and configured. So let’s focus on that.
How to access User Profile Service
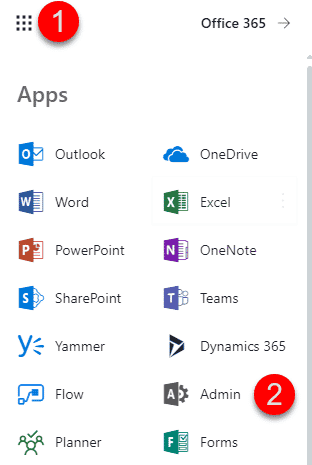
- Gear Icon > Admin
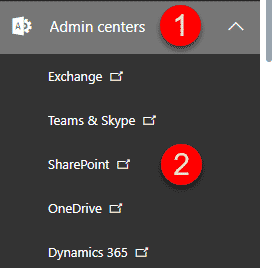
- Admin Centers > SharePoint
- Once you are in SharePoint Admin Center, click on User Profiles
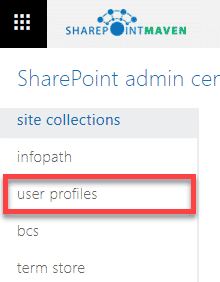
- That’s it – you arrived at the main User Profile page

What are the parts of the User Profile Service
Many components and functionalities make up the User Profile Service. For this post, I will focus on the one we will need to manage Delve properties: User Properties.

How to edit User Properties
Once you click on the Manage User Properties section, you will get to see the screen with a zillion properties.
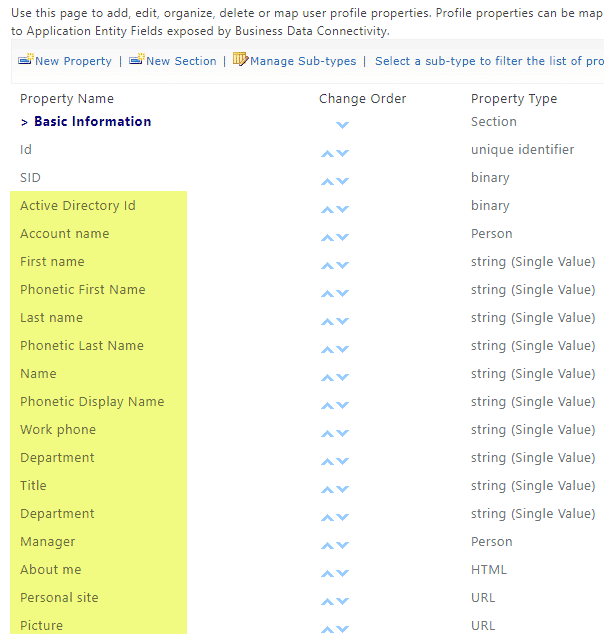
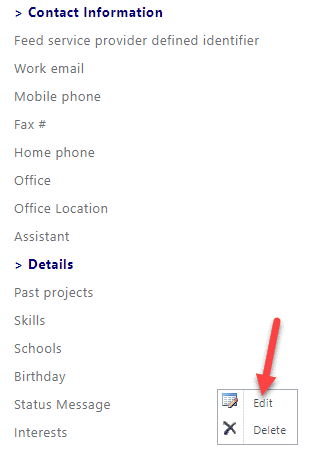
Some of these fields are displayed in Delve! Properties like Name, Department, Picture, Phone numbers, Skills, Interests/Hobbies, Projects. When you click on a field, you will be able to see and edit the specific details about that field. For example, click on Birthday (click the drop-down arrow next to the property, then Edit Button).
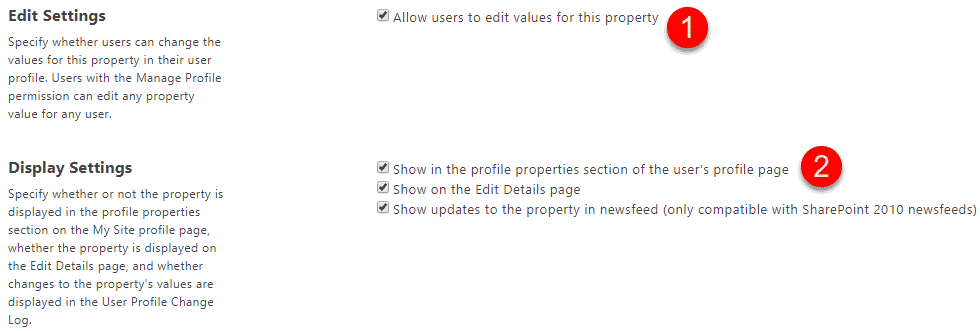
Then scroll to the middle, and you will see the settings that control…
- Whether or not a field is editable by the User
- Whether or not a field is displayed on Delve User Profile
How to prevent a user from editing a property on Delve profile
Say, for example, you want to prevent users from editing their Birthdays from within Delve. Below is how Birthday property appears by default in Delve – the little pencil means the user can edit the property.
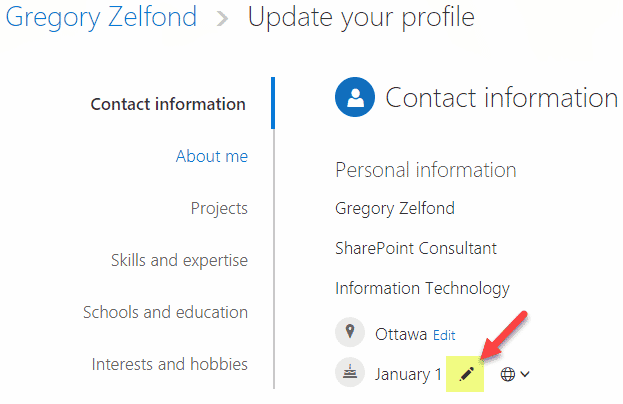
To make this non-editable, do the following:
- Click on the drop-down next to the property, then the Edit button

- Uncheck the checkbox next to Allow users to edit values for this property

- Hit OK at the bottom
- Now if you go to Delve Profile, you will notice the pencil missing – so the user can no longer edit the property!
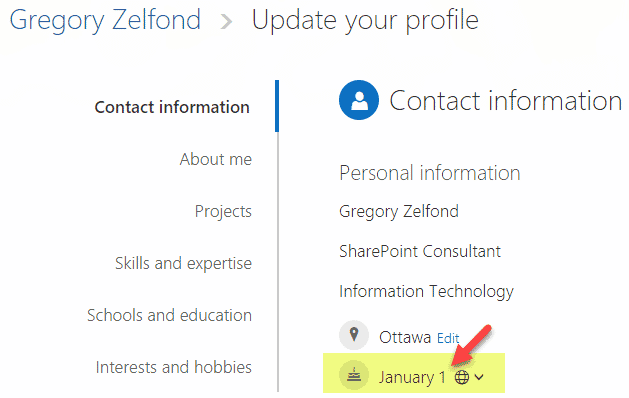
You can do this to other “sensitive” fields, like phone numbers, location, etc.
How to hide property on Delve profile
You can also hide the property from Delve altogether. Say, you do not want your colleagues to sing you “Happy Birthday” song on your Birthday. So it would be wise to hide the field entirely from the profile, so they would not even know when your birthday is. :-) . To do so:
- Click on the drop-down next to the property, then the Edit button

- Uncheck ALL 3 checkboxes as shown in the image below, as well as change Default Privacy Setting to Only Me
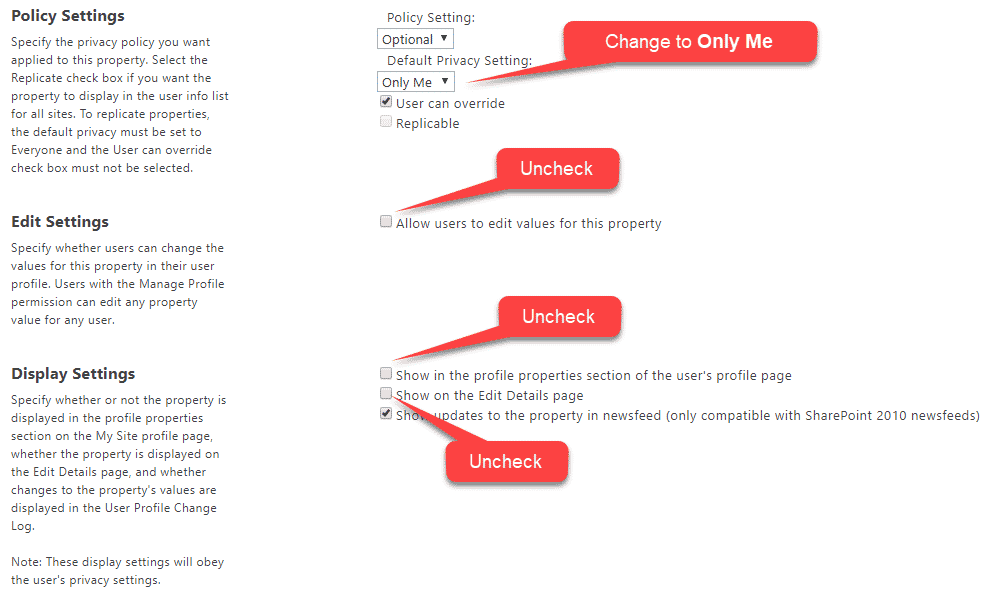
- Hit OK at the bottom
NOTES:
- I suspect that the description of each checkbox is self-explanatory. I found that only a combination of all of the above truly hides the property from all the areas of the Delve profile page
- The change will not be instant. Due to a timer job in SharePoint Online, it might take a while for the change to propagate.
