How to import an Excel spreadsheet to a SharePoint custom list
Importing Excel to SharePoint has always been somewhat of a matzo ball. We had a few options available, but each one came with a long list of quirks that made the whole process and result less than desirable. Recently, Microsoft has added a new capability to SharePoint Lists, where users can import Excel spreadsheets to a SharePoint Custom list, and the whole experience is smooth and extremely pleasing. Let me walk you through the process on how to import an Excel spreadsheet to a SharePoint custom list.
Step 1: Make sure your Excel list is formatted as a table
This is super important for this process to work. You can’t just take any Excel list and import – it has to be formatted as a Table.
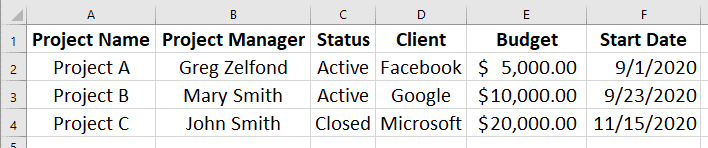
- Below is an example of a Project List I maintain in Excel.
- What you need to do is define the list above as a Table. To do so, in Excel, highlight the range first, Format as Table, click OK.
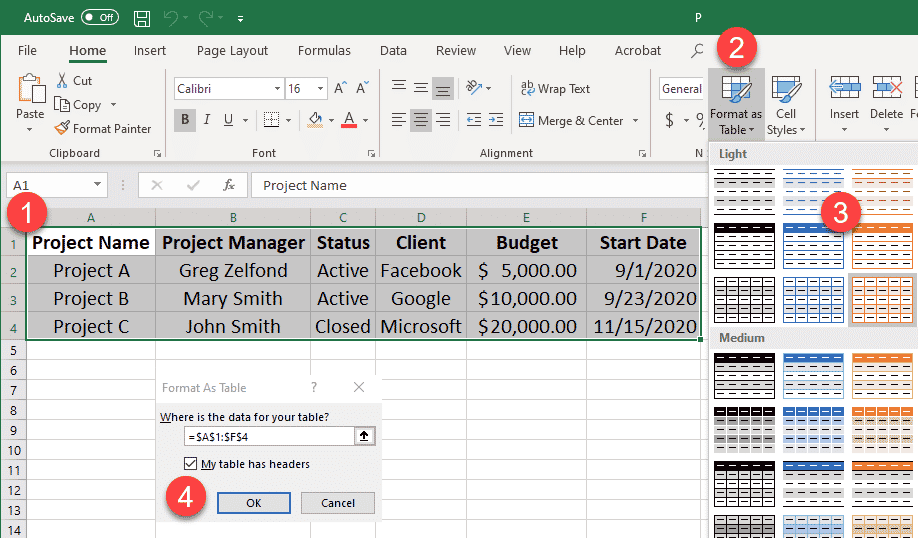
- This is how it should look at the end.


Step 2: Import an Excel spreadsheet to a SharePoint custom list
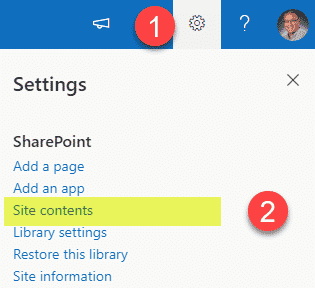
- On a SharePoint site where you want to create a list, click Gear Icon > Site Contents.
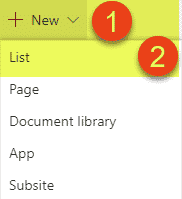
- Create a new Custom List (New > List)
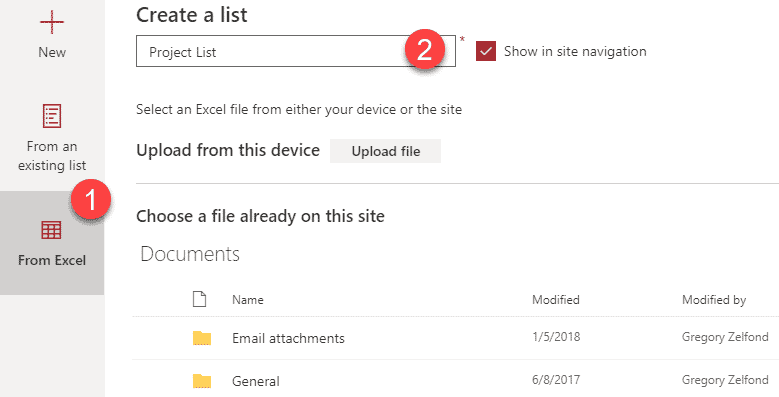
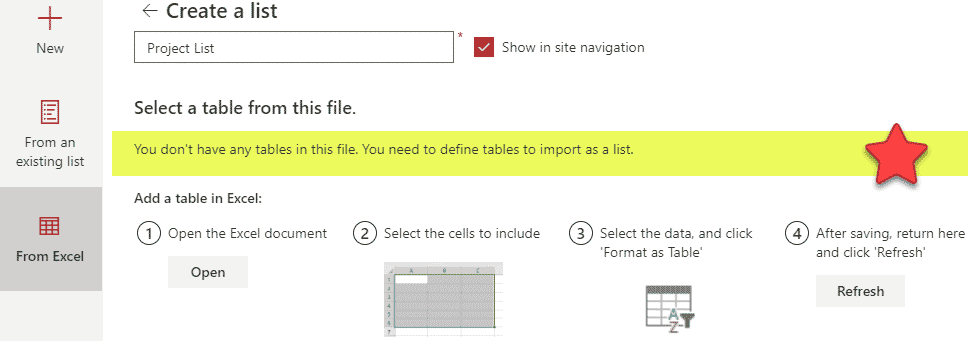
- You are going to see three options on how you can create a custom list. The one you need is called From Excel. Click that + give your list a name.
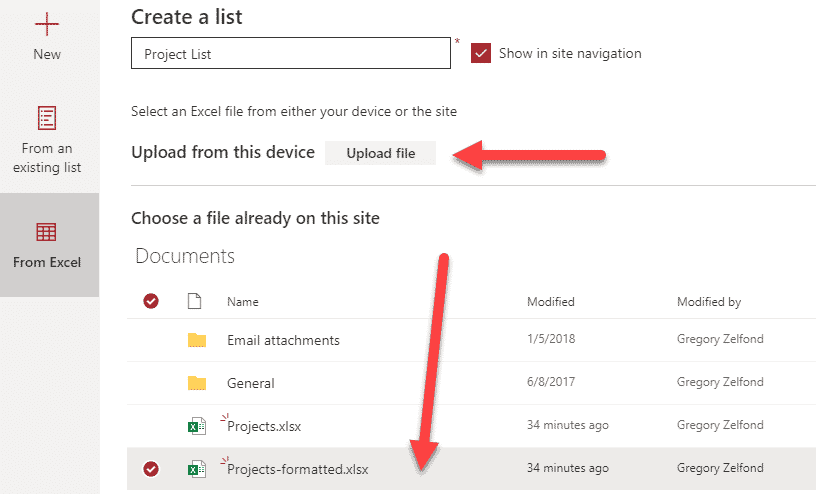
- Next, we have to choose an Excel file. We can either upload one from the computer or select an existing one from the default document library on a site. For this article, I will choose one I already have in the document library.
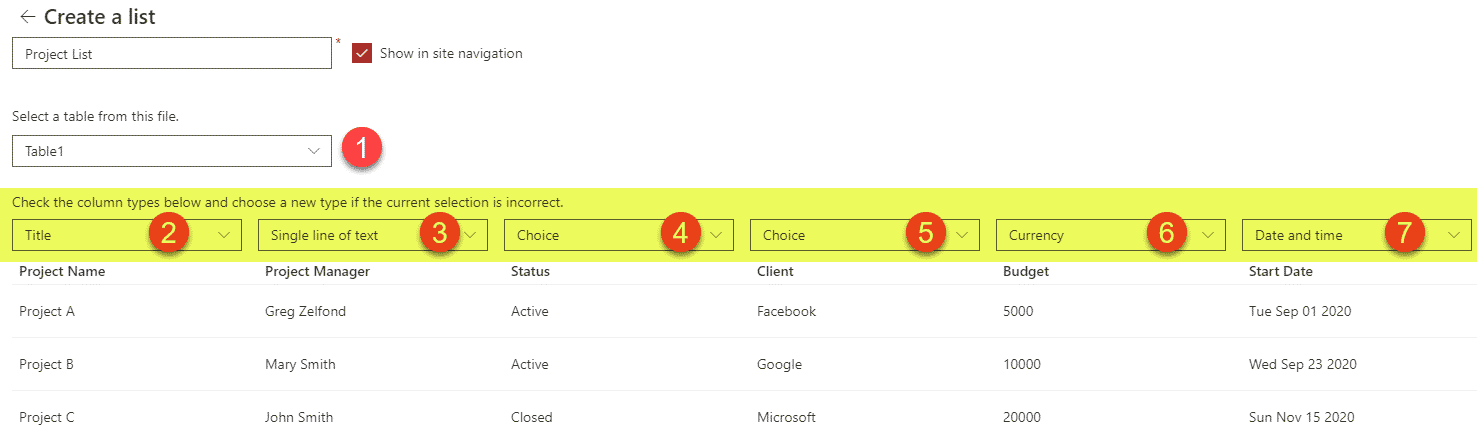
- Next, you have to choose the Table (tab) from the Excel you want to import. The only other important step – you need to define the type of column you will create. By default, the columns will import as a Single line of text, but depending on your data, you might want to switch to a different type of column (i.e., Date and Time, Currency, Choice (drop-down)). Make appropriate selections and click Create at the bottom of the screen.
- Once all is set and done, it will create a list for you.
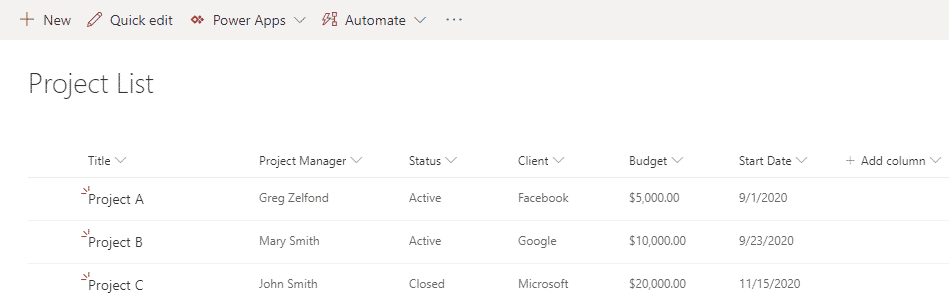
- The below image demonstrates why it is super important to create proper types of columns in previous steps – this way, you are going to get the right format for the data you enter.


Step 3: Additional Settings
Below are some additional settings I like to do every time I create a custom list. They are optional, but beneficial for the usage of the list:
Enable Version History
By default, custom lists do not have a version history enabled. So you would need to do so manually. To do:
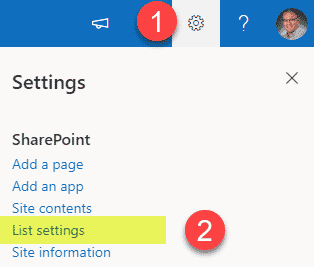
- Navigate to the Custom List, click Gear Icon > List settings
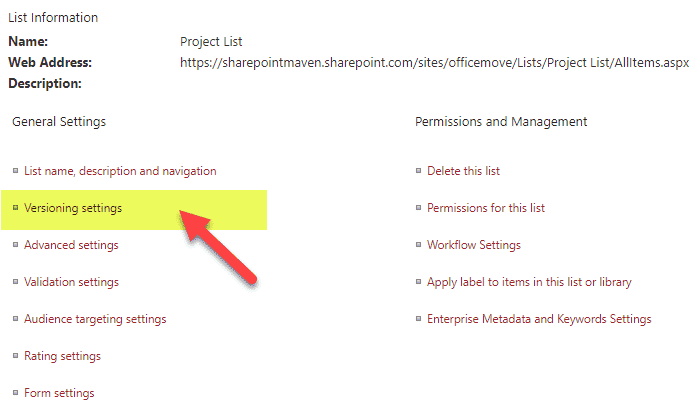
- Click on Versioning settings
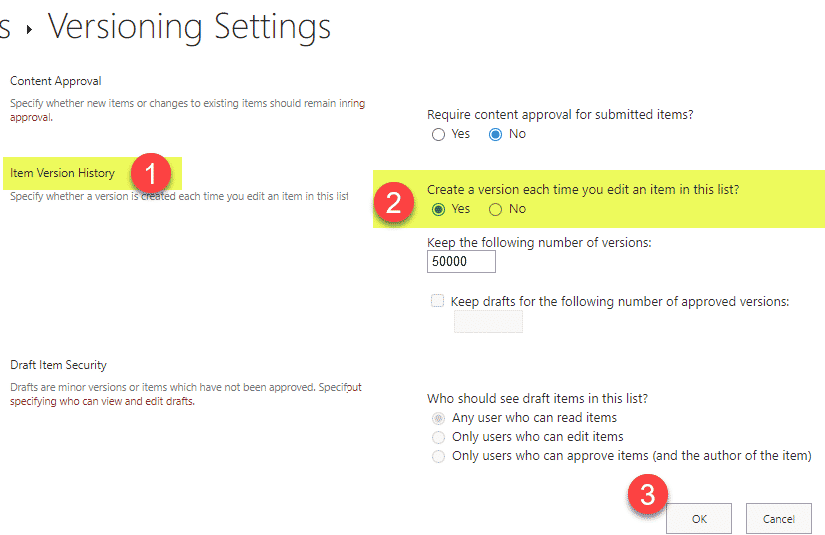
- Under Item Version History, check Yes radio button next to Create a version each time you edit an item in this list? Type in the number of versions you want to keep (up to 50, 000!). Click OK


Disable attachments
This one might or might not be necessary, depending on your use case. I prefer that users avoid adding attachments to the list items, and put them into the document library (read my reasoning for this here). That said, if you use the custom list for a Help Desk Log, for example, and need users to attach images to items/tickets – leave it alone. To disable list attachments:
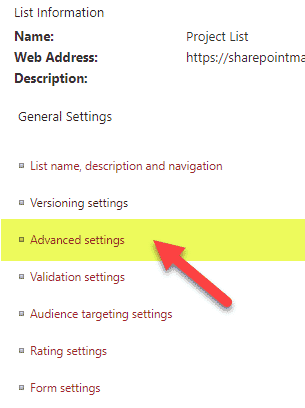
- While in list settings, click on Advanced settings
- Under Attachments, click Disable radio button next to Attachments to list items are:
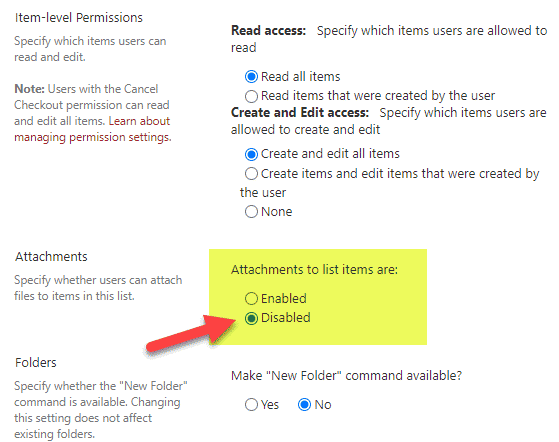
- Click OK at the bottom of the page.


Important Notes
- If you choose to upload a file from your computer, the Excel file gets uploaded to the Site Assets library
- If you decide to import the existing Excel file you already have, it has to be located in the default document library (Documents) on a site. If you have it located in any other library you created, you won’t be able to choose it
- Once you create a custom list from Excel, there is no association between Excel and a custom list you created. In other words, changing either one will not change the other
- Before importing Excel to a custom list, you must format your Excel as a Table, as stated in Step 1 above. Otherwise, you will get an error message below.
- When you map your data to the types of columns (Choice, Currency, Date and Time, etc.), one column type (the Title Column) is mandatory. You can’t have a list without a Title Column. It is a column that opens up an item when you click on it. Make sure to choose the appropriate column (usually Single line of text column) to be the Title column.
- Make sure the Excel you are importing does not have empty rows. Also, make sure the column you choose for Title does not contain an empty cell. Per the above, it is mandatory. Otherwise, you will get an error message “Title: You must specify a value for this required field“.

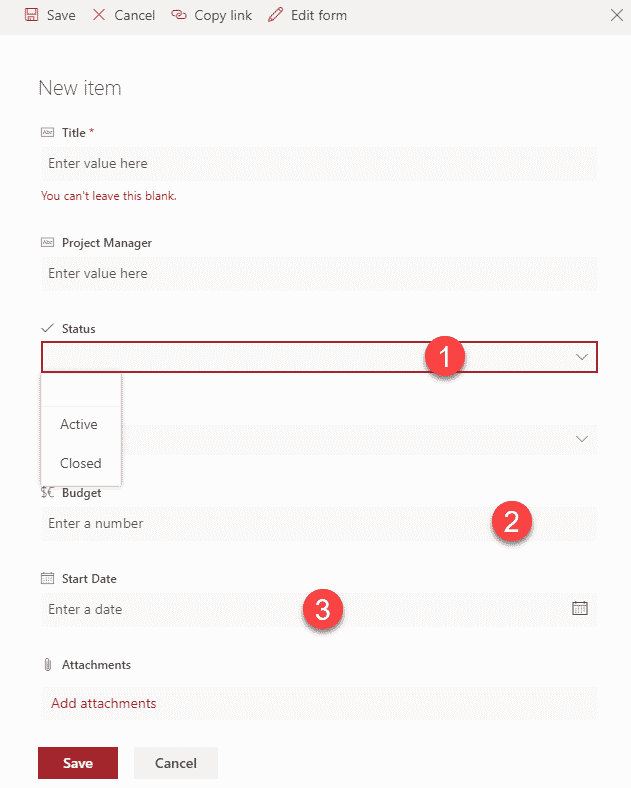
- When you import an Excel spreadsheet to a SharePoint custom list, you are limited to a subset of column types (i.e., no Hyperlink, People or Location column types not available)
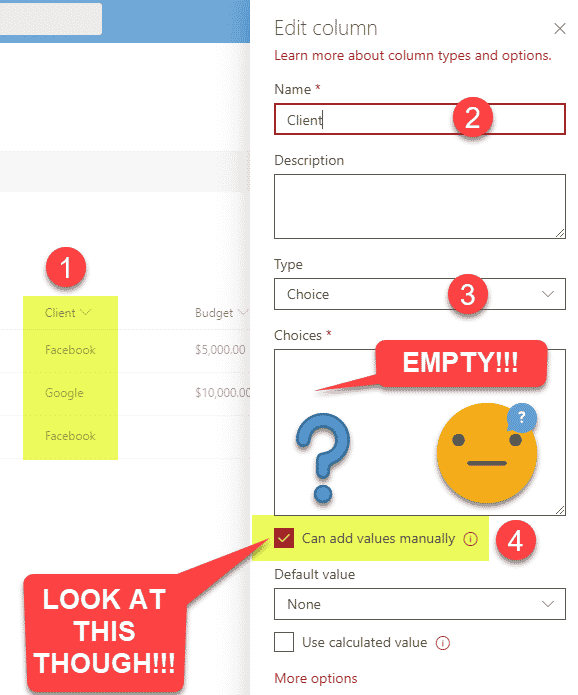
- For the Choice Column Types, it DOES NOT add the values from the list to the Choices box as one would expect. Instead, it just creates a Choice Type Column, but then allows users to add (type in) values manually. I am not a huge proponent of this as this kind of defeats the purpose of the choice column (since users can type in any junk they want). So you would need to manually update this column (uncheck the checkbox + update with the drop-down choices you want to have users select from). See the below image to understand what I am talking about.
- The columns will be created at the library level – so if you were thinking of later using/re-using them at the site level, it is not going to be possible.
- Kind of related to the above, the drop-down columns will give you a chance to default to Choice columns. If you were thinking of using the Term Store – it is not going to be possible.
- Import from Excel is a one-time operation. Once the Custom List is created, you cannot import additional rows of info from Excel. Your only option at that point would be to copy rows of data from Excel and paste them into the custom list using the Quick Edit function.
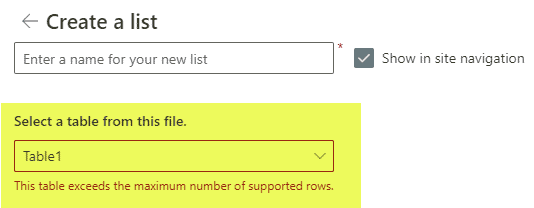
- According to the post from Microsoft, you can import an Excel table with a maximum of 20,000 rows. If you have more than 20K, you will get an error message “This table exceeds the maximum number of supported rows“


Share Article